


Shorai Battery box
A quickish update. I’m still waiting on parts to start the rewire. I’m hoping my birthday tomorrow brings some shiny treats for the bike….
The Shorai Battery arrived and I was blown away by it’s size and weight.
New vs Old

Next to the m-unit it also looks so tiny.

In the meantime I got to work building the battery mounting box. I’m fabricating this out of sheet aluminium. After a couple of sketch drawings I got to work using the bending brake.
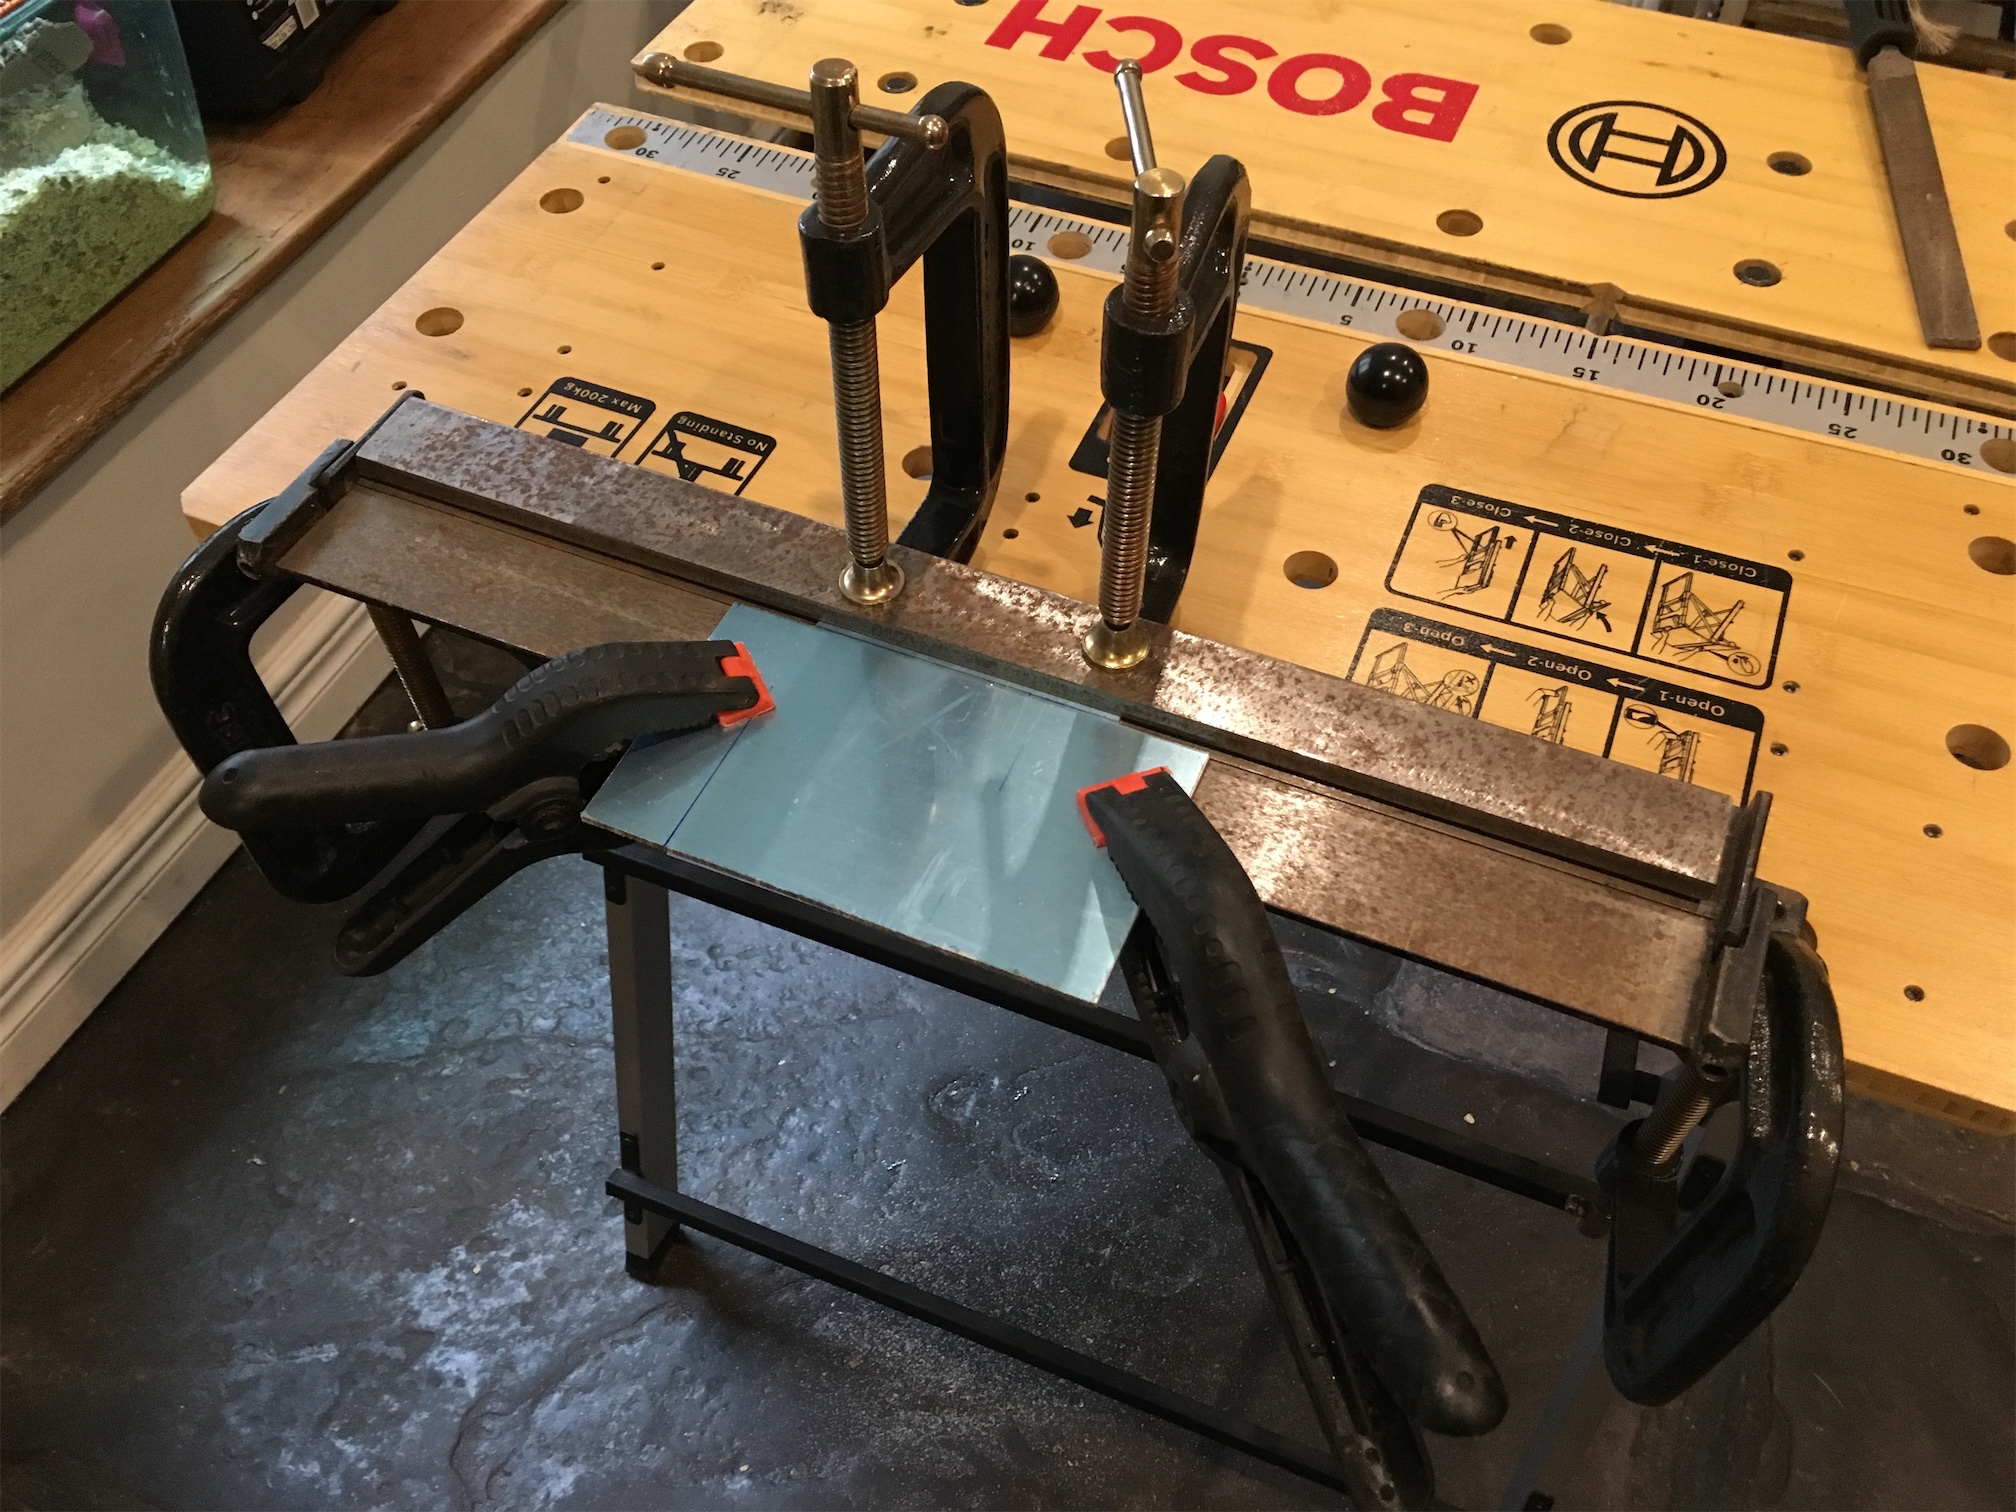
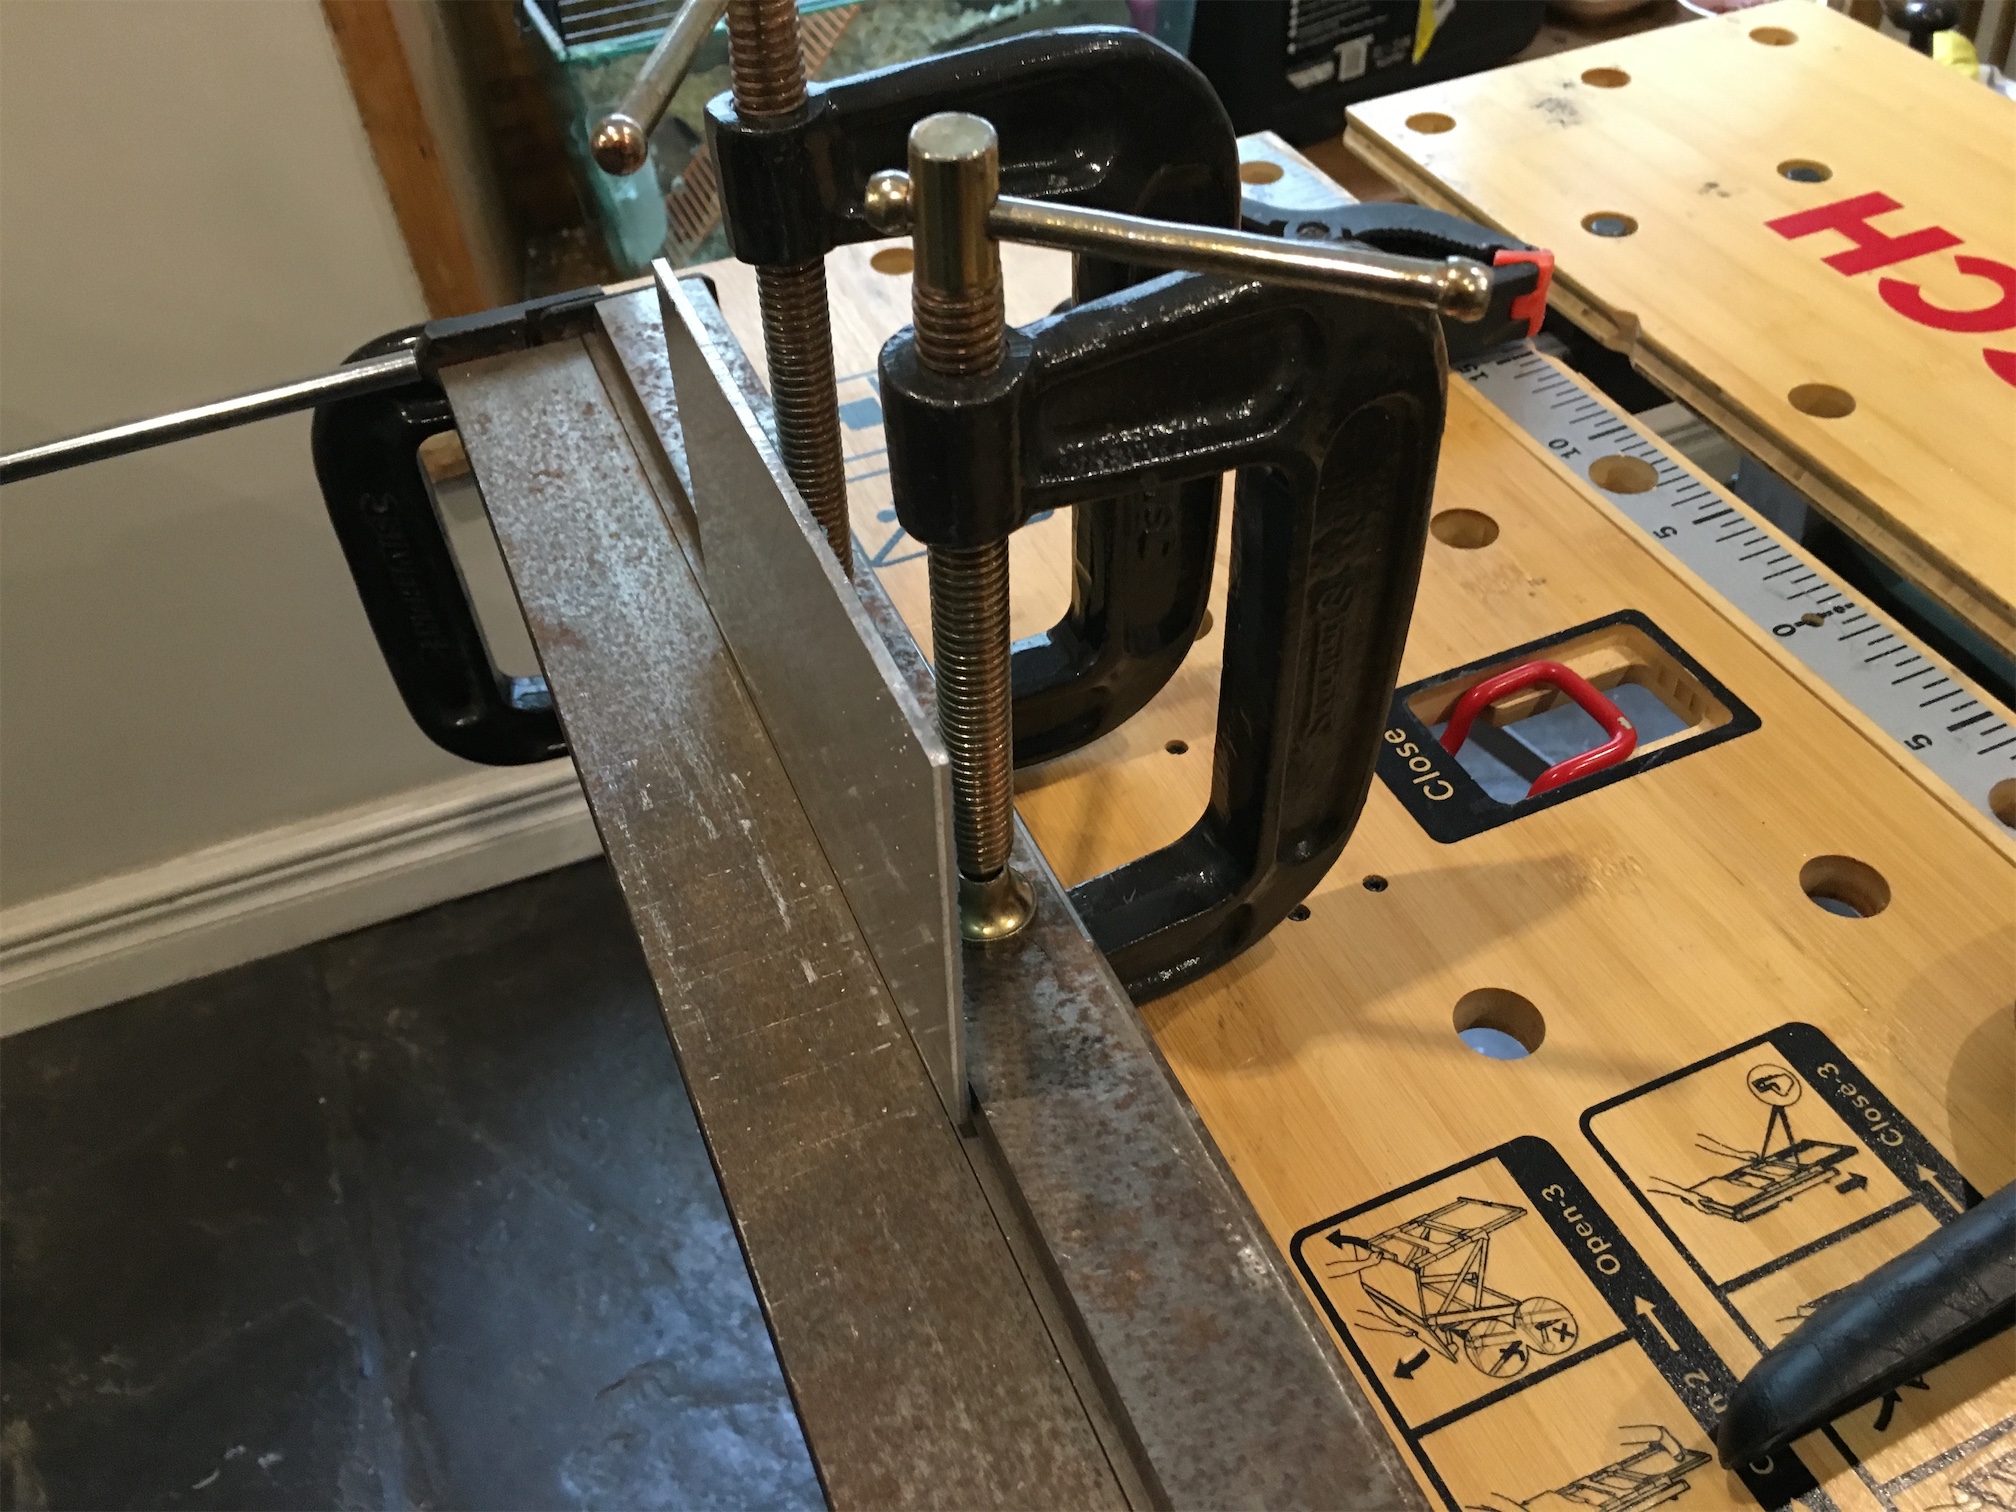
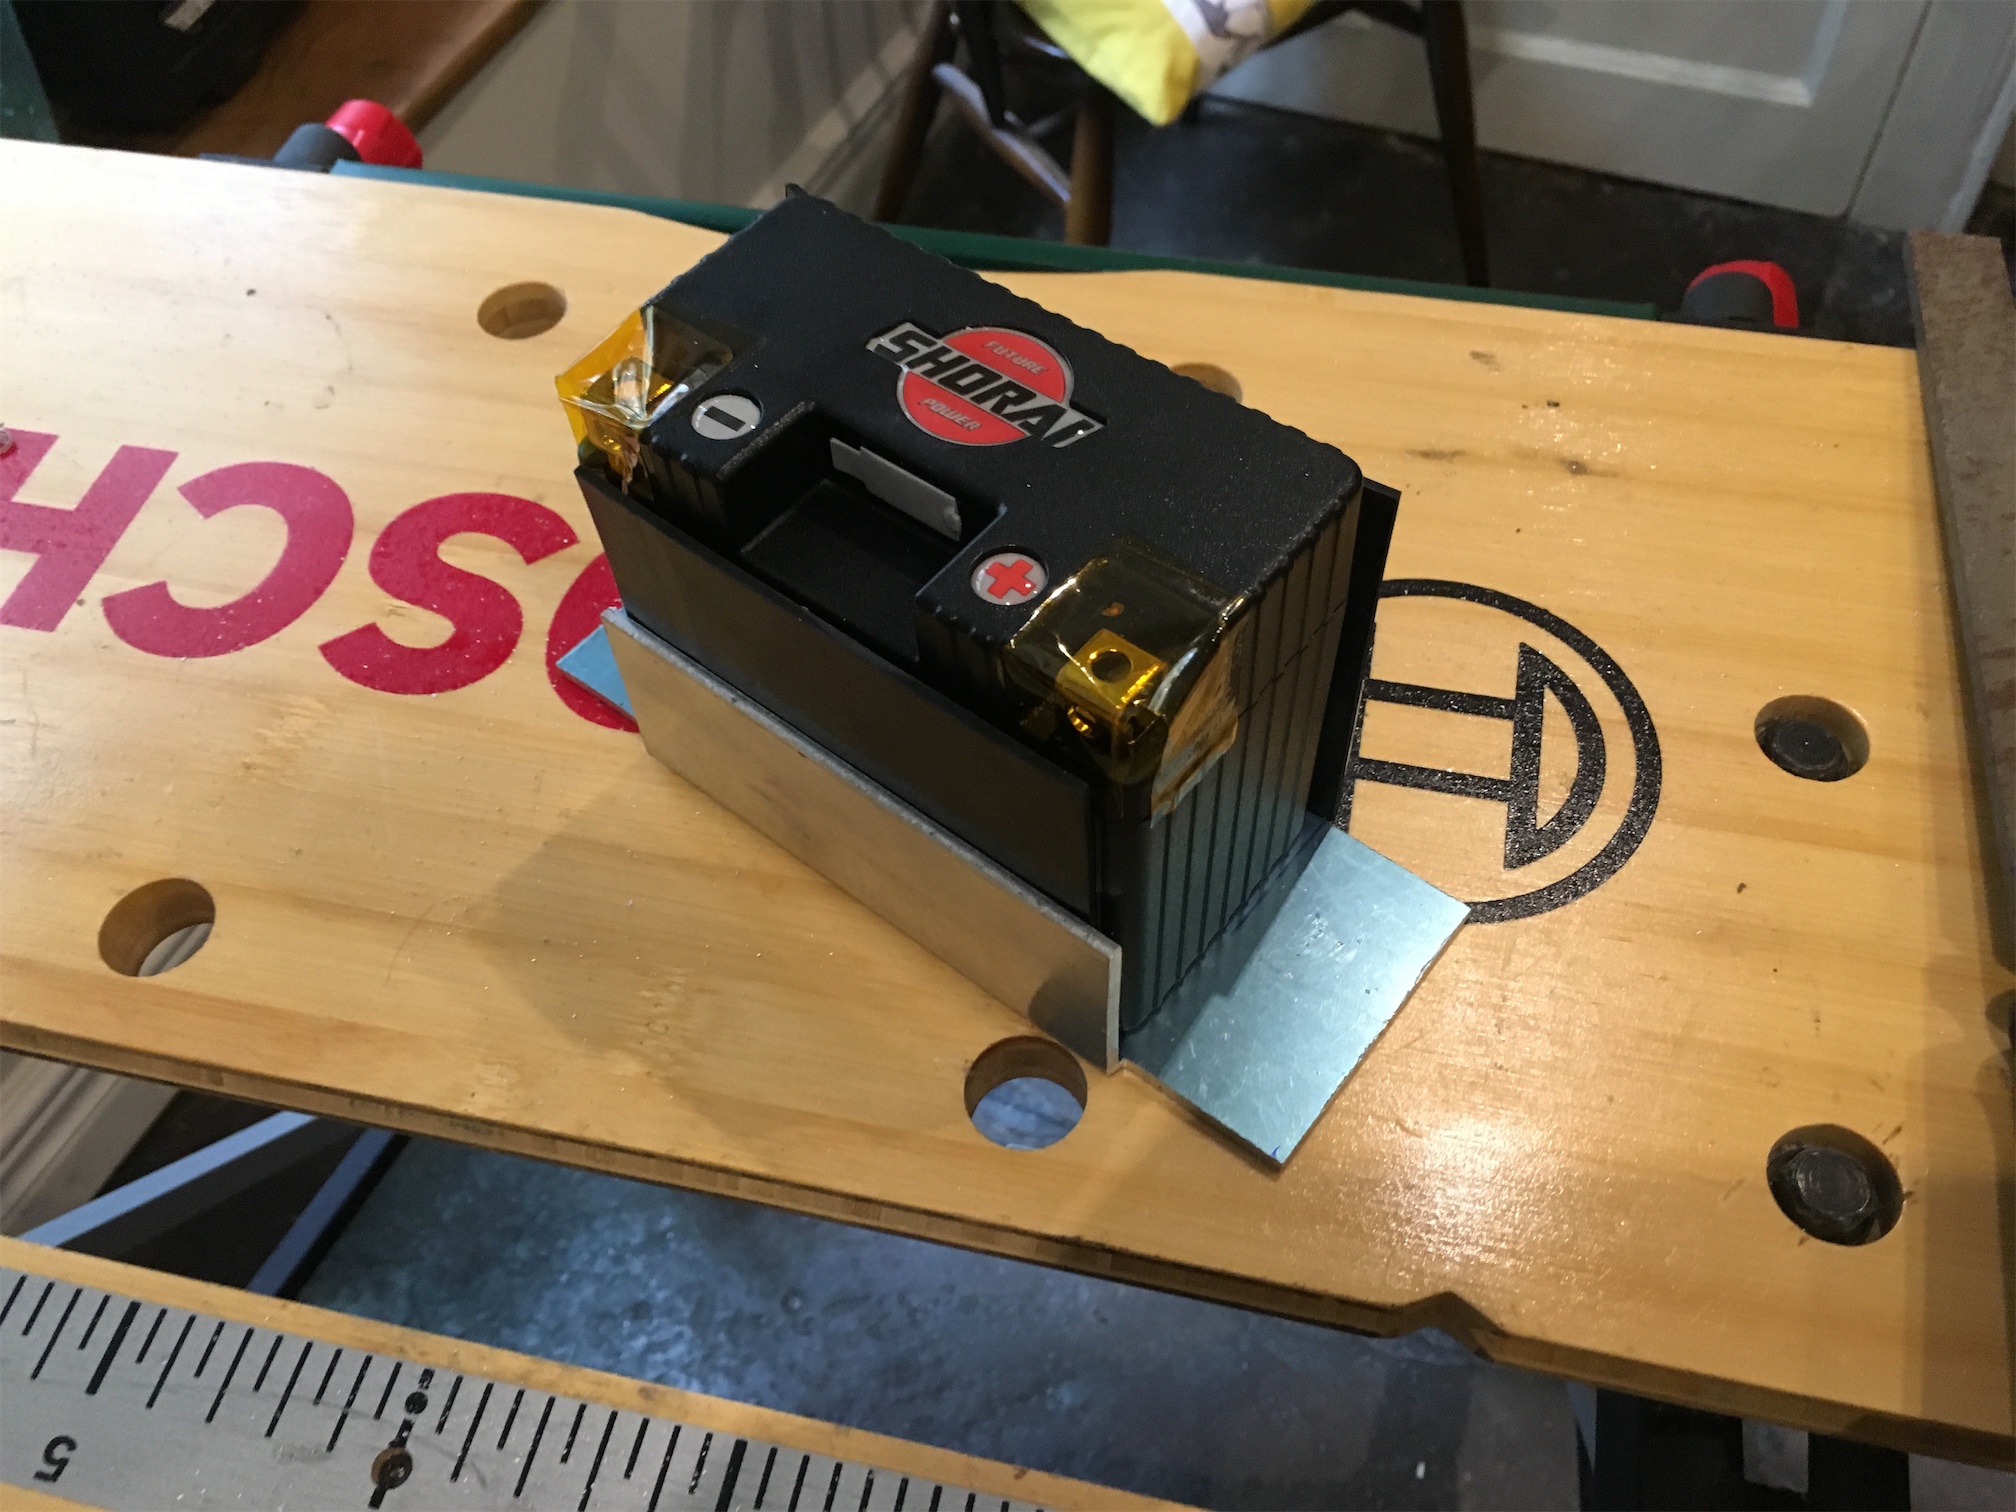
A quick test fit.

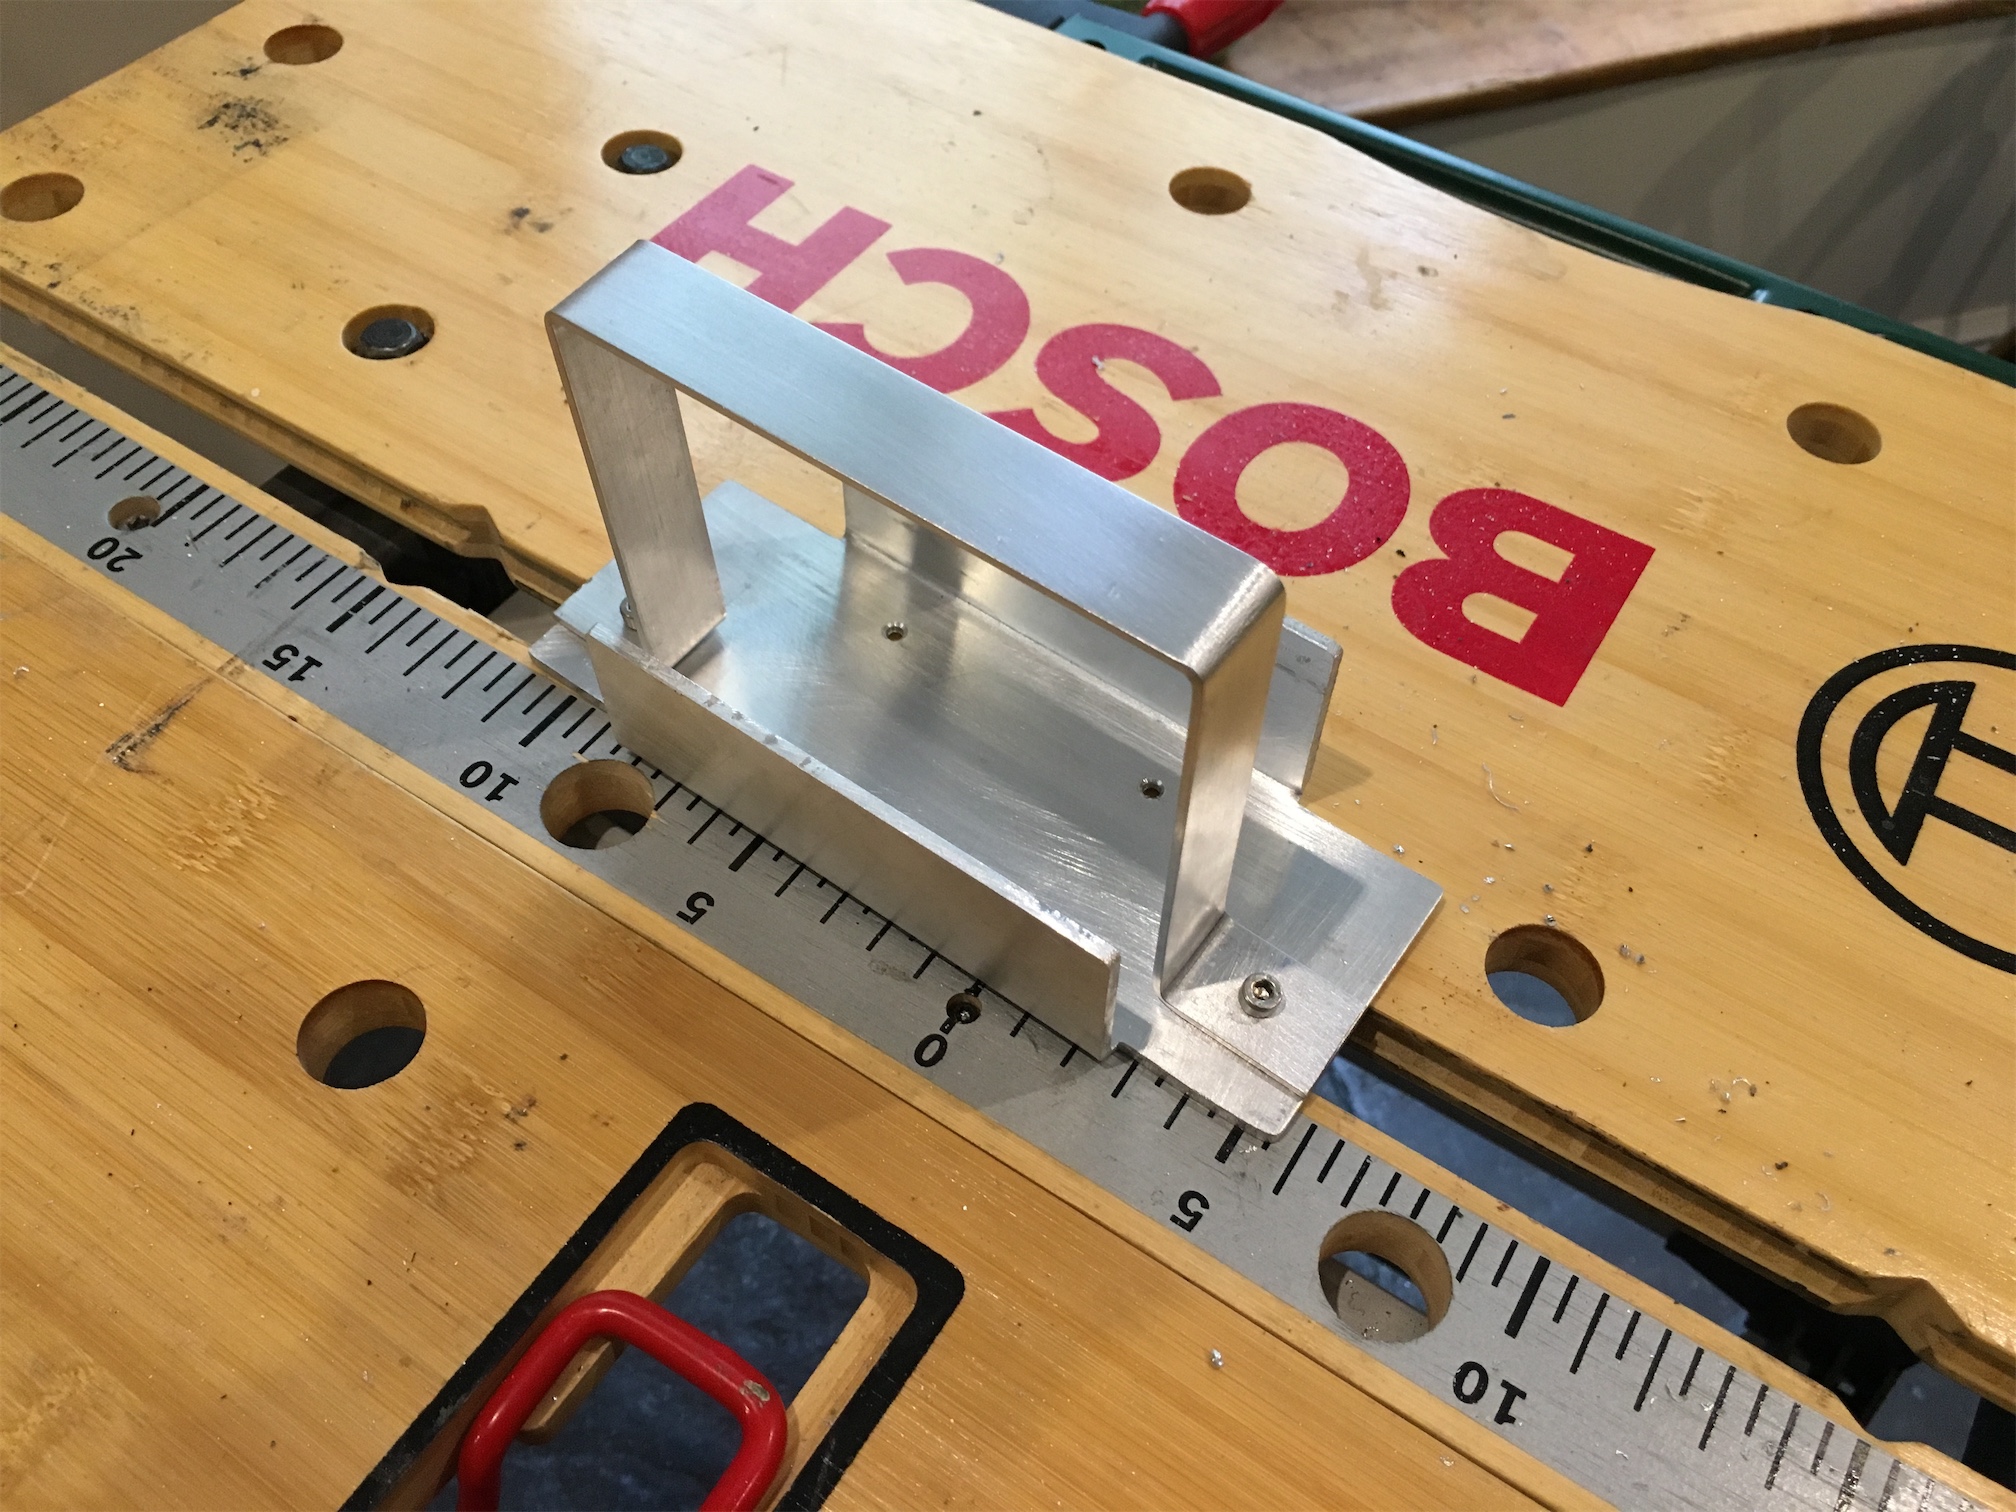
Next I made the attachment strap out of aluminium as well.

Looks like this should work. I need some longer mounting bolts and some sheet rubber for protecting the battery from the metal, but it’s a start.

Next job will be to drill the holes into the frame for the battery box to mount to. I’m not looking forward to that bit!
Z650 Update and Rewire
So it was about time I updated this project log. I’ve ridden the bike a few times, but I’ve been suffering constant electrical gremlins. I tried replacing the regulator with a Shindengen SH775 ,but that didn’t fix things. As the weather has been foul I’ve not had a chance to do much work on the bike.
For some time now I’ve wanted to do a complete rewire so finally I said sod it and got started. First off I wanted to do it properly and easily so my first purchase was a Motogadget M-Unit

Motogadget M-Unit

Motogadget M-Unit
It’s an amazing bit of kit, it makes life much easier for the rewire. To go with it I’ve order lots more kit that is arriving shortly I hope. In the mean time I started removing the old crap wiring.
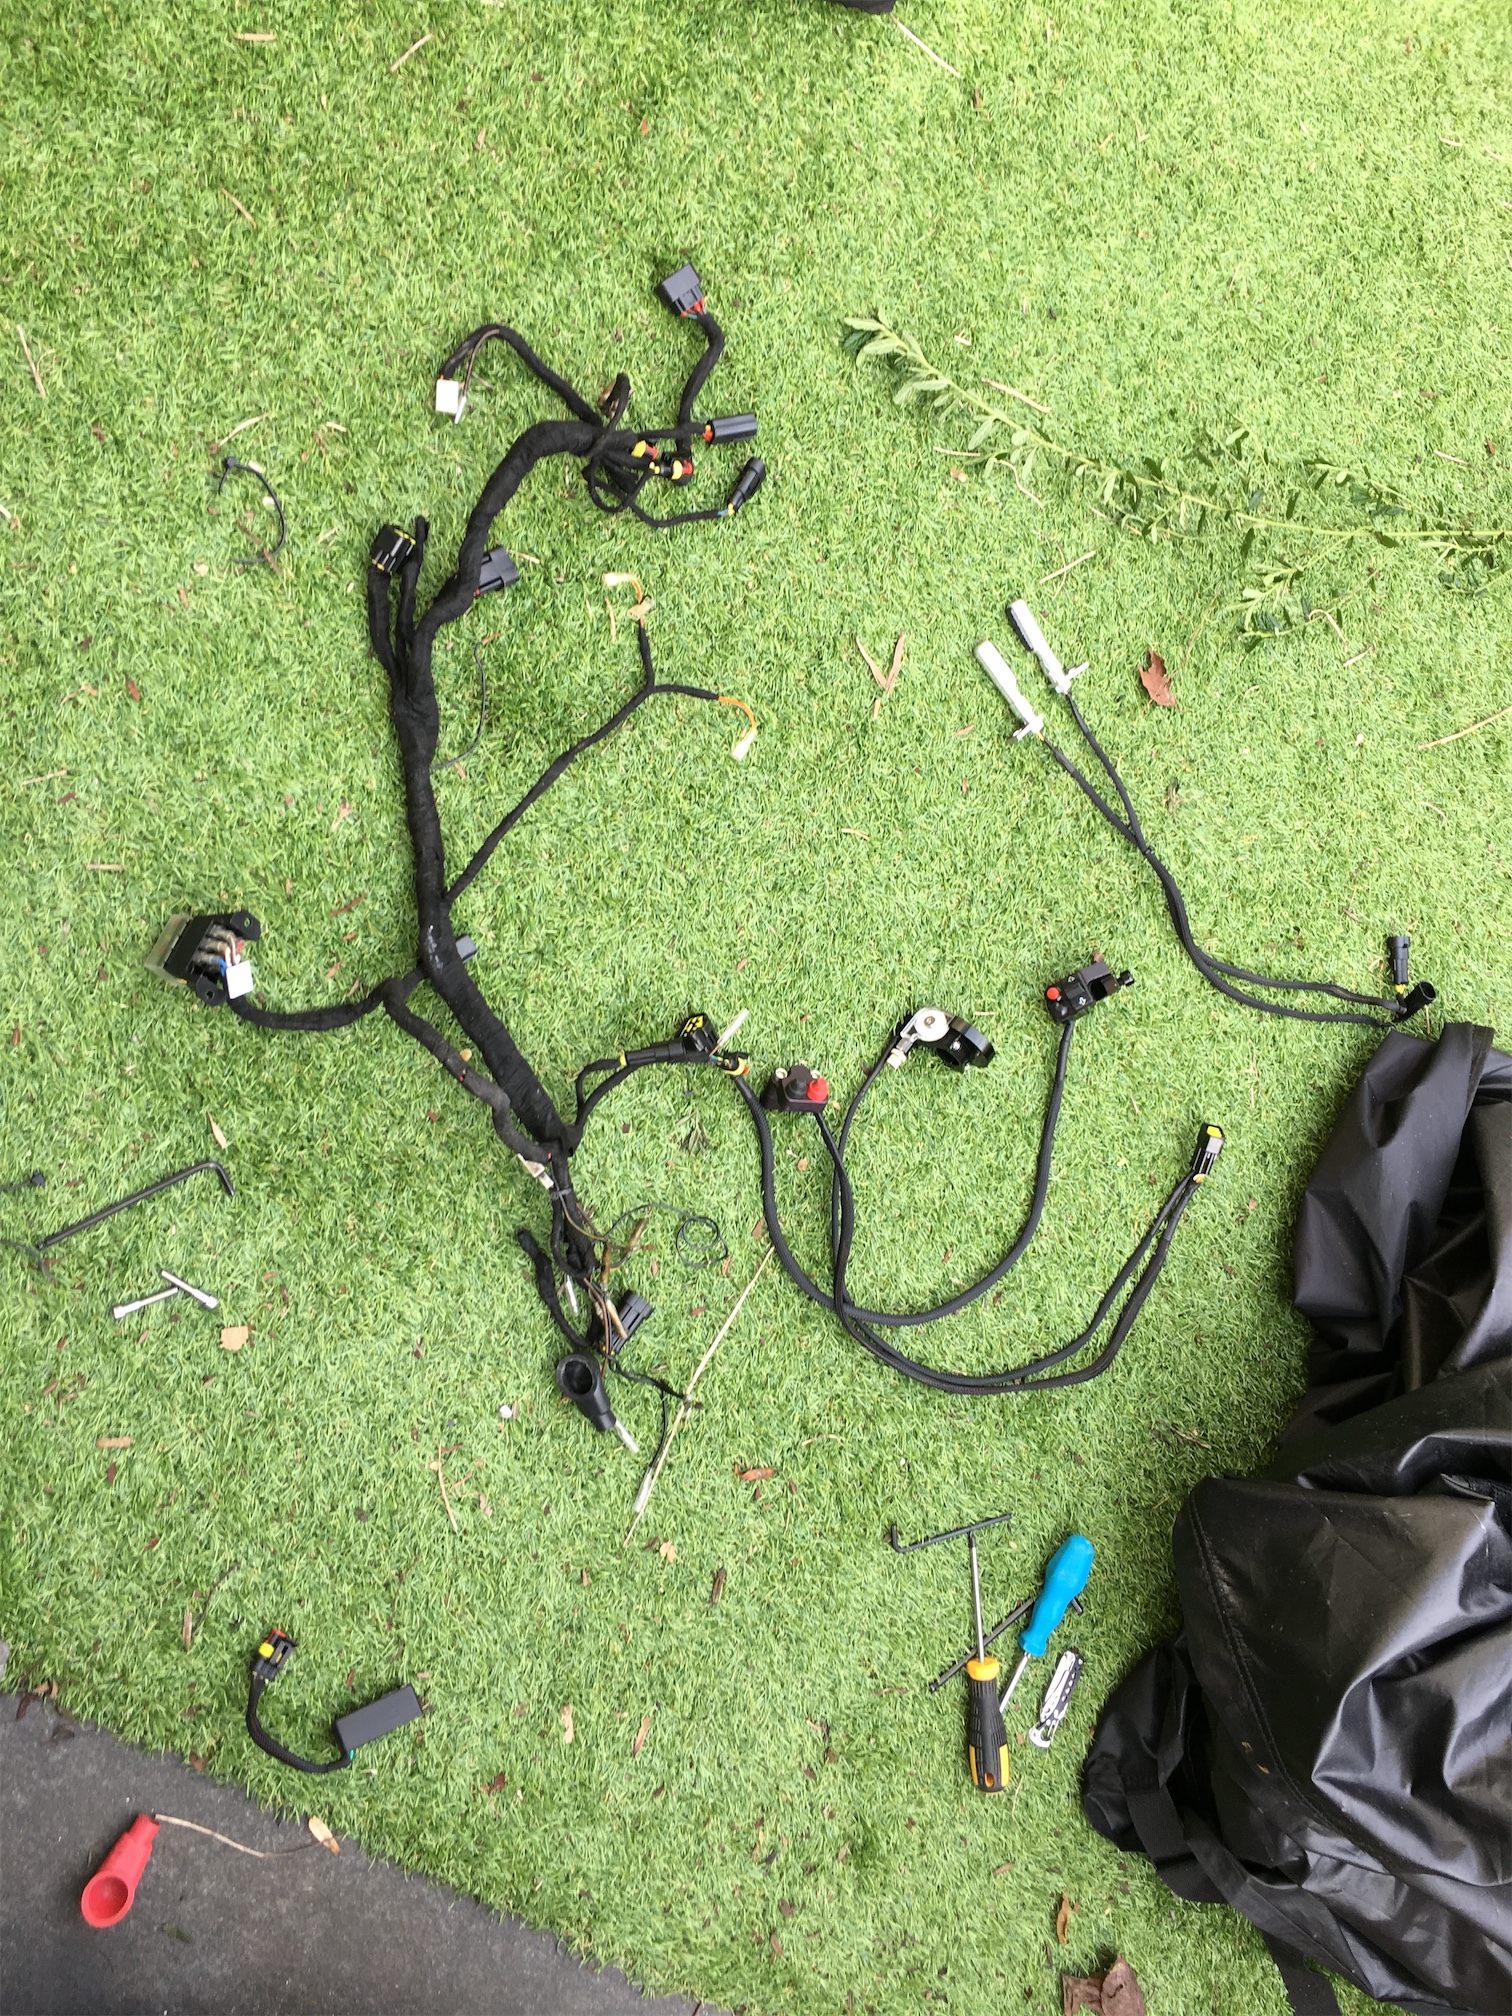
The bike looks much cleaner with out all that rubbish hehe

When the rest of the kit arrives I can start planning the next phase. Here’s some of my shopping list:
Dyna S complete coils/ignition kit
Motogadget M-Unit
Motogadget M-Lock
Shorai Lithium Battery
New Spark plugs
Loads of wiring bits.
Uni Clamp On Air filters
Starter Relay
Nerf Stryfe Tacticool Extreme
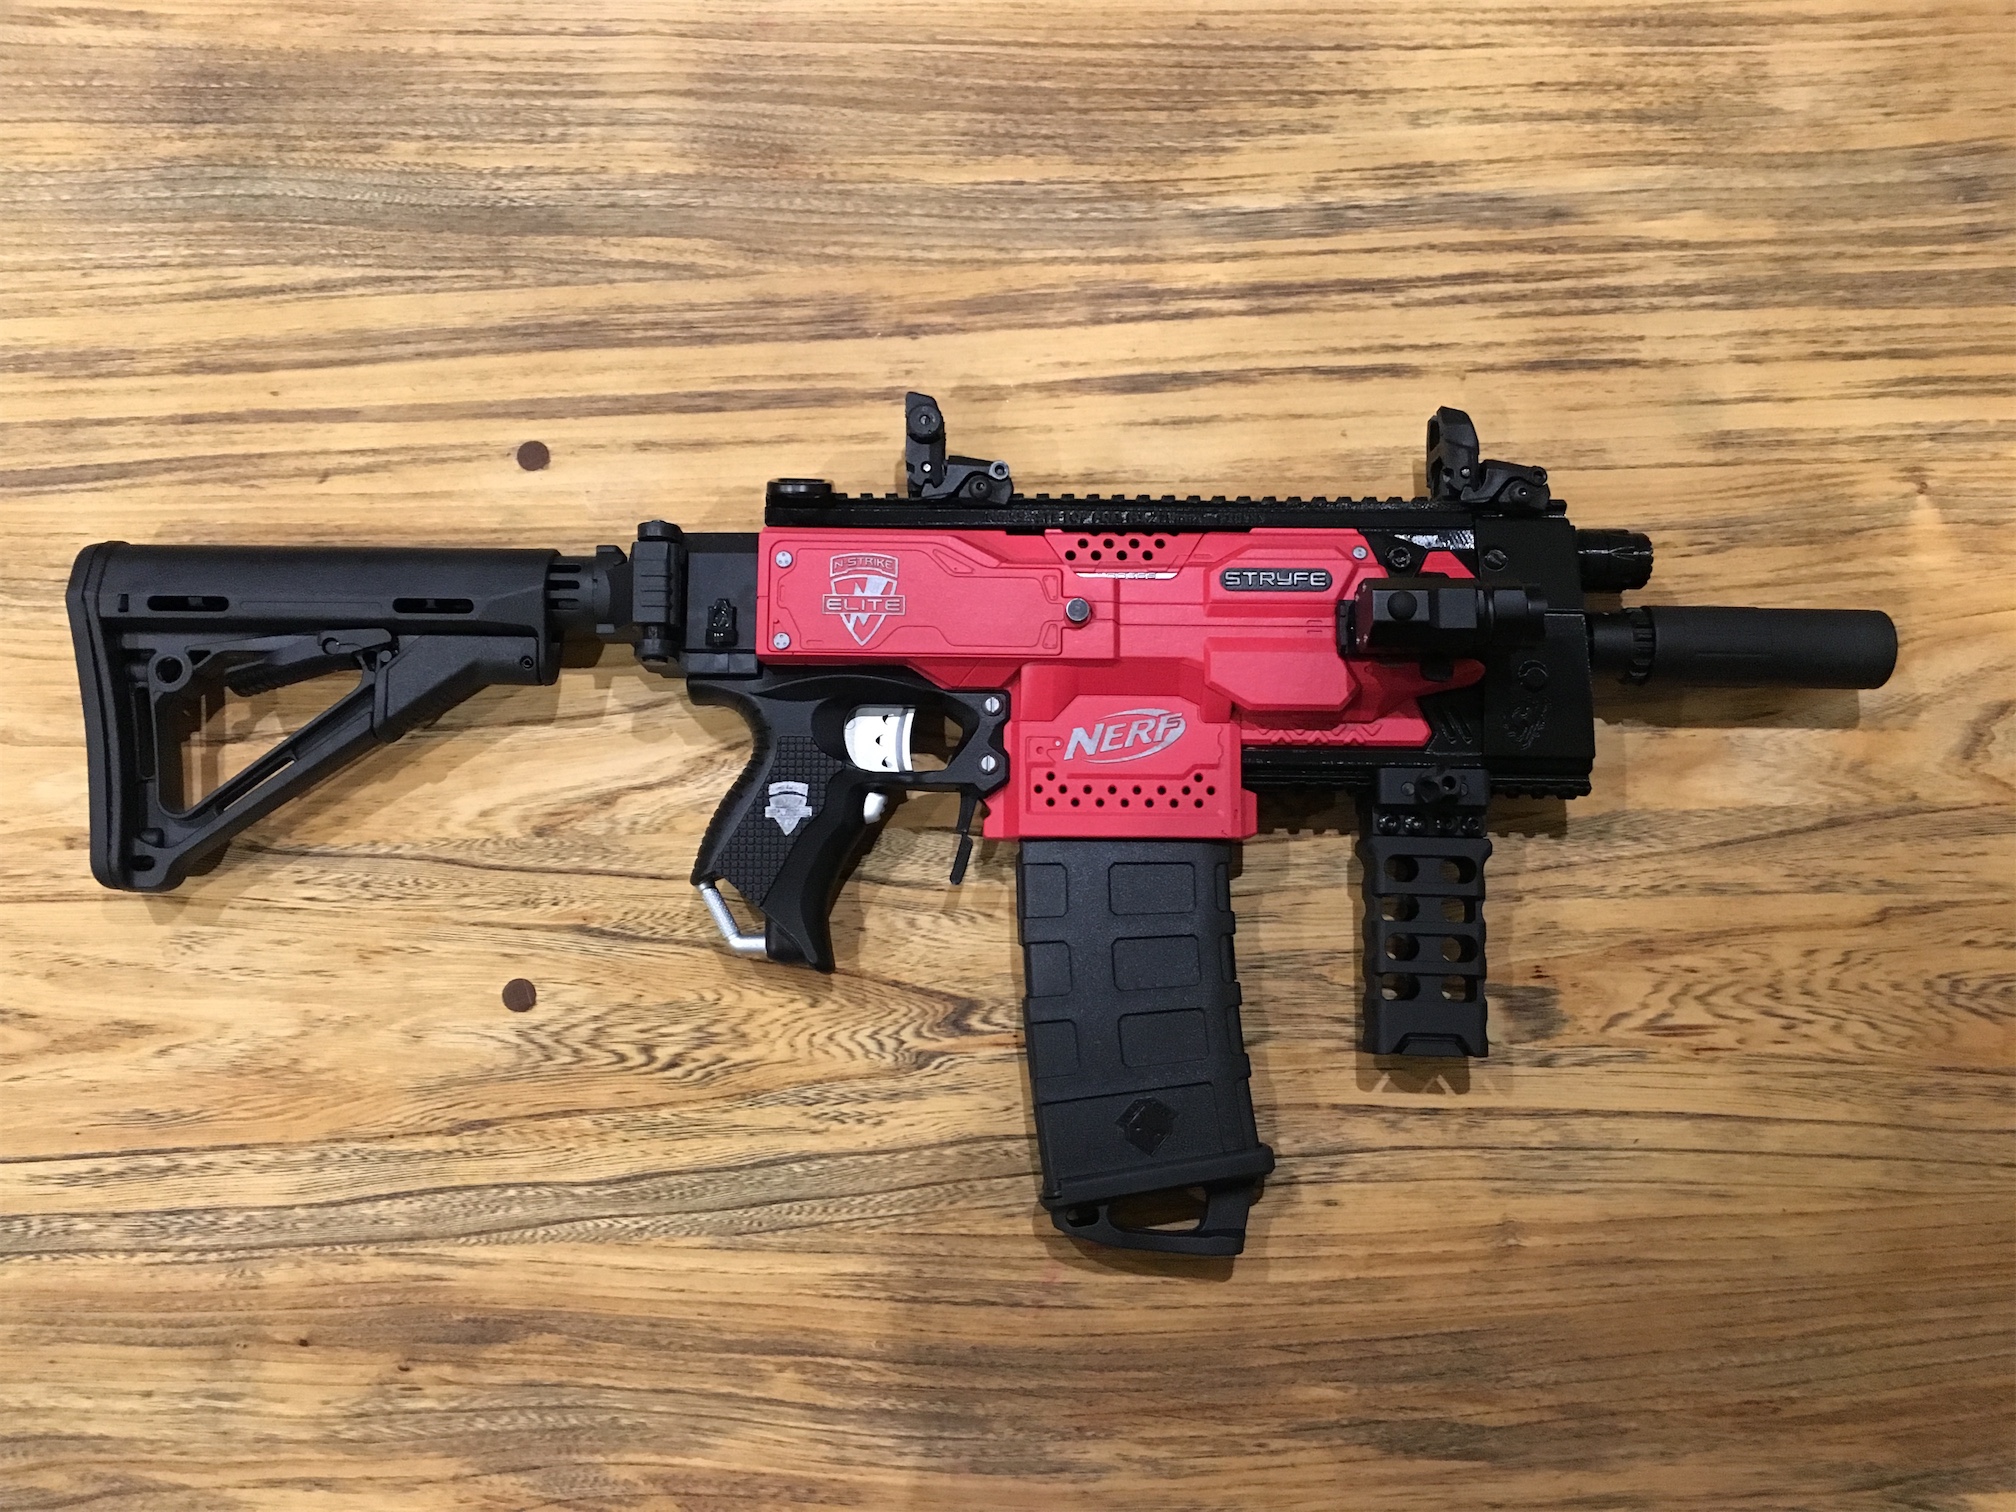
So since I last updated the blog, I’ve made a ton of changes and progress on the stryfe. When I first planned it out I wasn’t intending to do any painting or majors changes. It was going to be a 3d printed Kriss Vector replica. However I wasn’t a fan of the final look as it looked rather bulky and orange. So I decided to make some changes to the plan.
- Only use some of the kriss vector kit, ditching the mag cover and stock.
- Paint the main blaster red with a black grip.
- Remove the IMR based setup and replace it with a proper lipo setup.
- Get more tacticool bits, because clearly it needed more.
Step 1 was to order a ton of bits from Taobao as they take a long time to arrive. I then ordered some battery bits and bobs from Hobbyking.
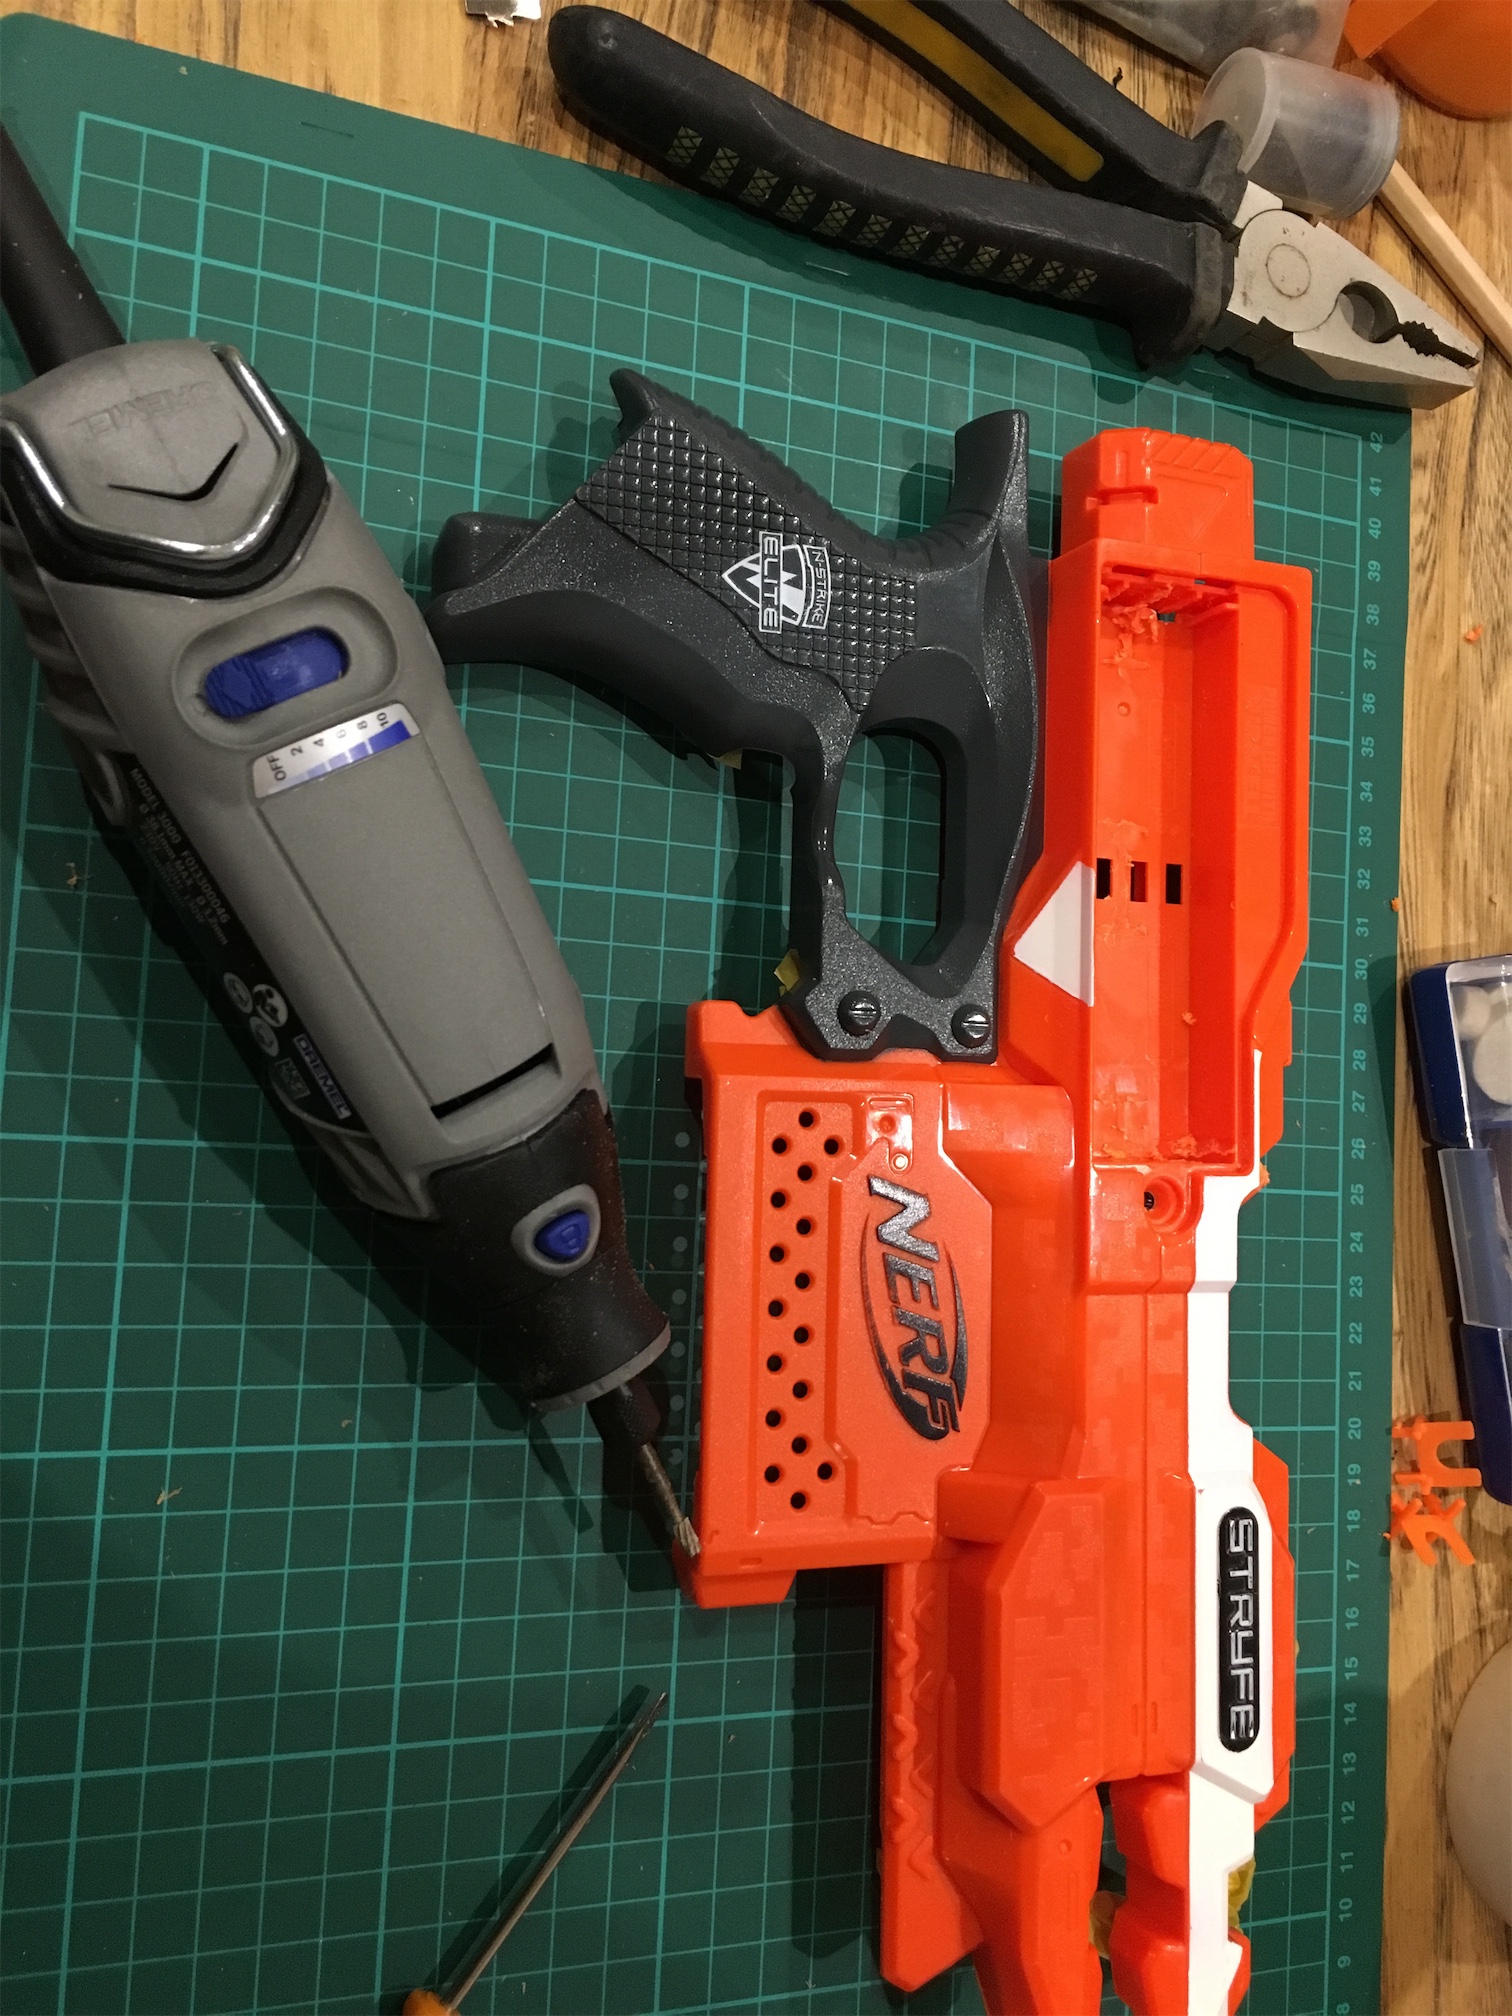
Step 2 was to start attacking the battery tray with my dremel to free up room for the new battery.

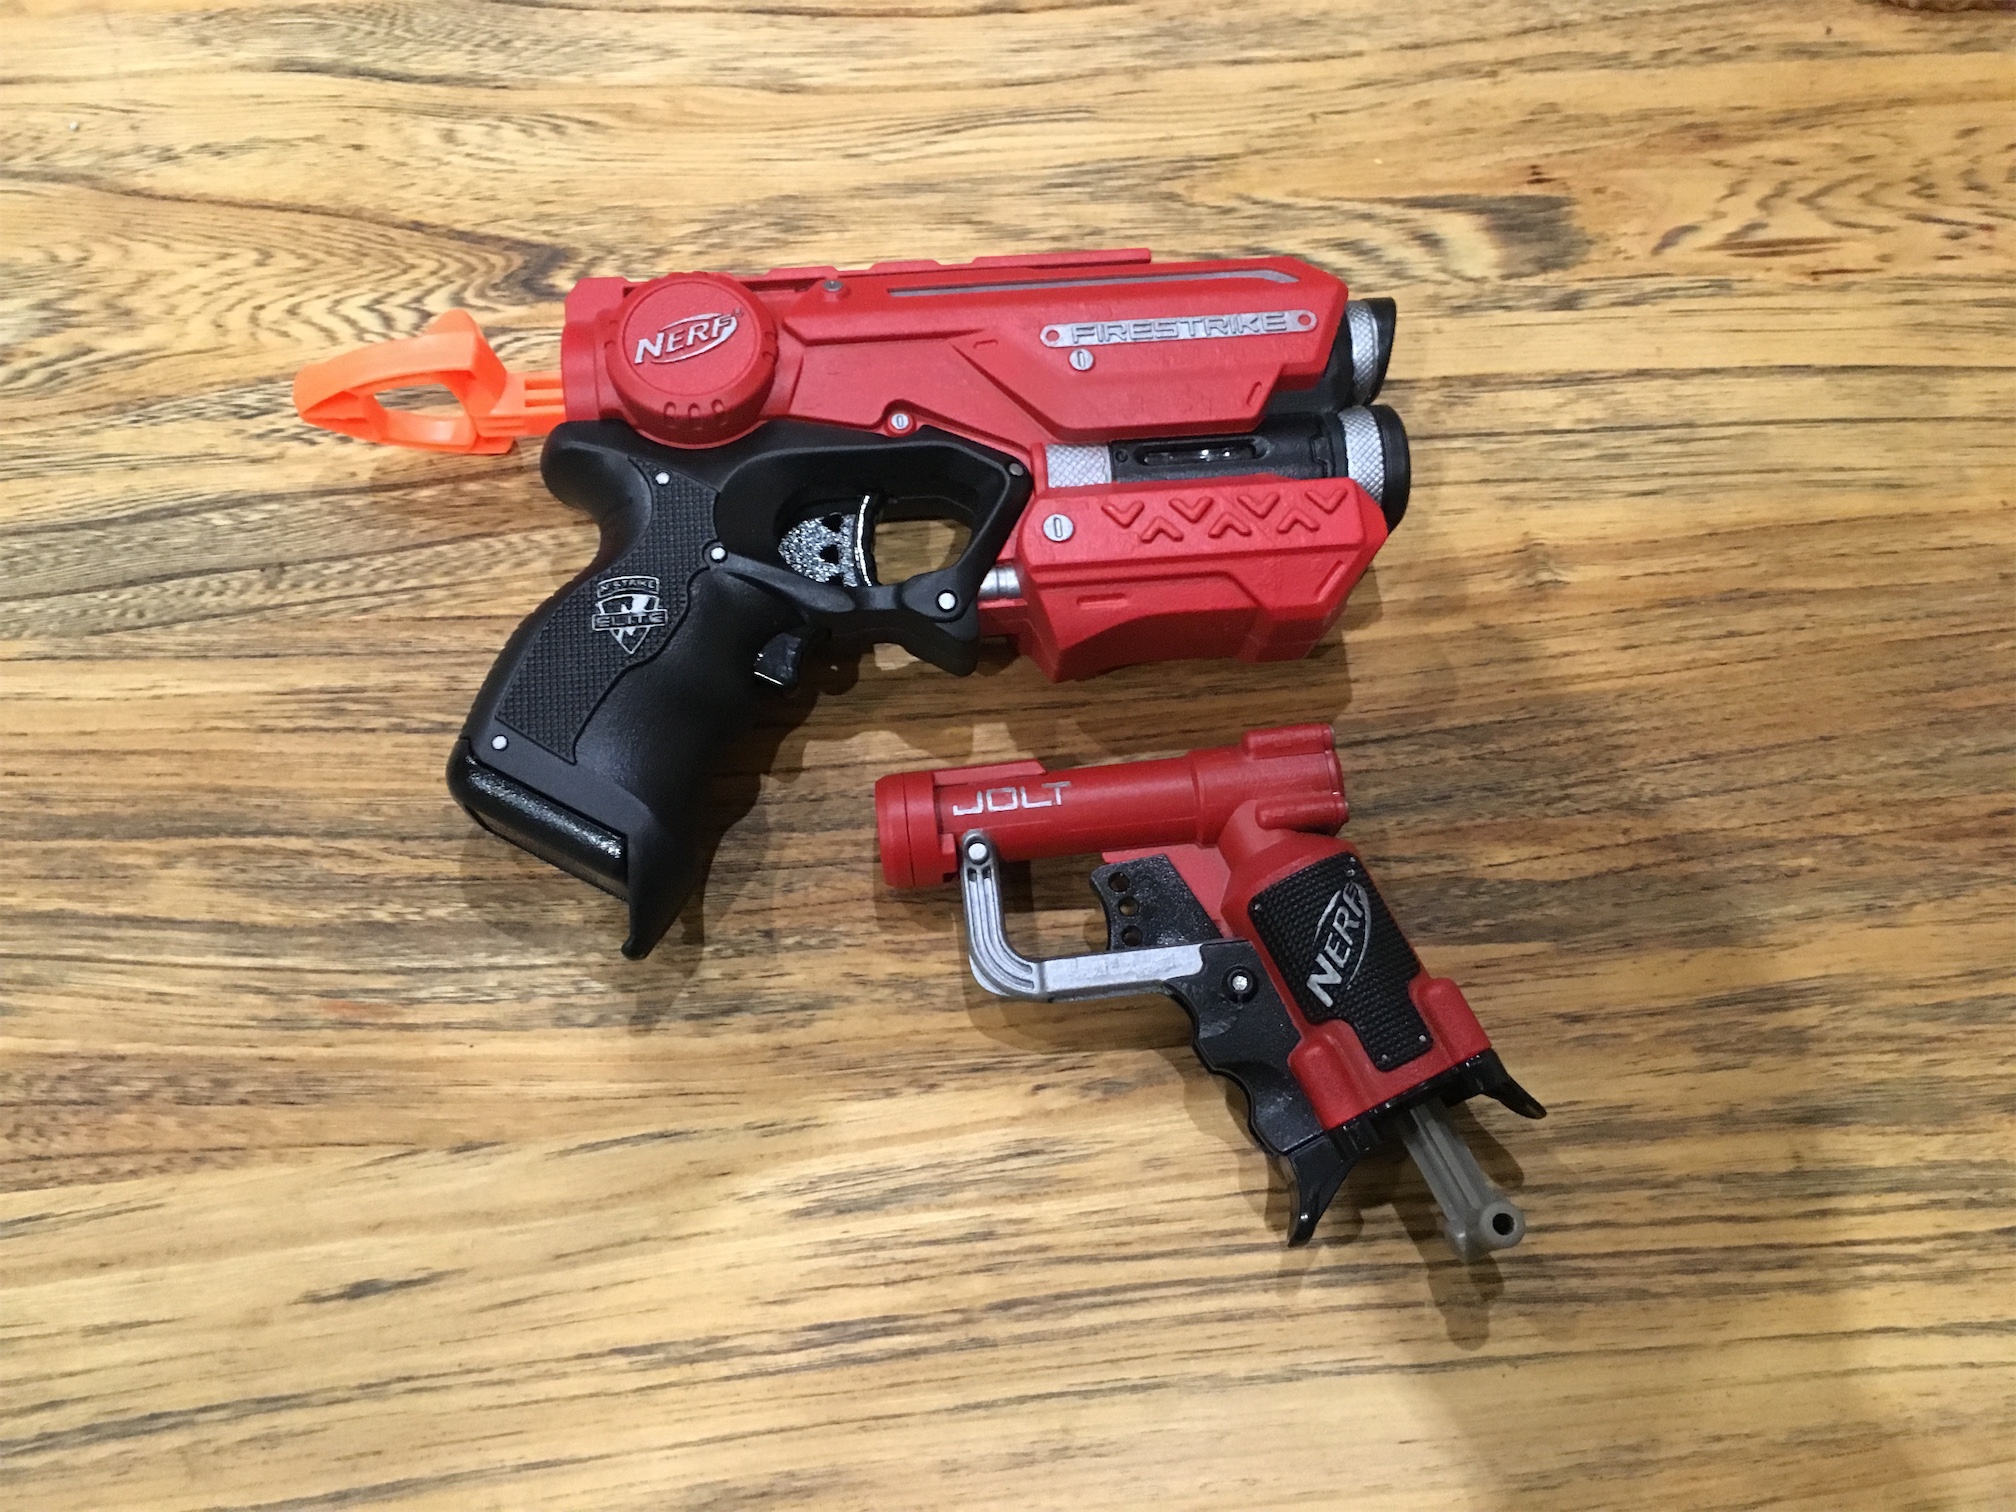
Step 3 was to get painting. As I had practiced on some firestrikes and a jolt I was confident in how I was going to get it done to my satisfaction.
I used a lot of really light coats to build up the layers of paint slowly. Spraying too much in one go results in losing detail and a bad end result. I use a box to contain the parts and paint as much as possible.


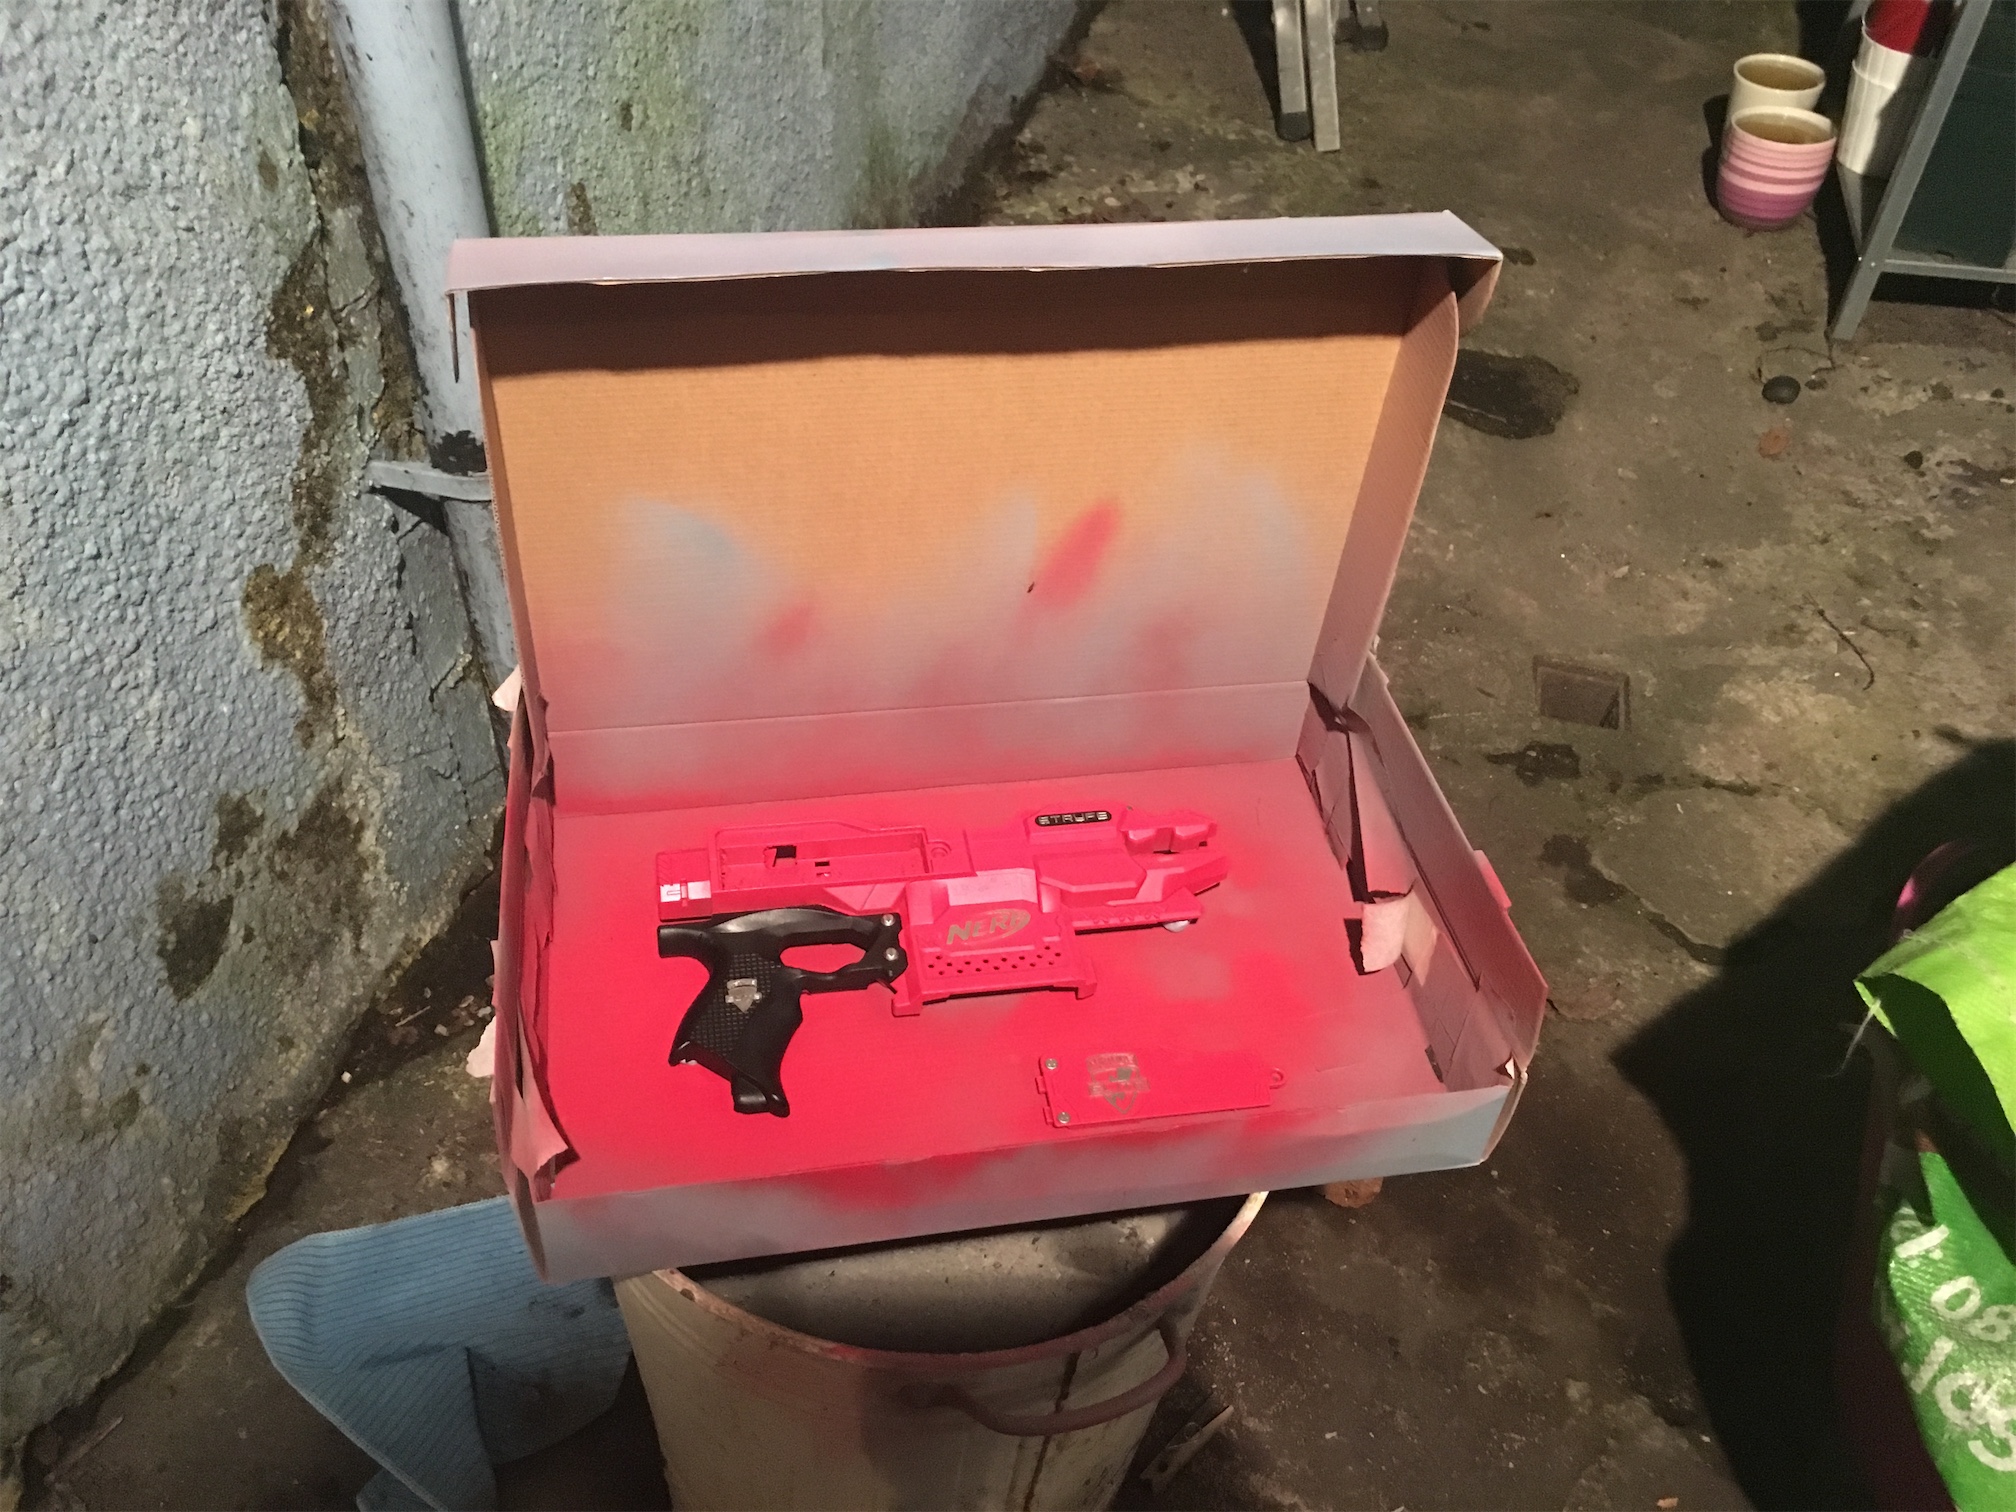
After the final coats of Plastikote Matt Red, I then set to work detailing it with enamel paints and a brush. I was very happy with how it turned out.

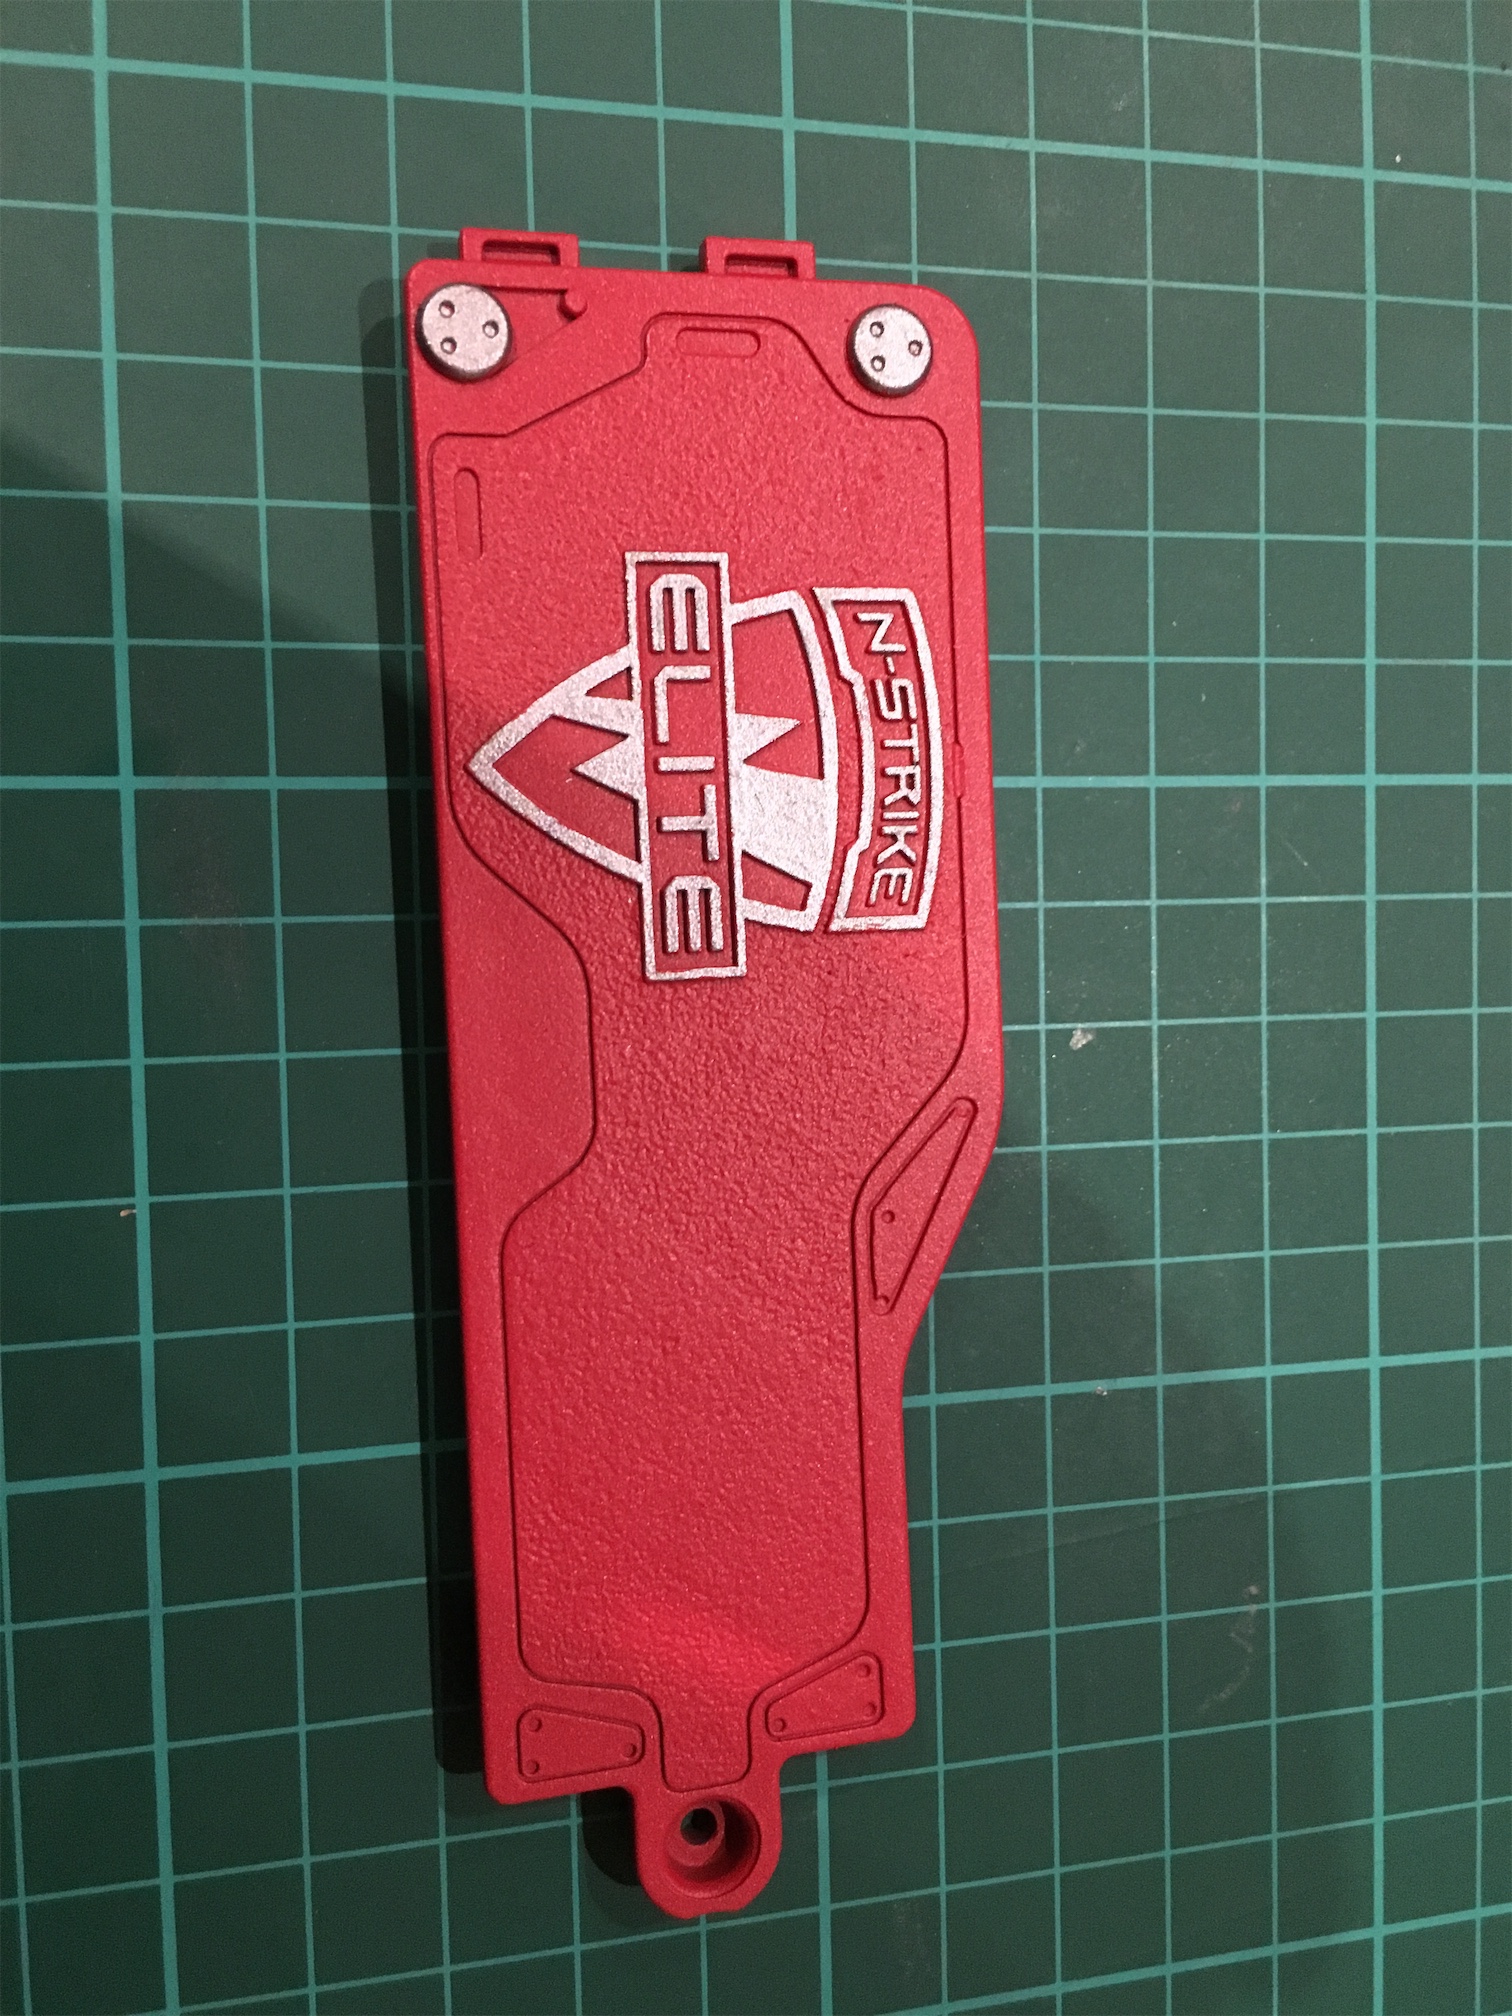
For the triggers and other parts I went for a silver finish as a contrast. I’m very pleased with how it turned out. I left the bits that won’t be visible as orange for speed. It also allows me to make it much more toy looking if I ever want to use it more publicly.

Next up I had to wire in the new Lipo system. I went with an combination alarm and digital display, but at present it’s not fitting in place. I will have to come up with a solution to this soon.
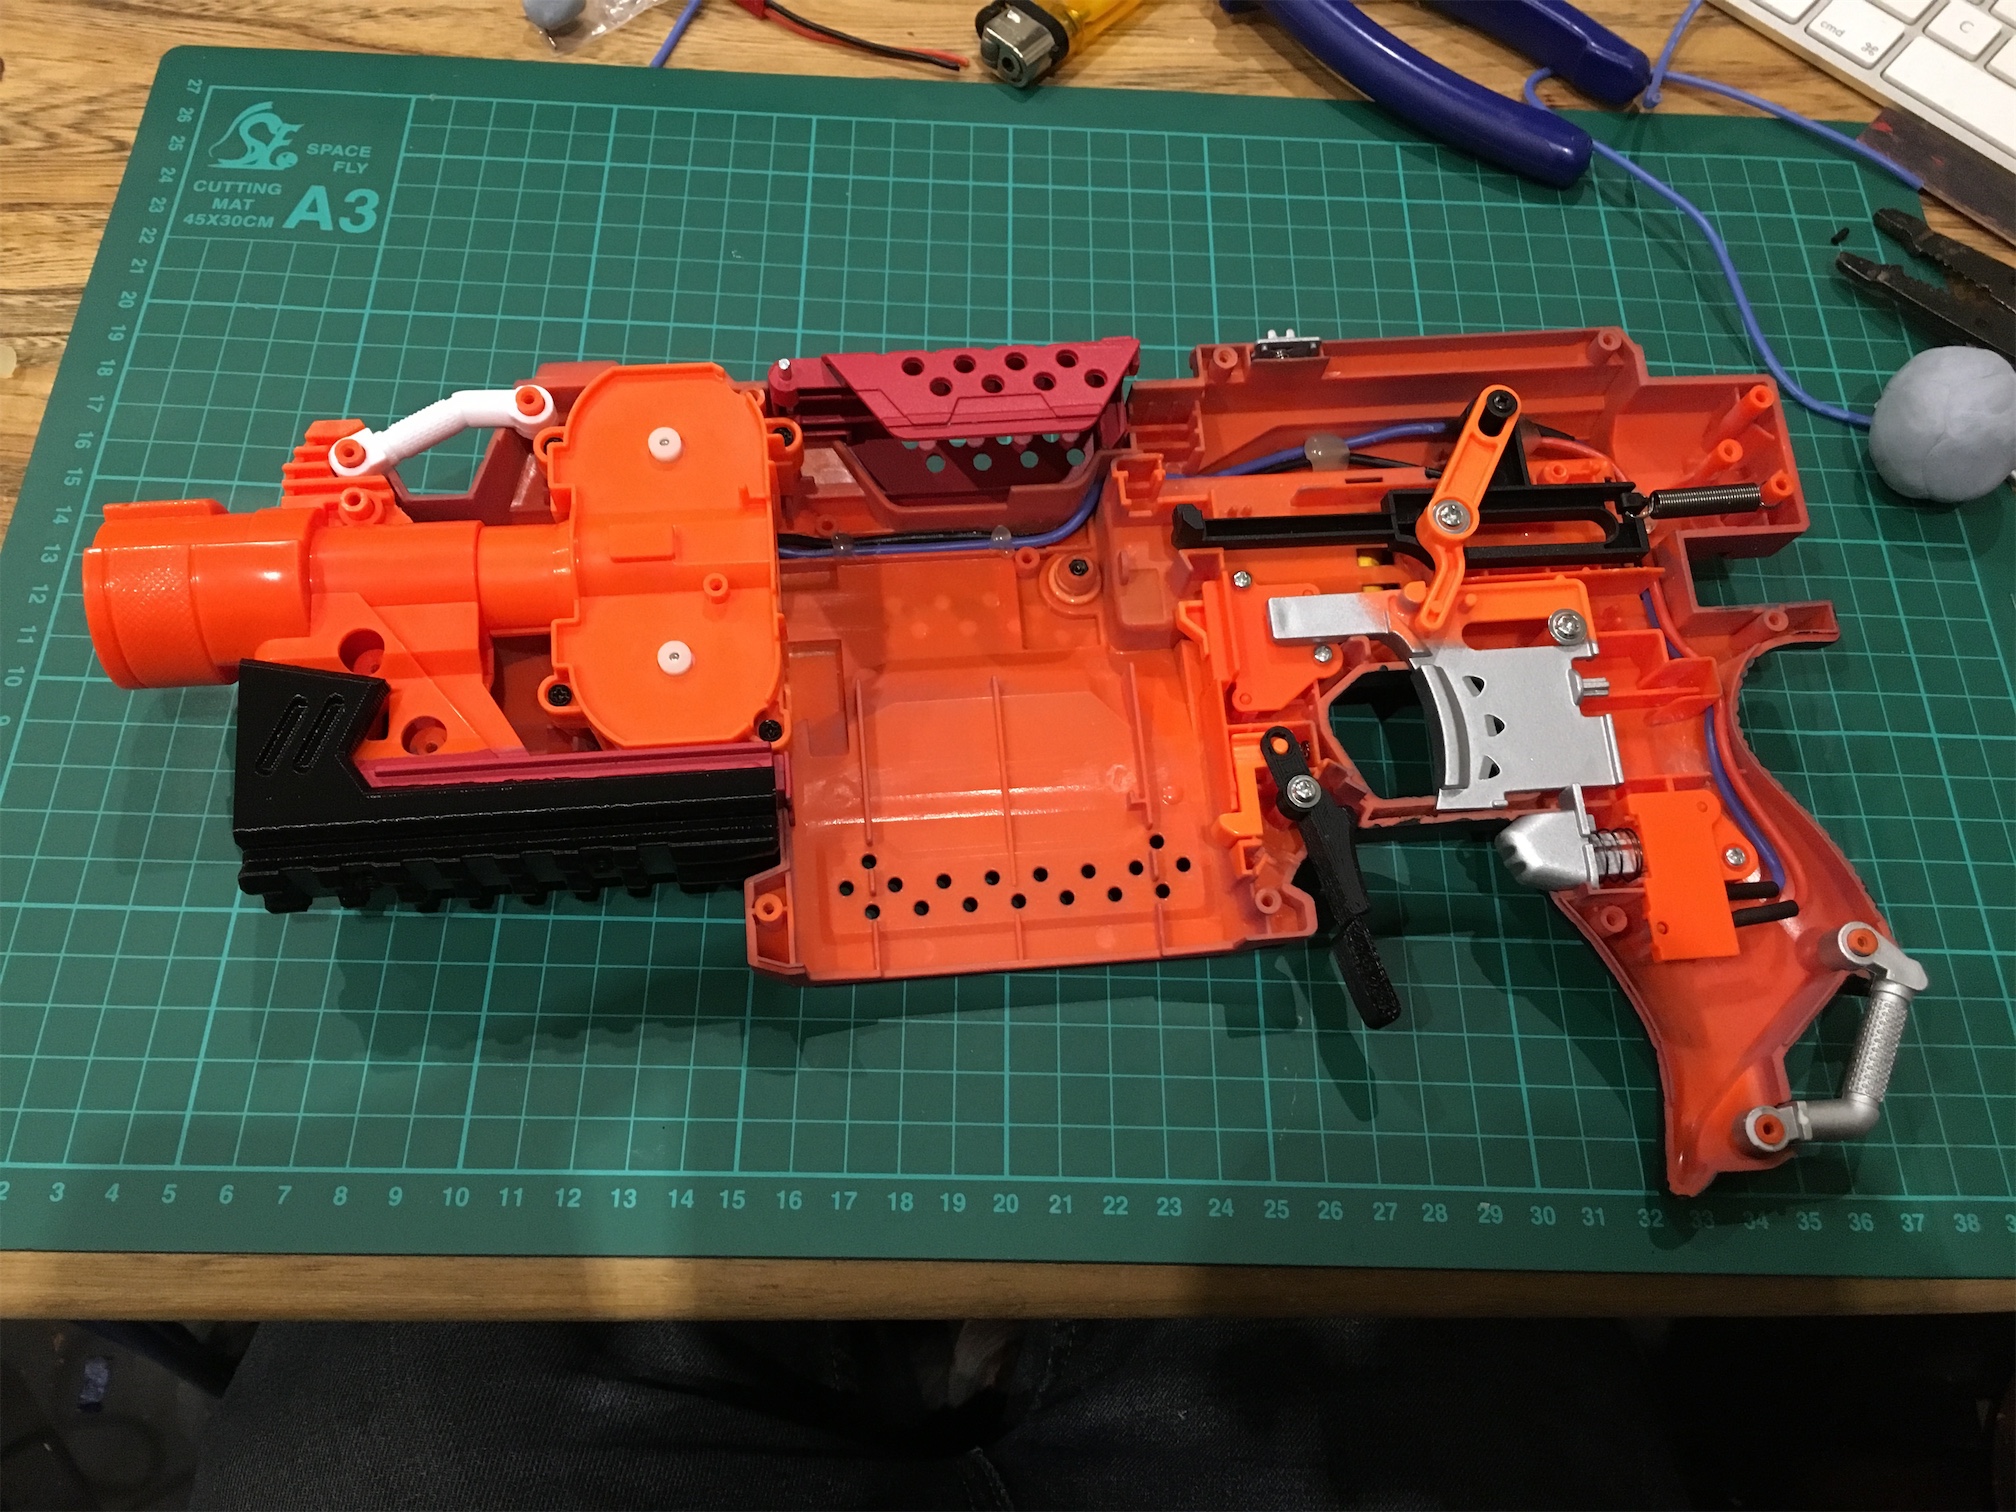

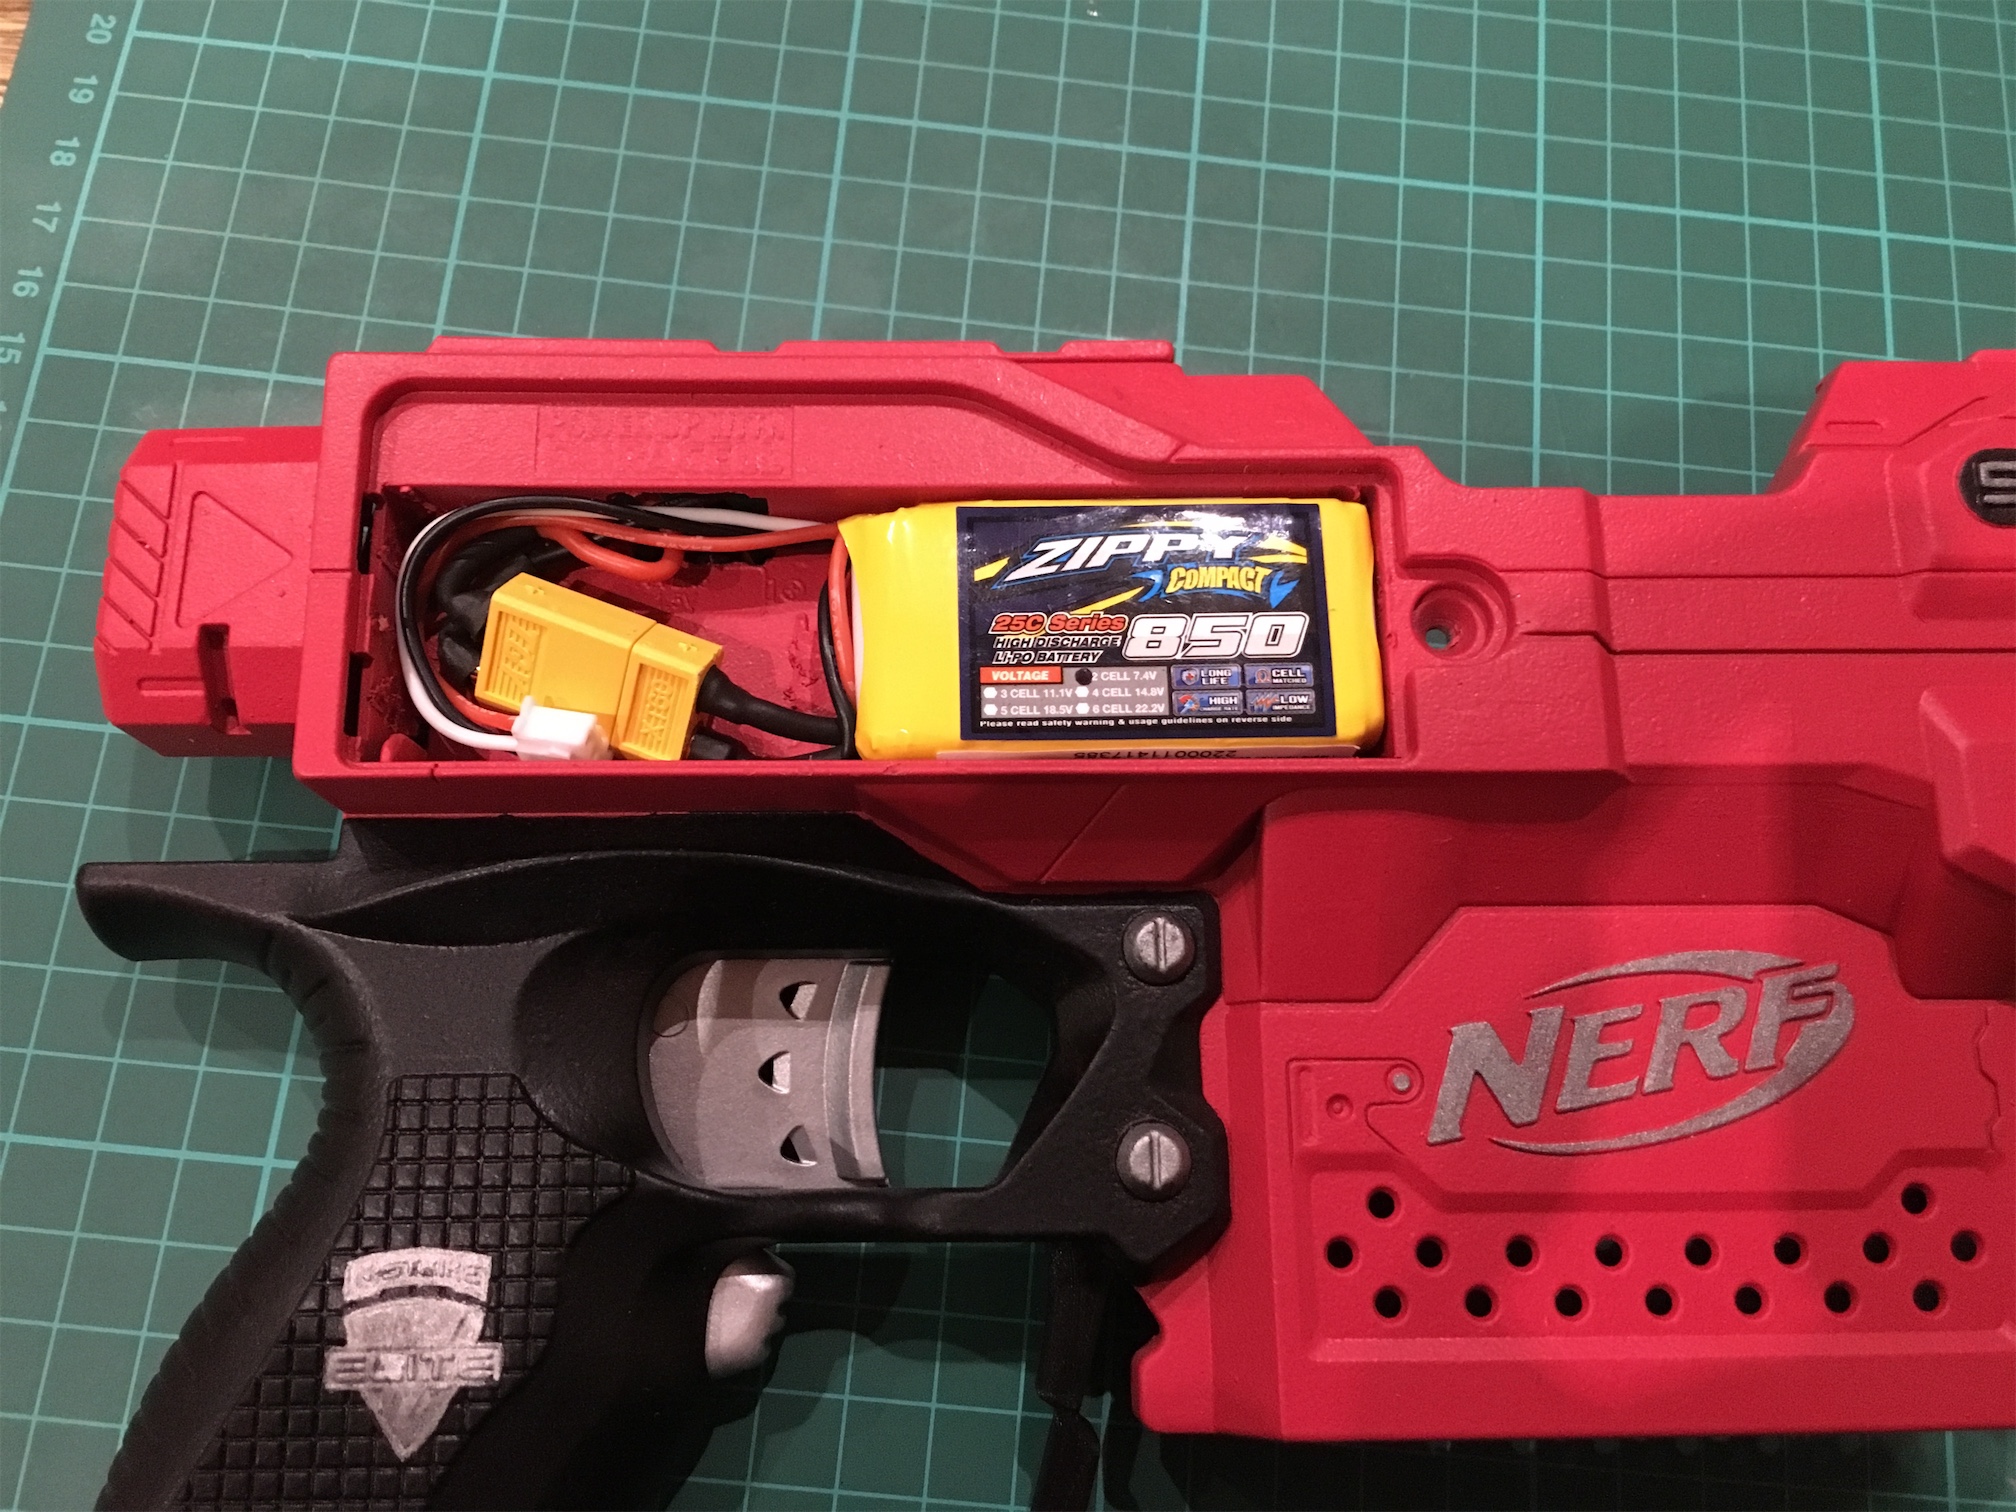
The battery cover just fits in place with the battery in and the plastic ridges dremel’d off the battery cover.
By now my Taobao order had arrived with some new goodies.
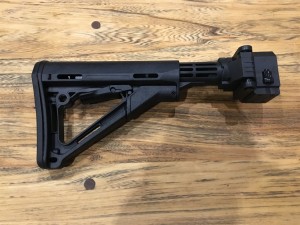
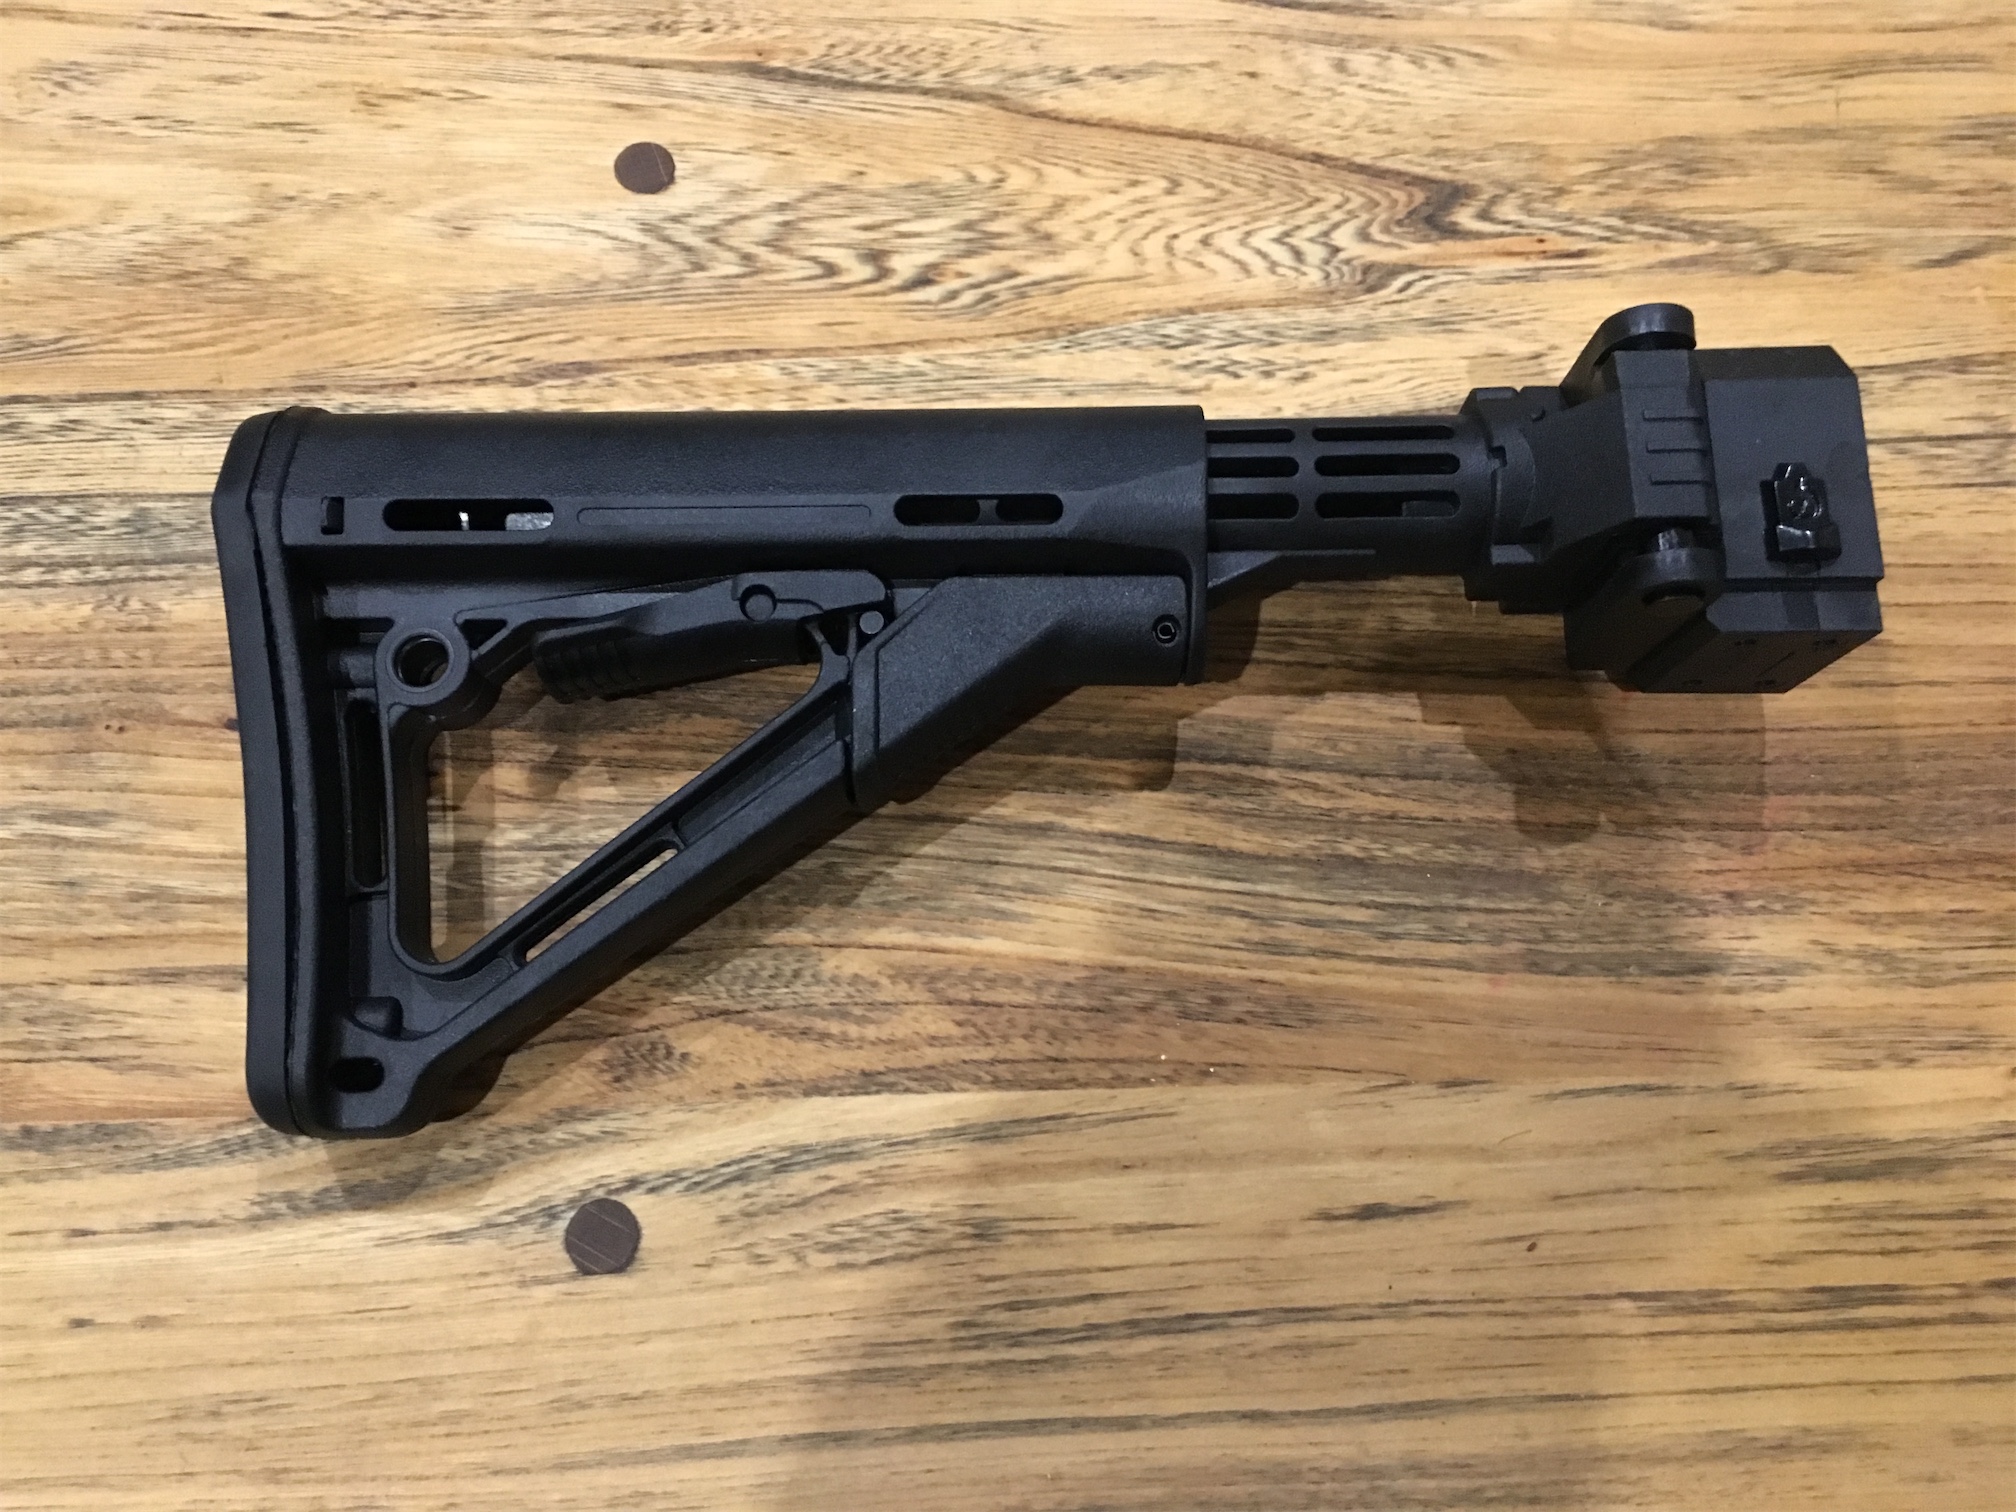
- Folding Worker stock mount and CTR adjustable stock
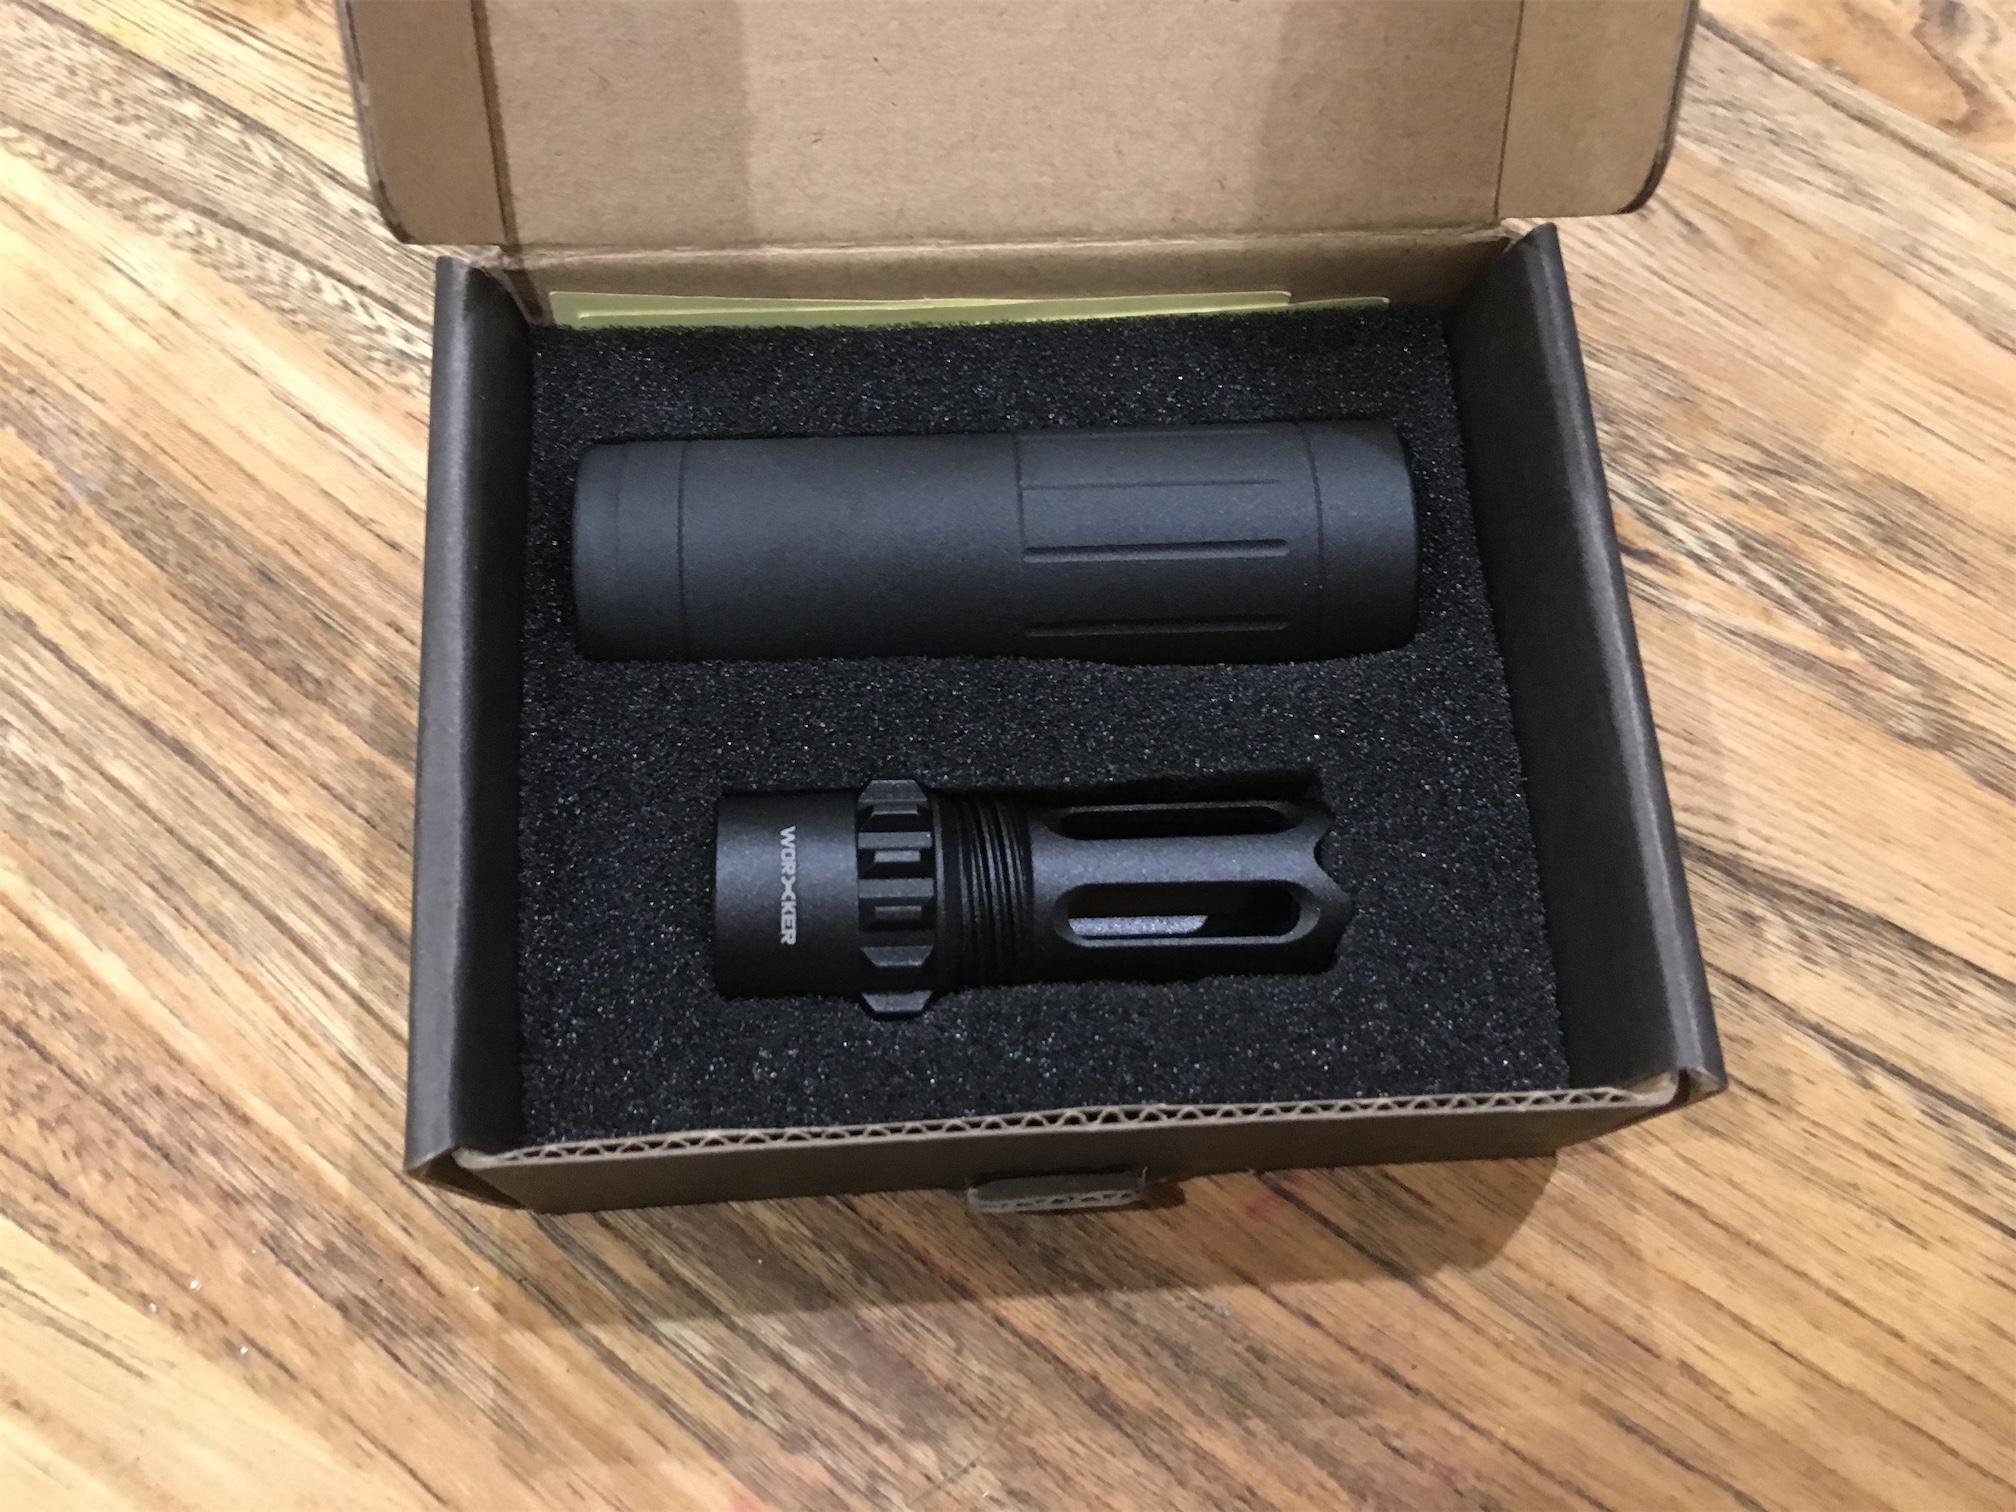
- Worker aluminium silencer and flasher


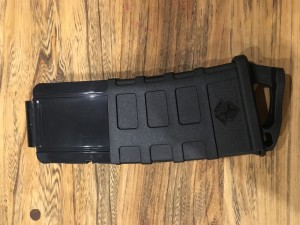
- Worker 12 round Mag’s with puller
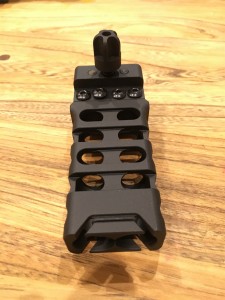
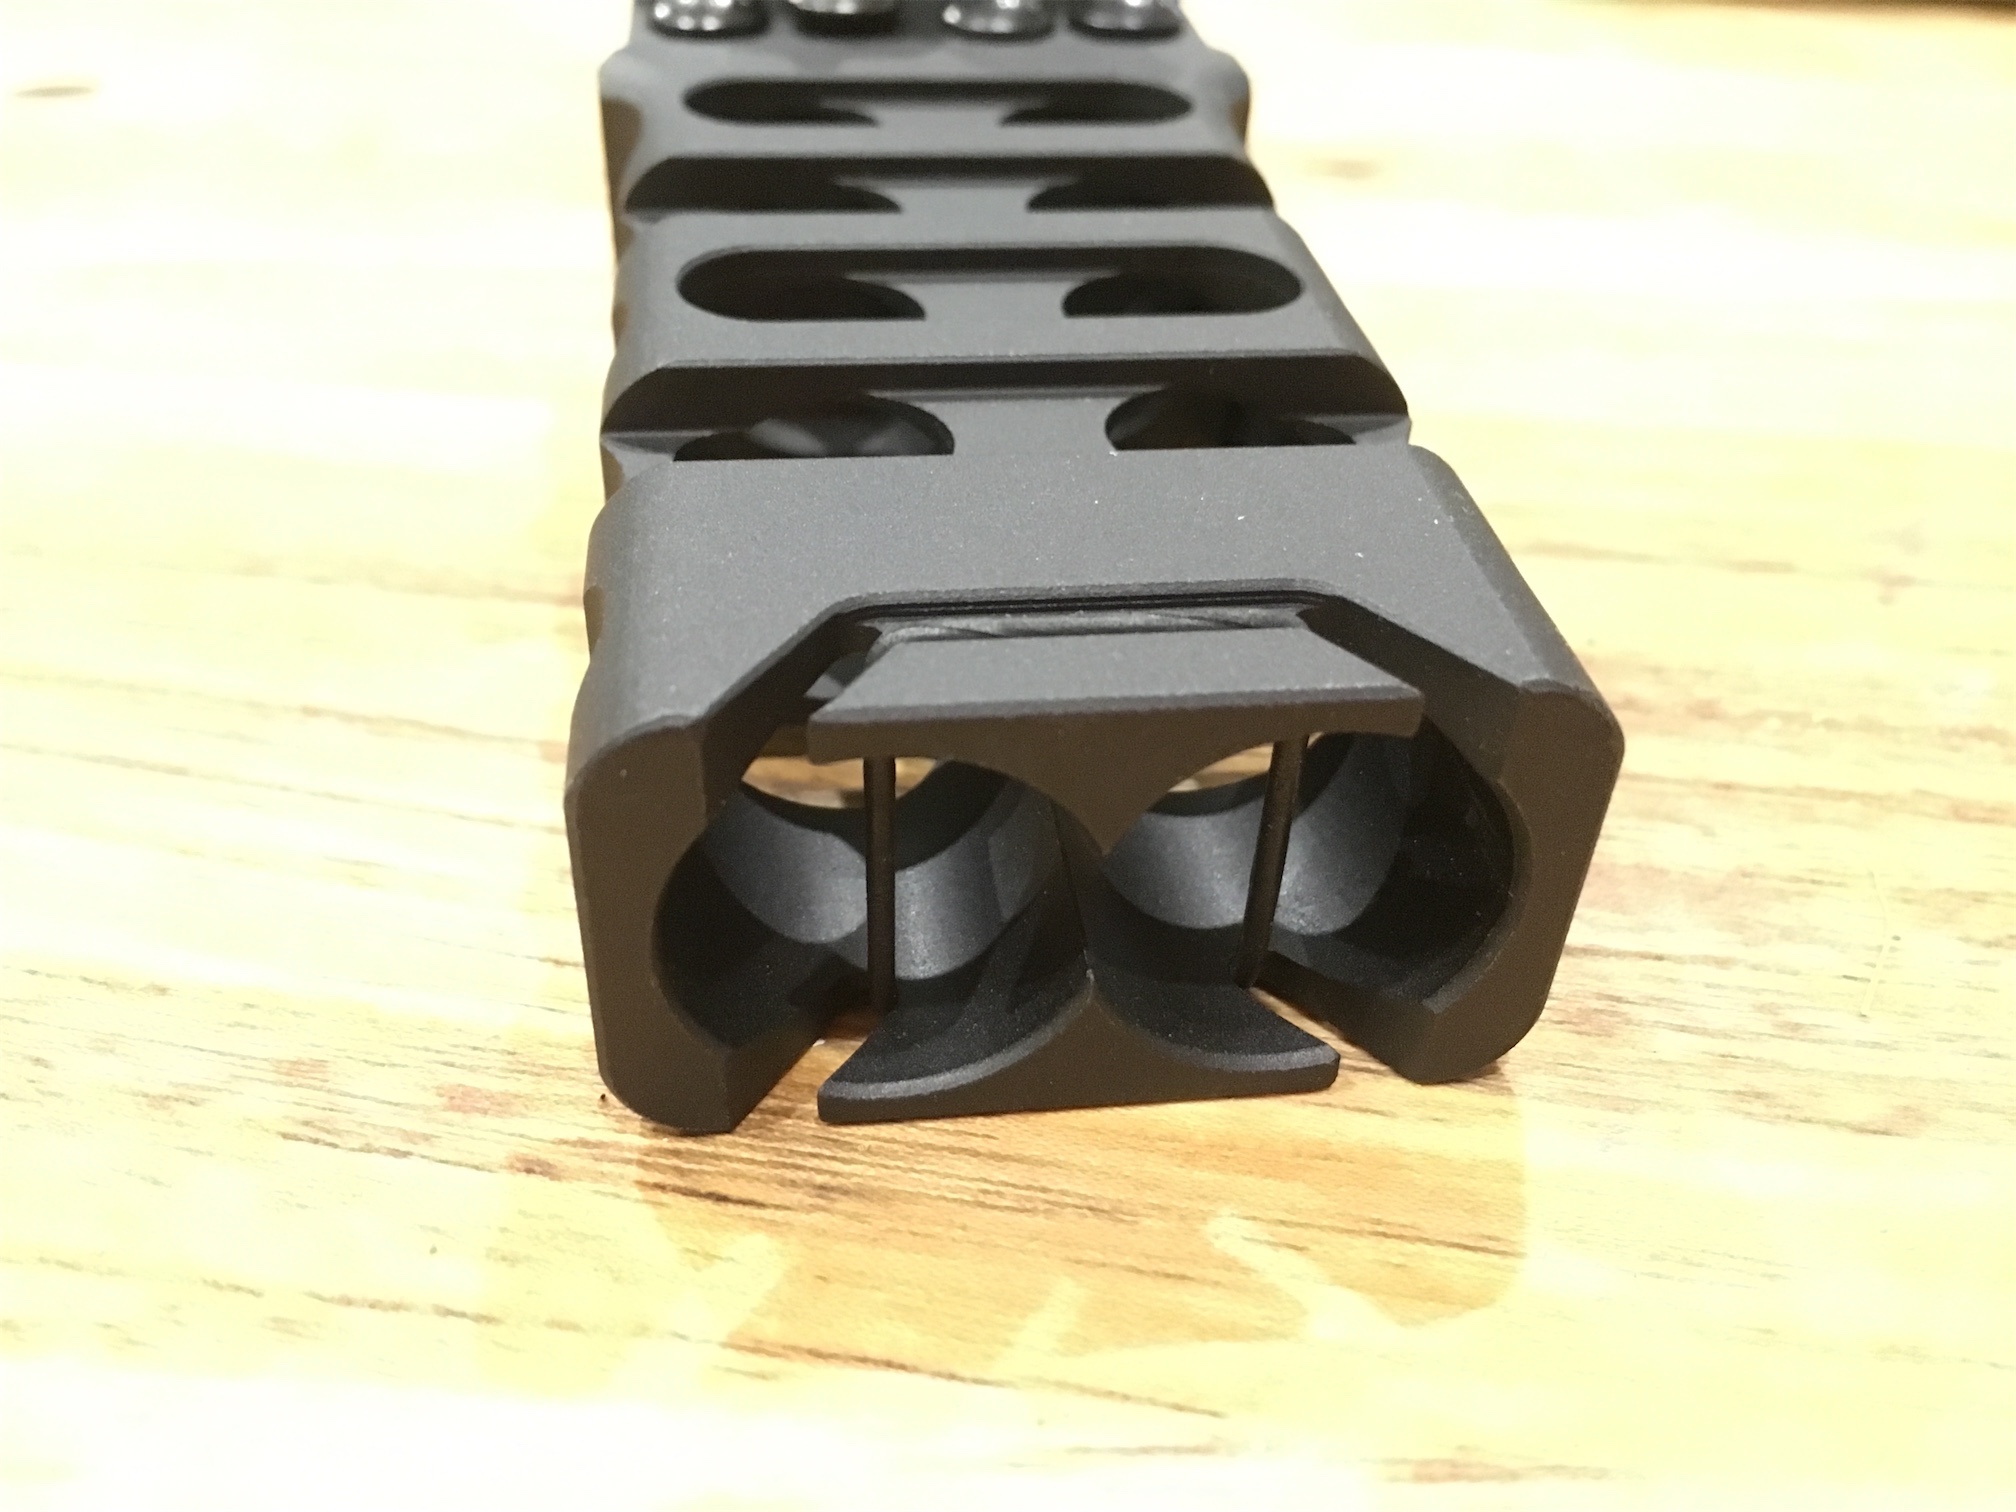
- Finally a little something special. A new aluminium foregrip. It’s a stunning bit of kit and I love it. It even has a space inside for spare batteries.


- I had some other trinkets in the order such as MBUS sites and a sling. Along with parts for my rapidstrike and demolisher builds.


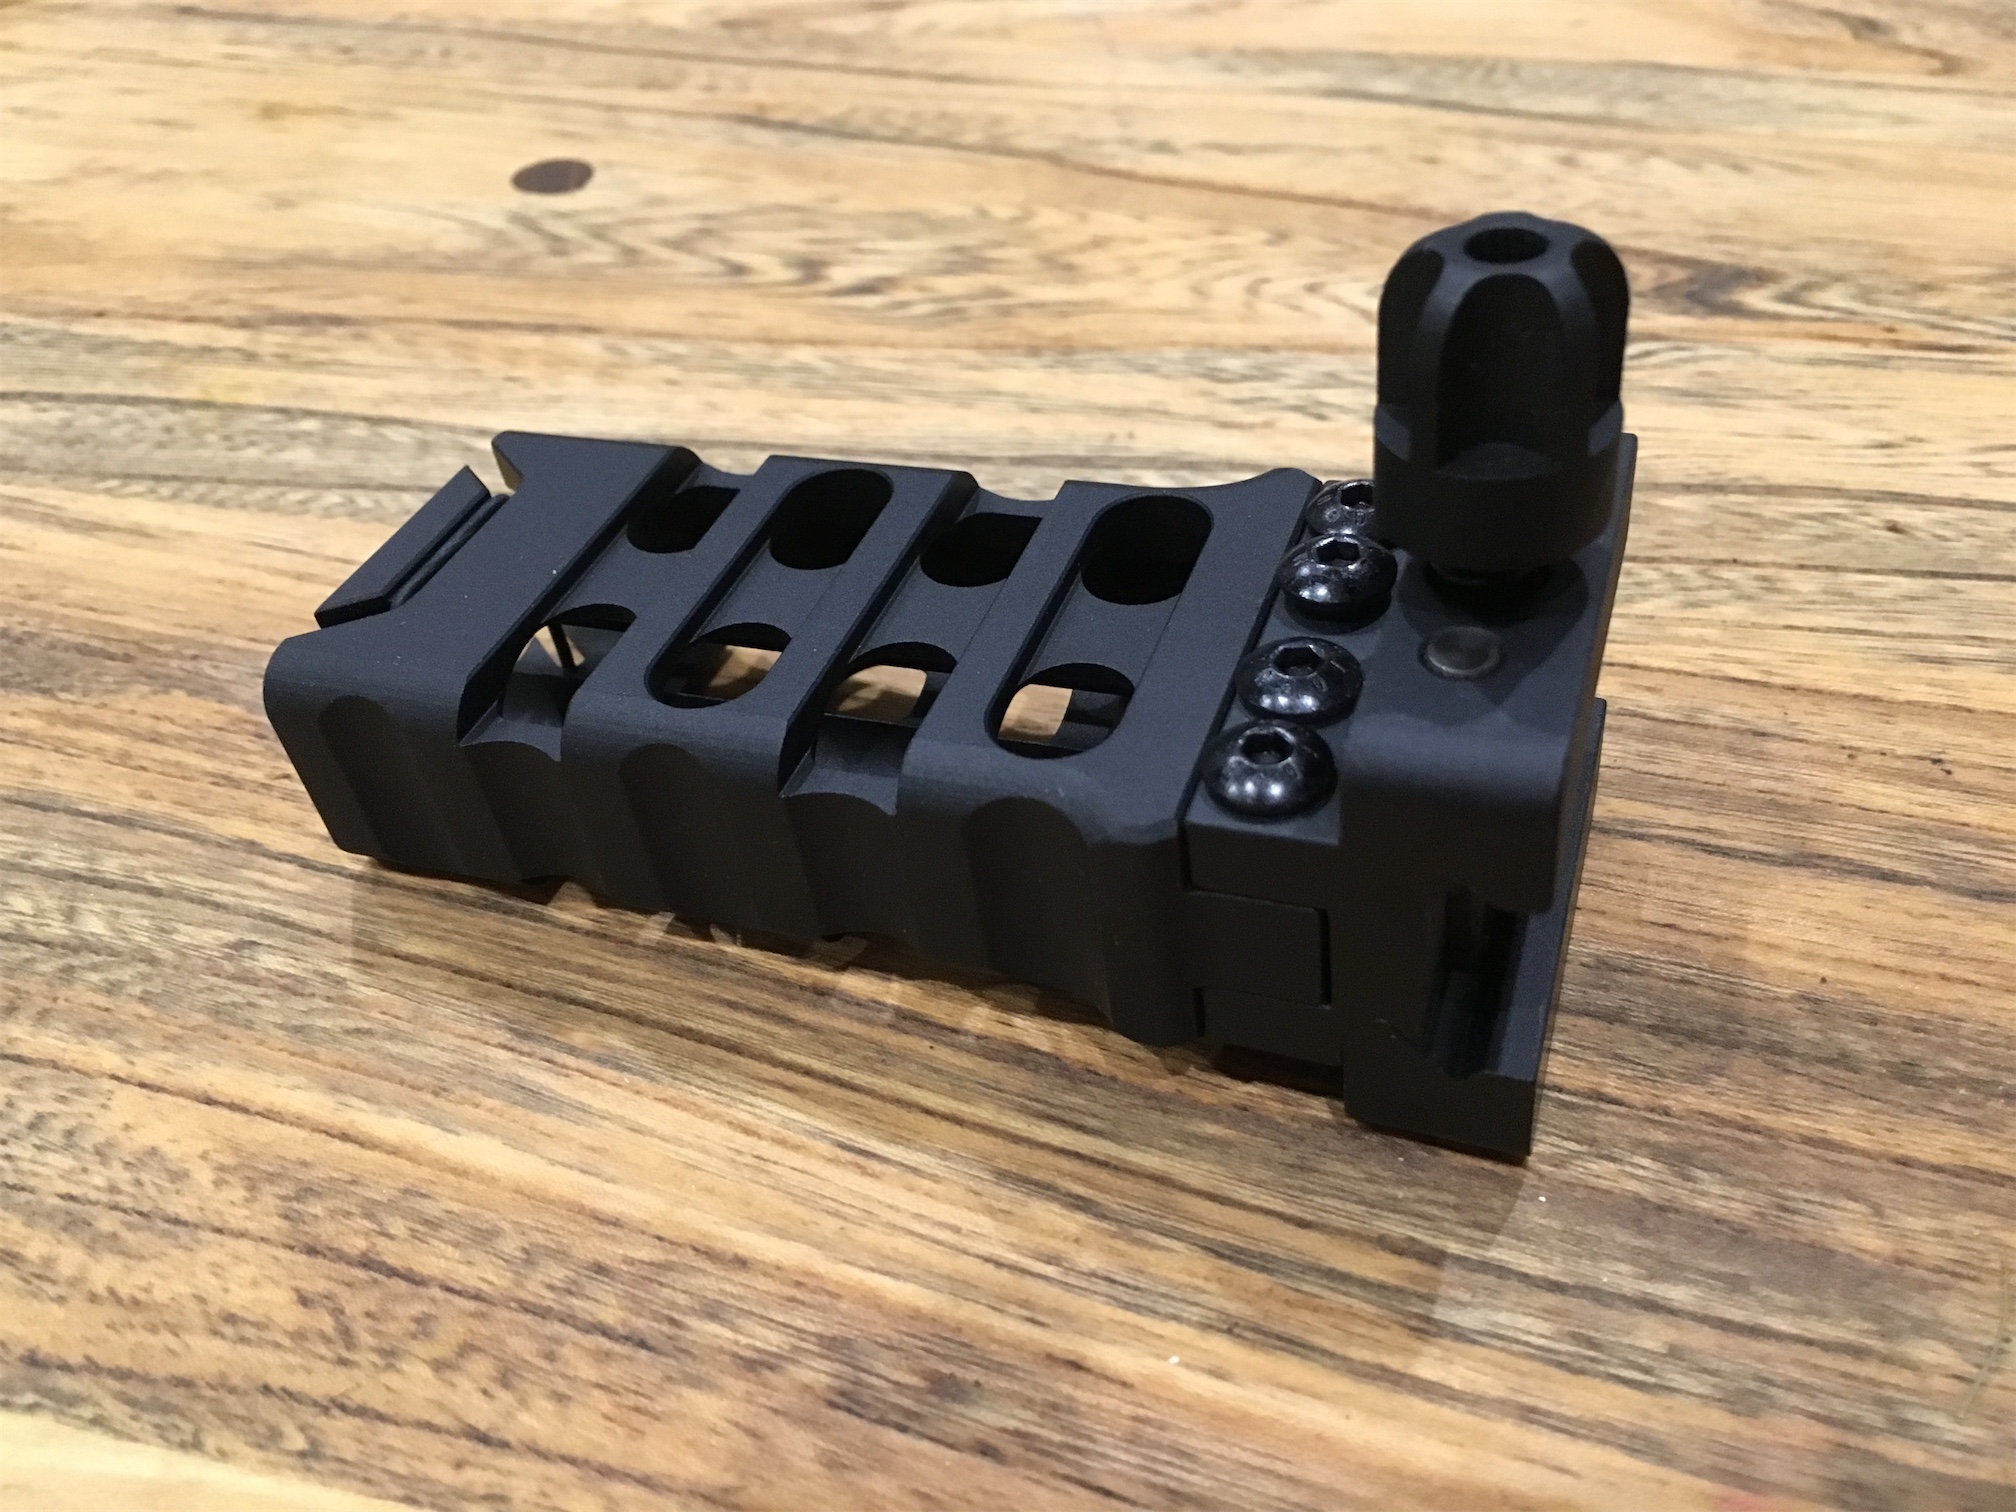


I could now set to work assembling the blaster, I was exceedingly happy with the end result. It has some serious weight to it now!
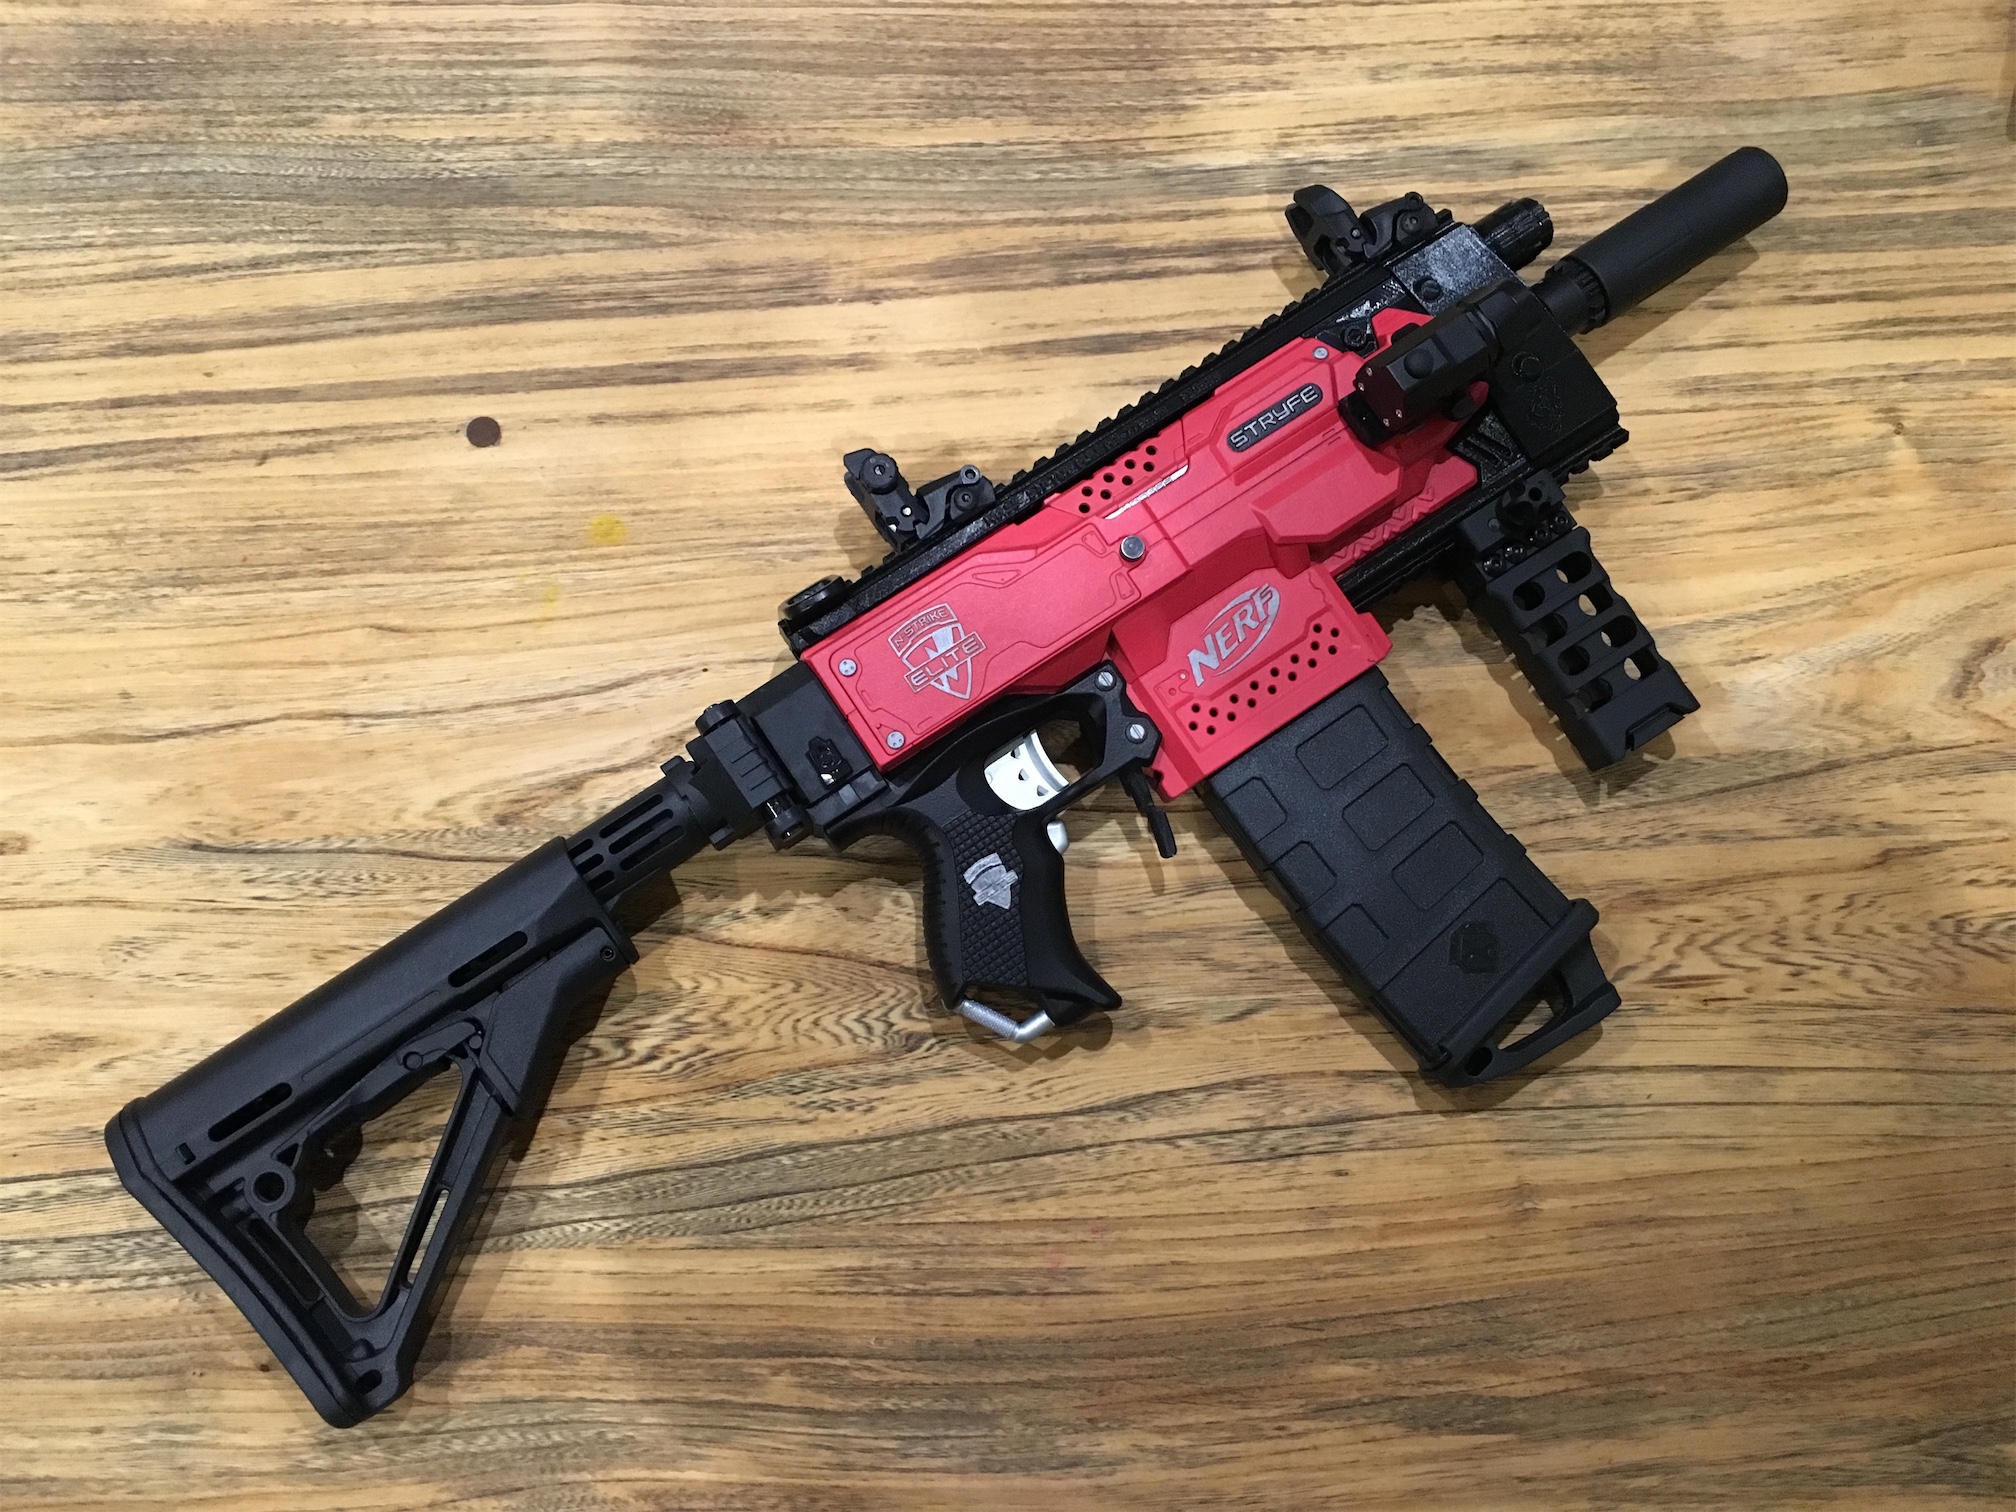
Nerf Stryfe Tacticool
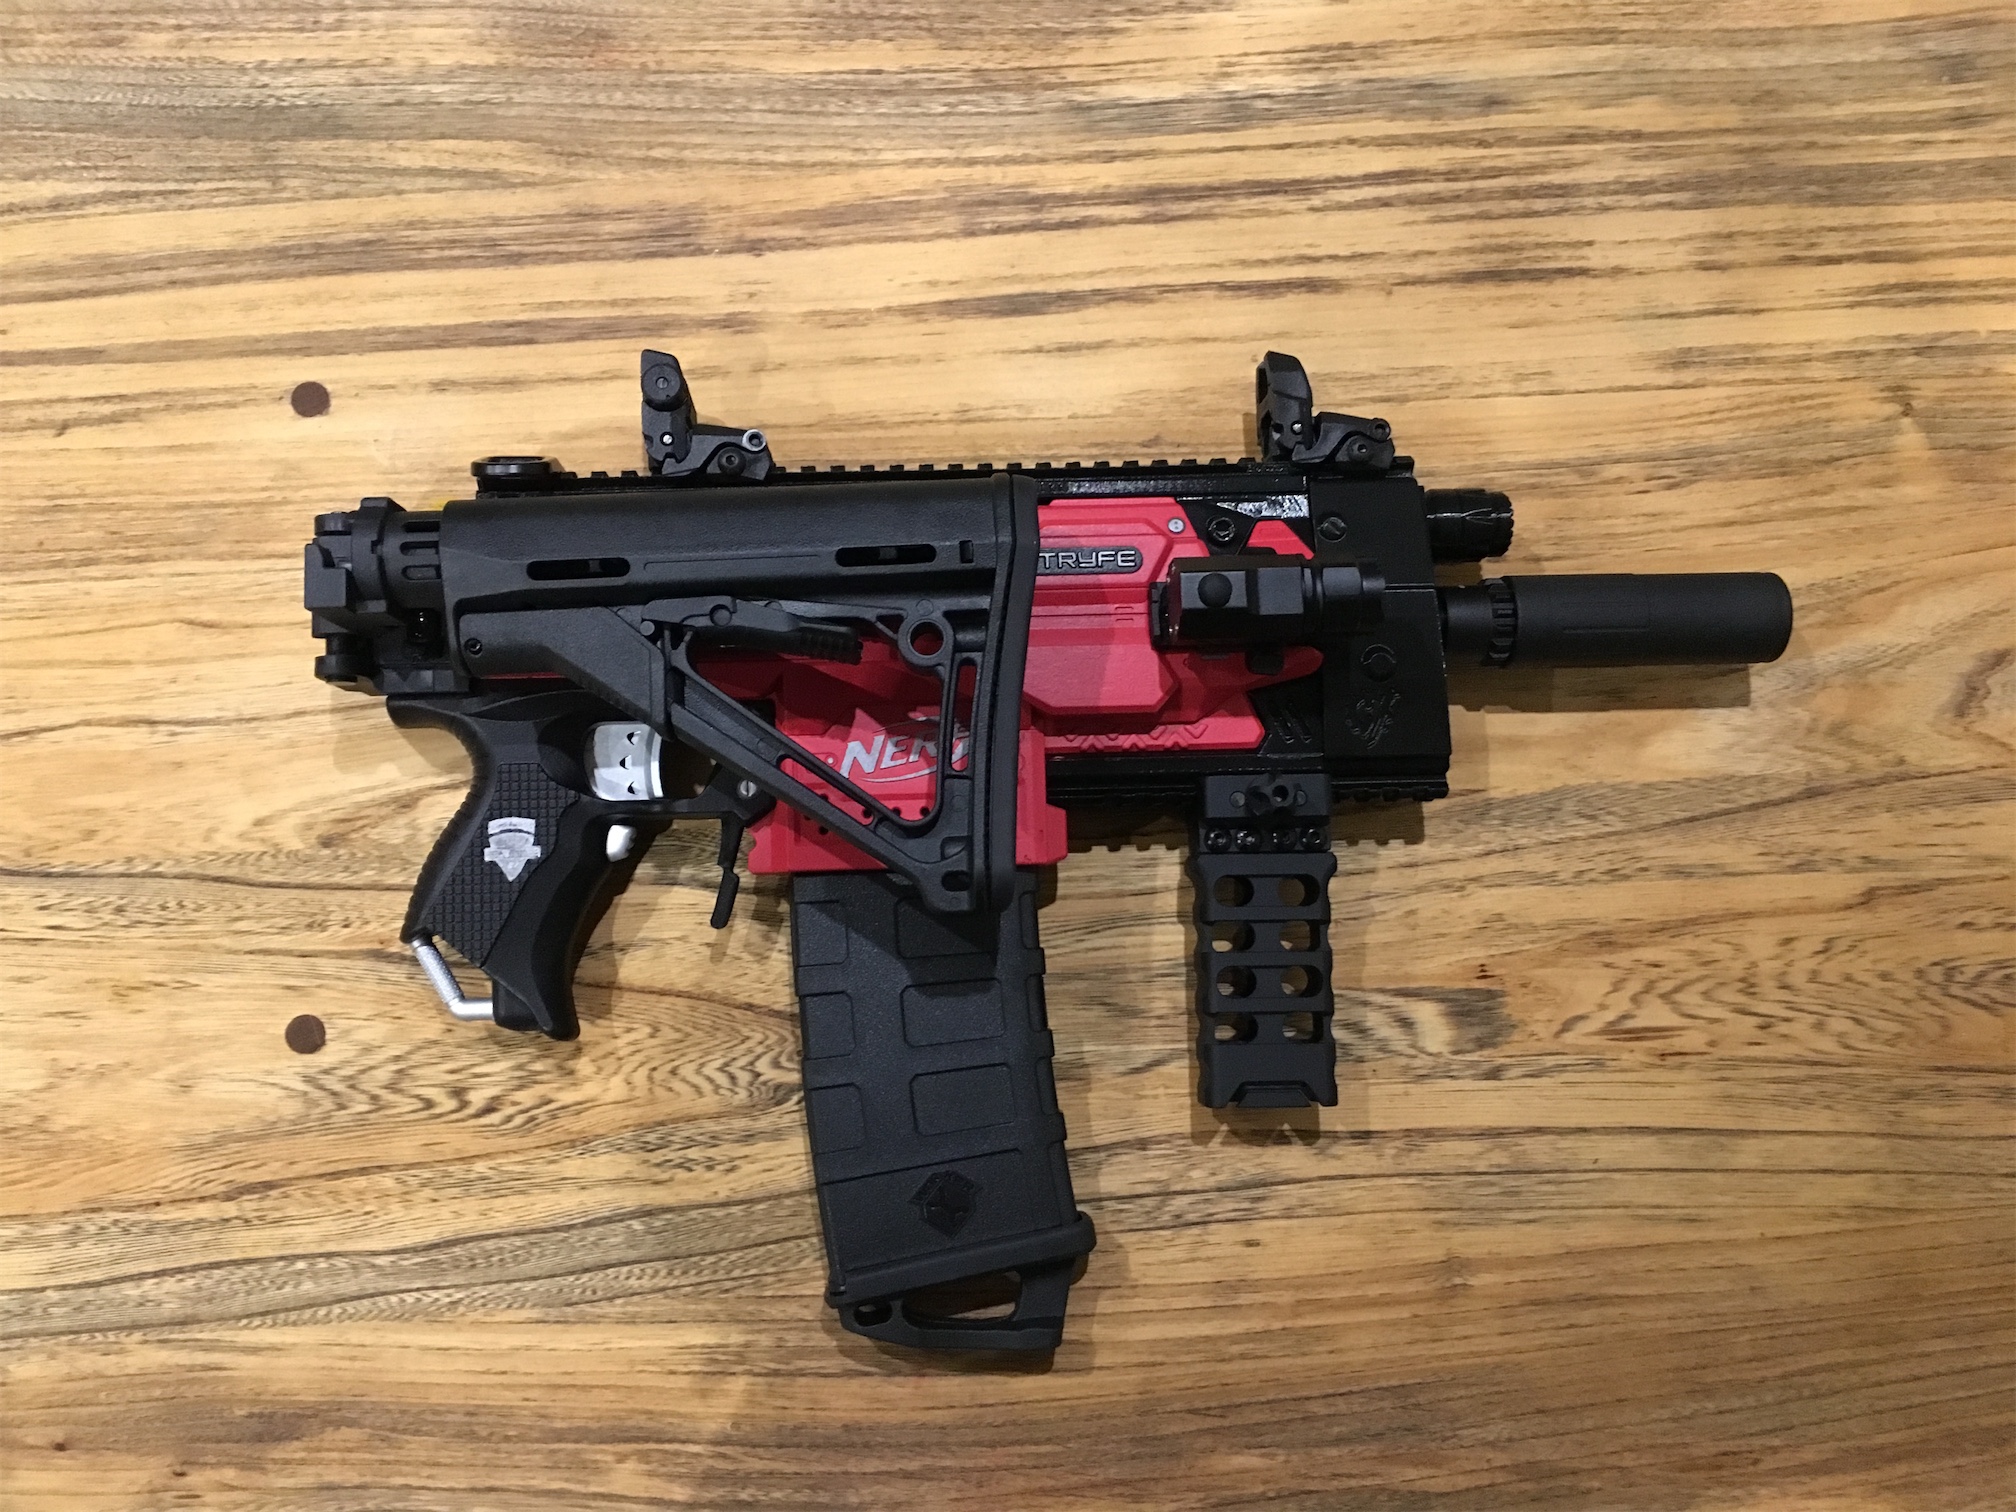
Nerf Stryfe Tacticool Folded Stock

Nerf Stryfe Tacticool No Stock
Nerf Stryfe Tacticool with Stock
It looks very different to how it last looked.

Nerf Stryfe Kriss Vector
Here is a video of it in action
The final spec’s/parts are as follows:
Nerf Stryfe
18 AWG Rewire
2 x Rhino MTB Motors
2S Zippy Compact 850 battery
XT60 Connectors
Worker Flywheels
All locks removed
Gavinfuzzy 3d Printed Mag release.
Worker Aluminium flasher and silencer.
Worker 12 Pmag with puller.
Worker battery thumbscrew
Worker folding stock
CTR Stock
MBUS sights
F10555 3D Printed top rail
F10555 3D Printed side rail
F10555 3D Printed bottom rail
F10555 3D Kriss Vector front section
Viking Tactics Ultralight Vertical Grip
TrustFire LED Gun Tactical Flashlight
I hope you like the end result as much as me.
