


Mudguard fitted & carb woes
Quick pre MOT update and mudguard pics.
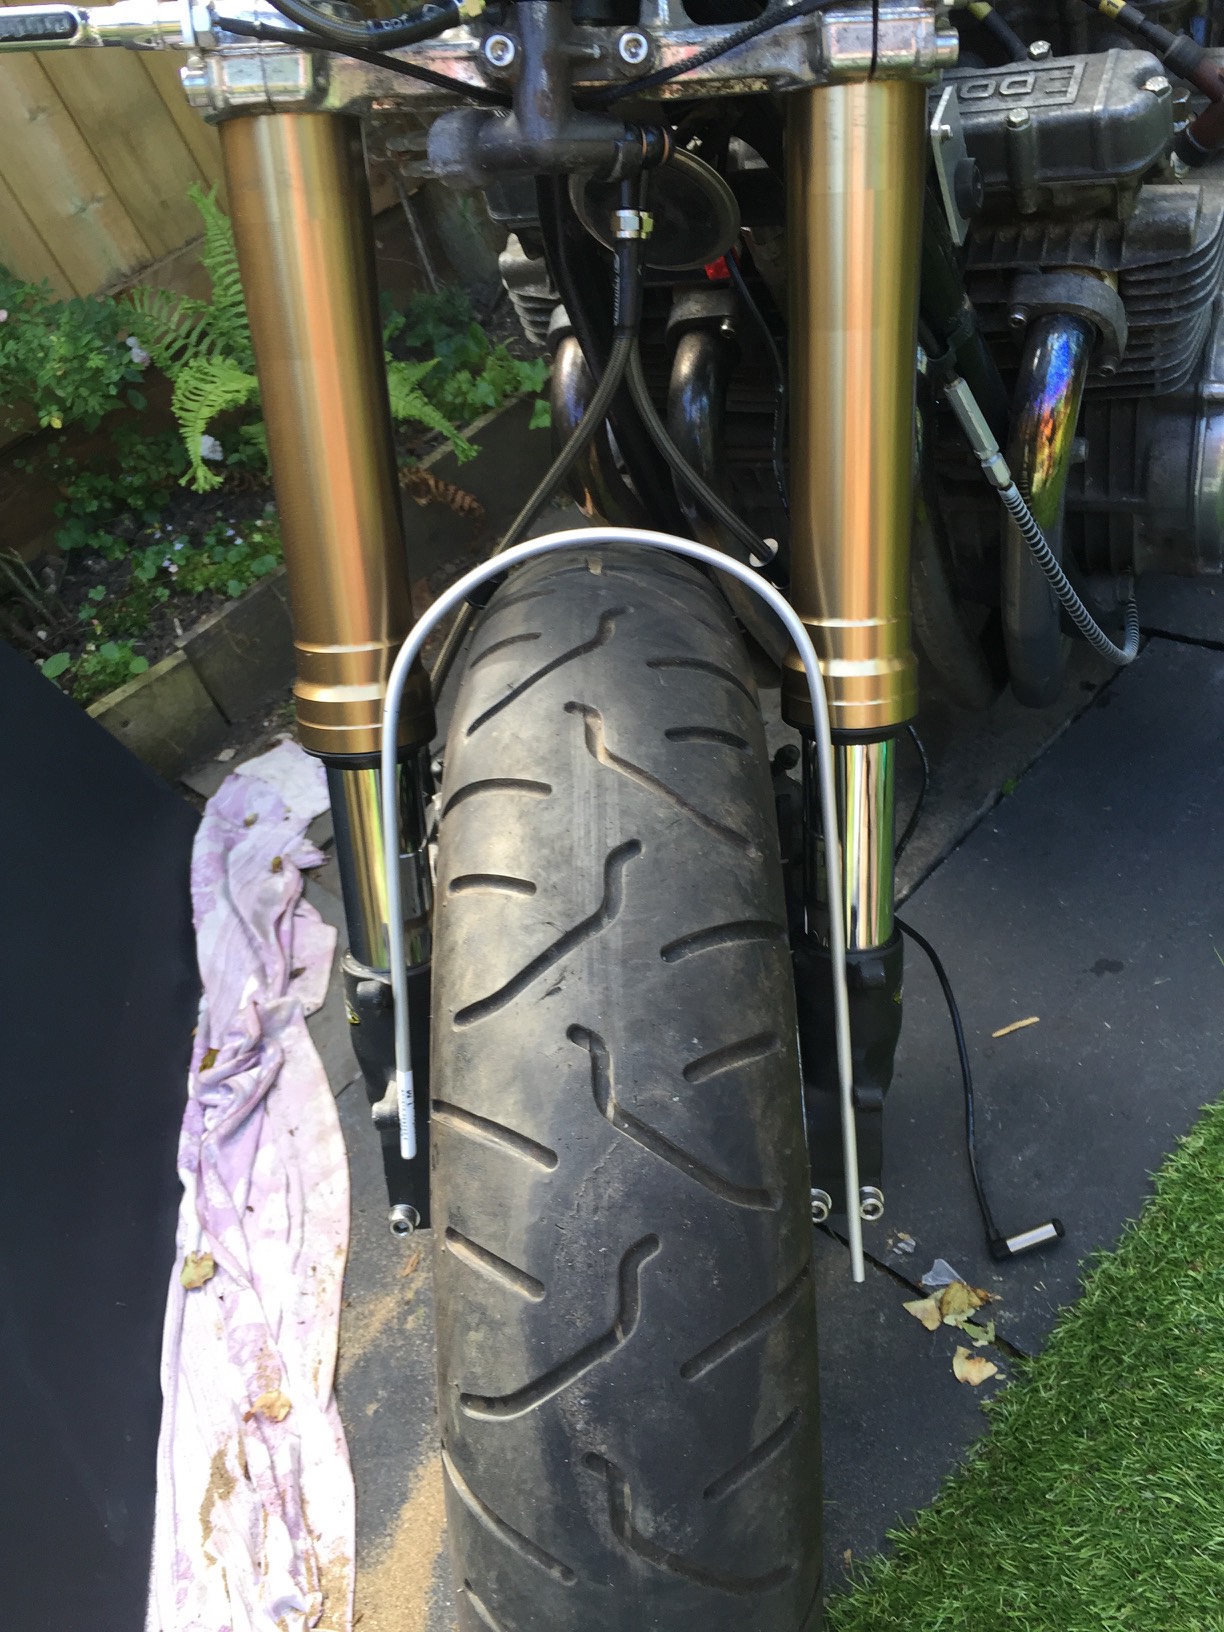
I managed to create a mount for the triumph mudguard using aluminium pipe bent to shape and attached with P-clips. I had no idea whether it would work or not when I started. First I used the rear tire as a bending guide as it’s about the width that I needed. This gave me the front bracket which I attached to the mudguard as a test.


That worked really well so I set about making the second bracket for the rear.
What I had failed to think about was how to get the brackets and mudguard into place. I had hoped to leave the brackets attached to the mudguard and slide them on, but that was never going to work. So i had a very fiddly time trying to mount the brackets to the mudguard once they were in place. With a lot of swearing and dropping nuts I got there.


I am so delighted in how it turned out. I never expected it to work so well.
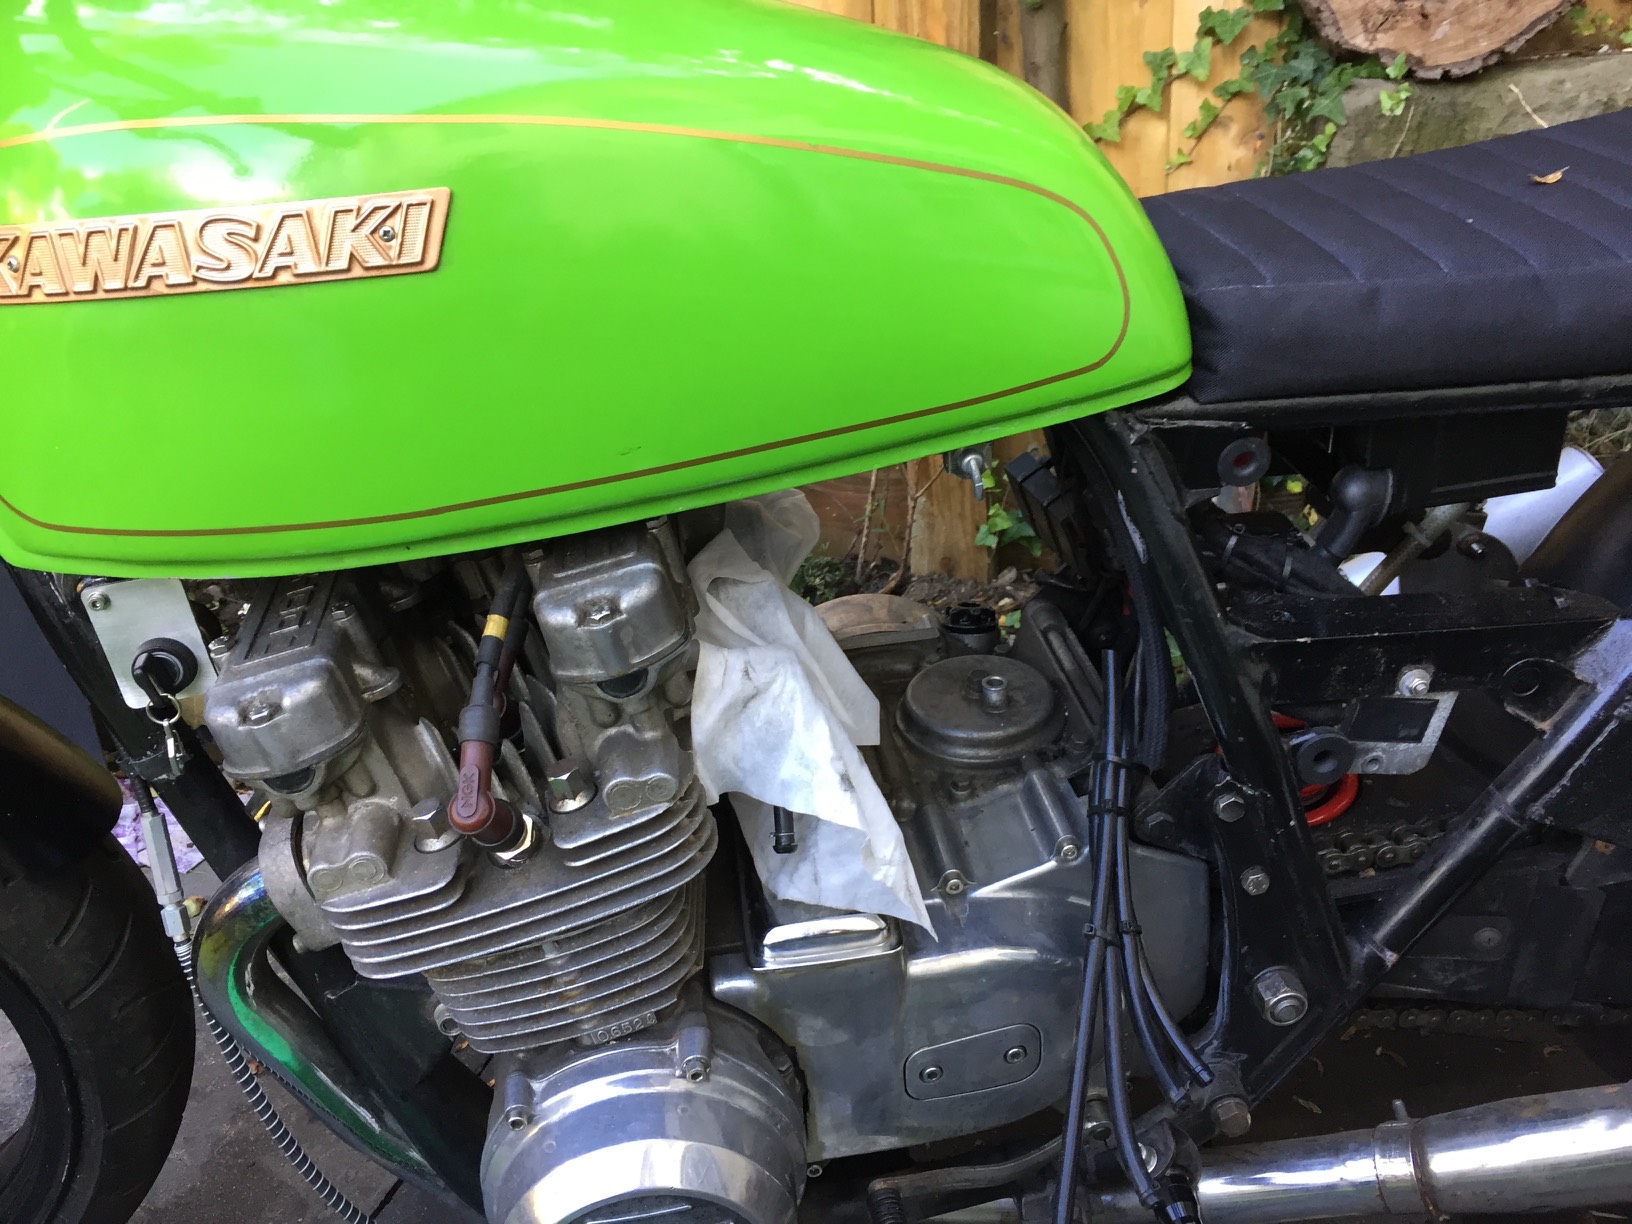
Next it was time to refuel the tank and fire it up. This is where the headache started. The bike started ok, but sounded odd, I realised that it was pissing fuel out from somewhere. Not good. I also realised that one of the exhaust headers was cold not hot. Also not good.
I rapidly realised that there was probably a carb issue. I’ve avoided touching these so far as I don’t want to cause more issues than I fix, but needs must. I took them off the bike which was much easier than I was expecting. Thankfully I didn’t need to remove the tank either.
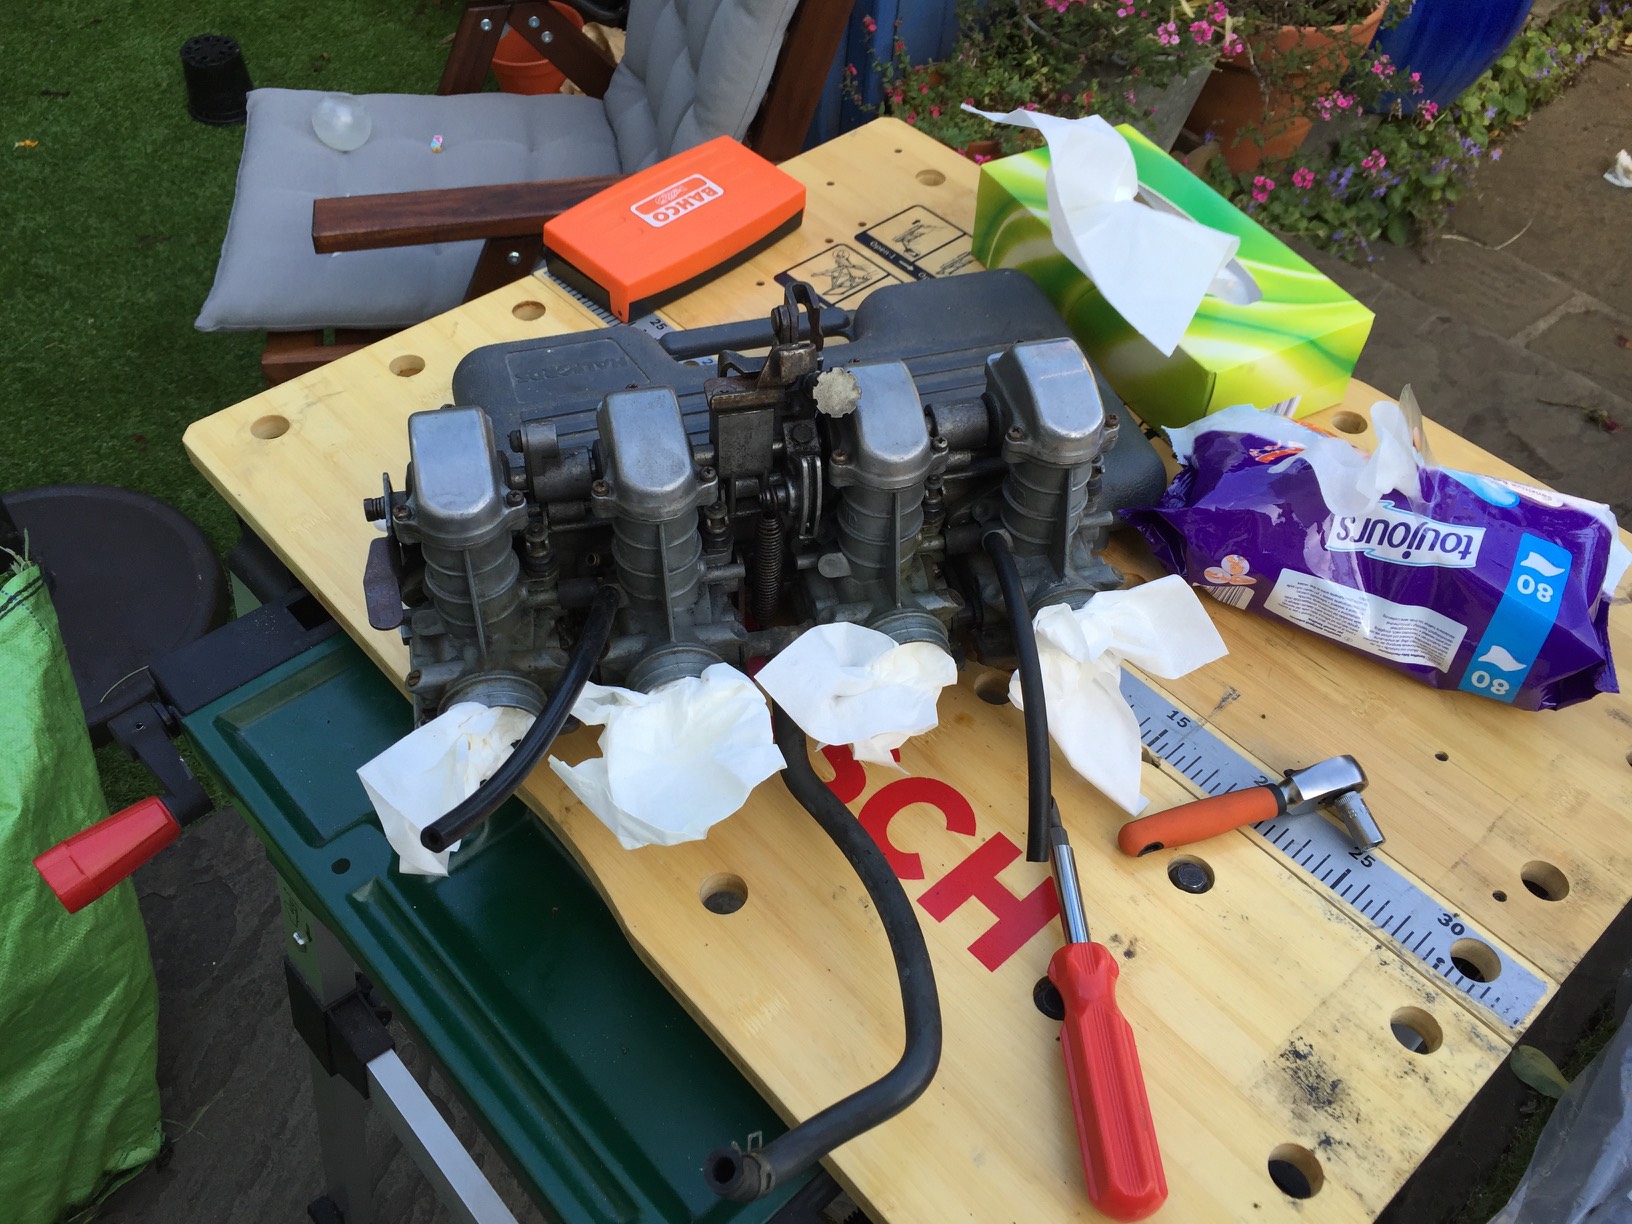
I found some blockages in the carb that I thought was the problem and managed to clean them out. I’ve just put them back in and it seems to have sorted the issue out. Certainly it sounds better and is no longer pissing out fuel which is nice!
A job for this winter is a proper carb clean inside and out.
Brakes and other jobs
I’m so close the end of this….
I’ve made a chunk of progress though it doesn’t all show. The main jobs left to do from last time was sorting the wheel placement and fitment. I then also need to fit the brake calipers.
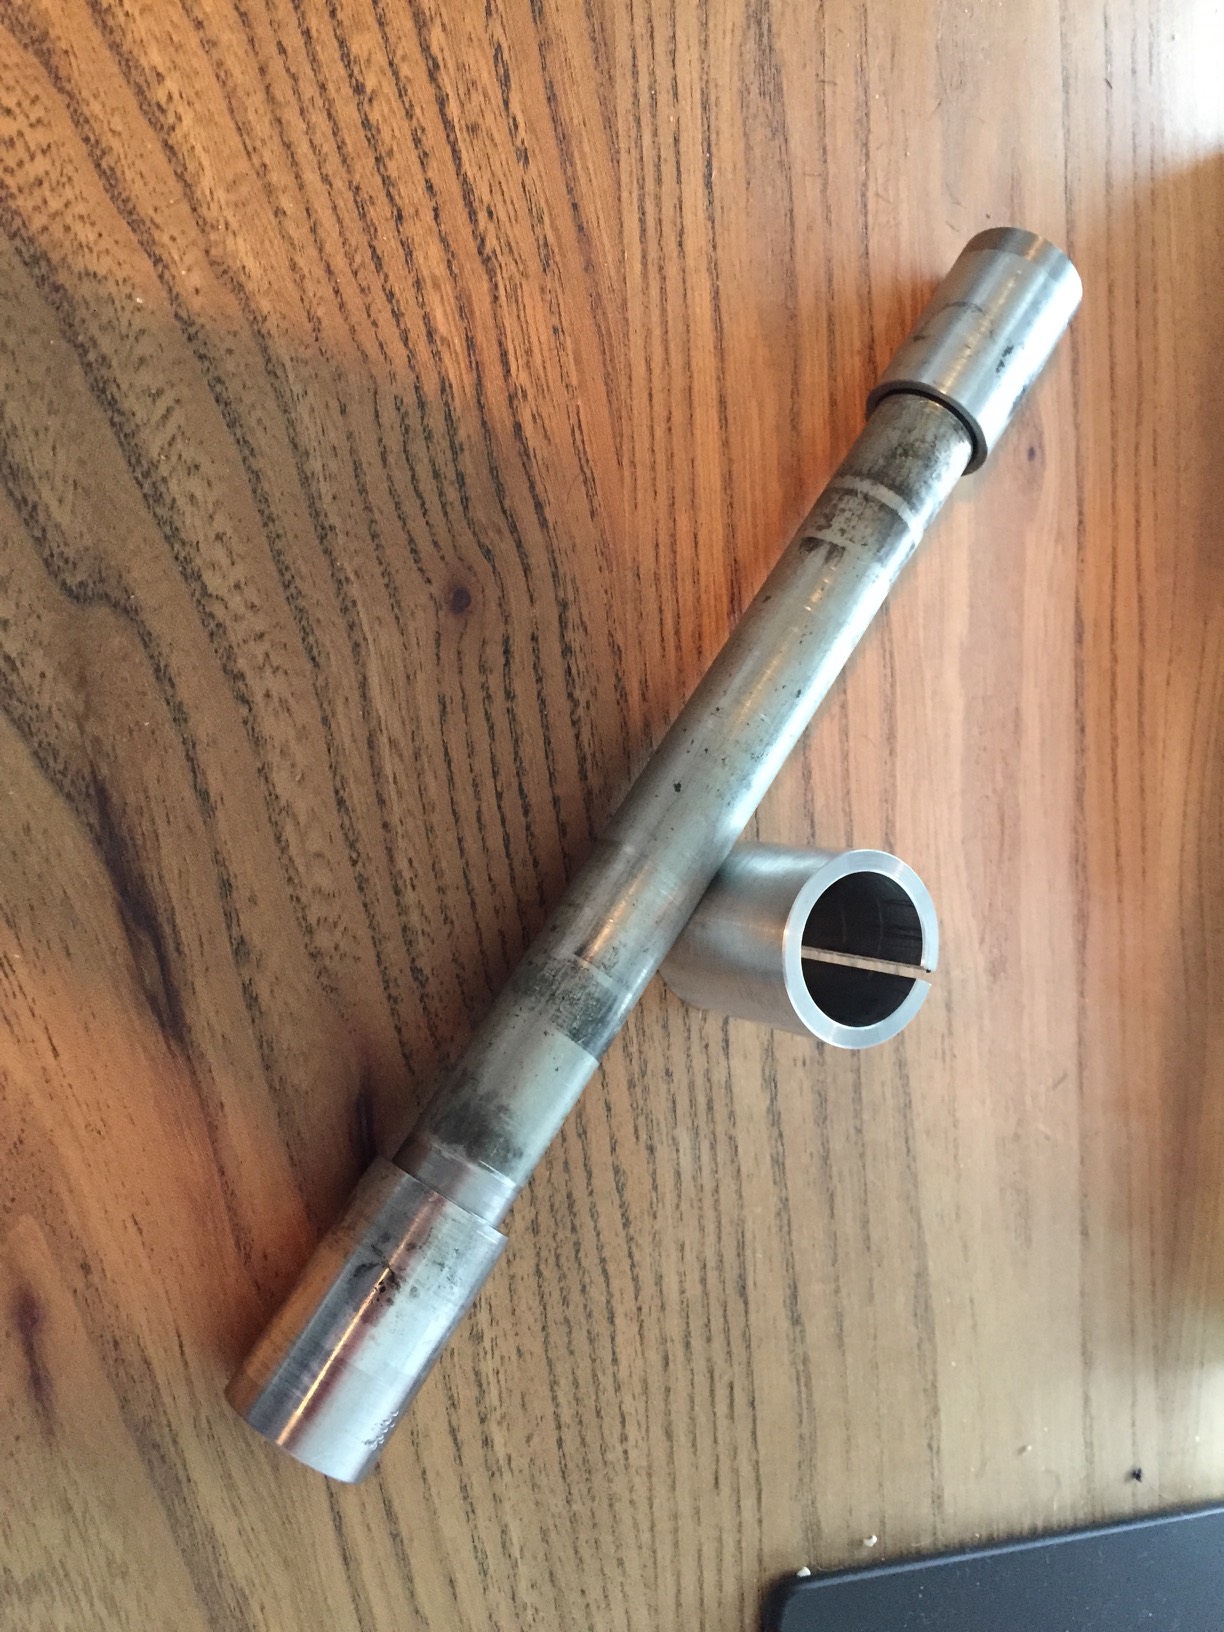
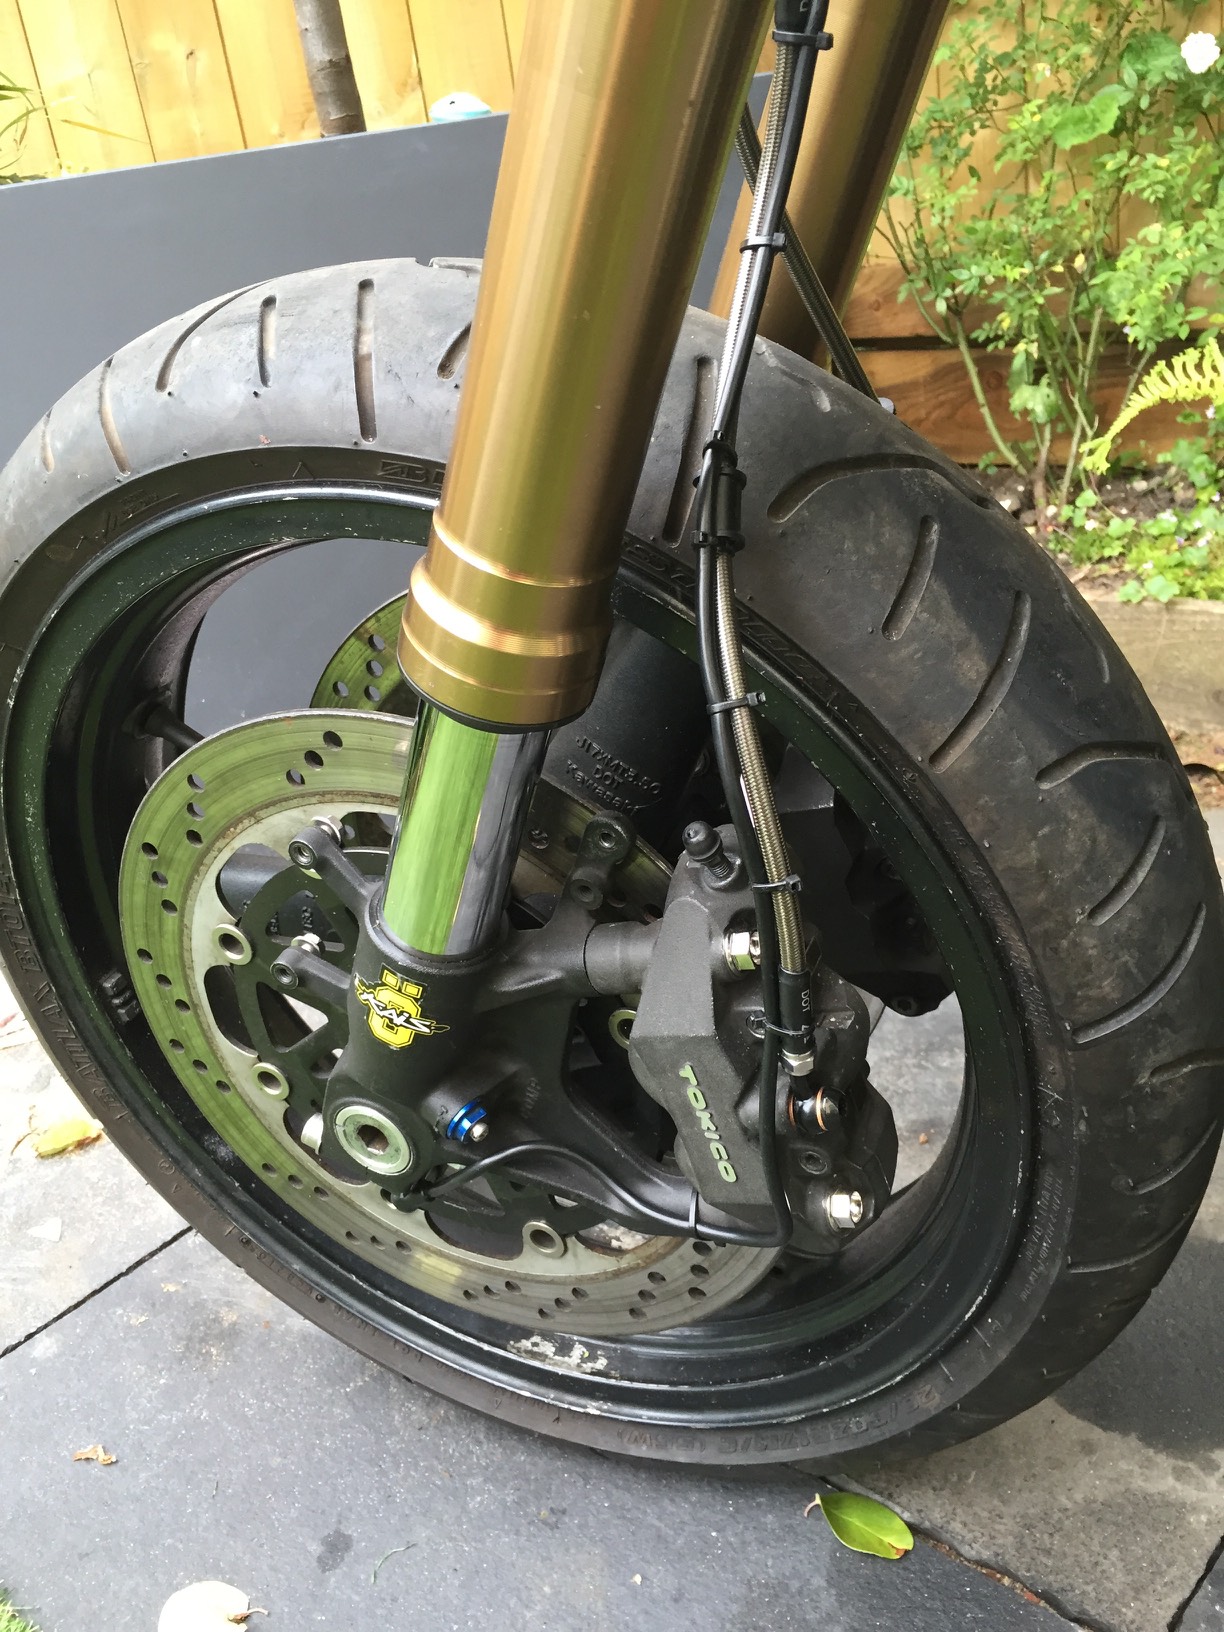
1. Front axle
I had the axle machined down to the correct length. This meant I could finally test fit the wheel and get the correct spacings
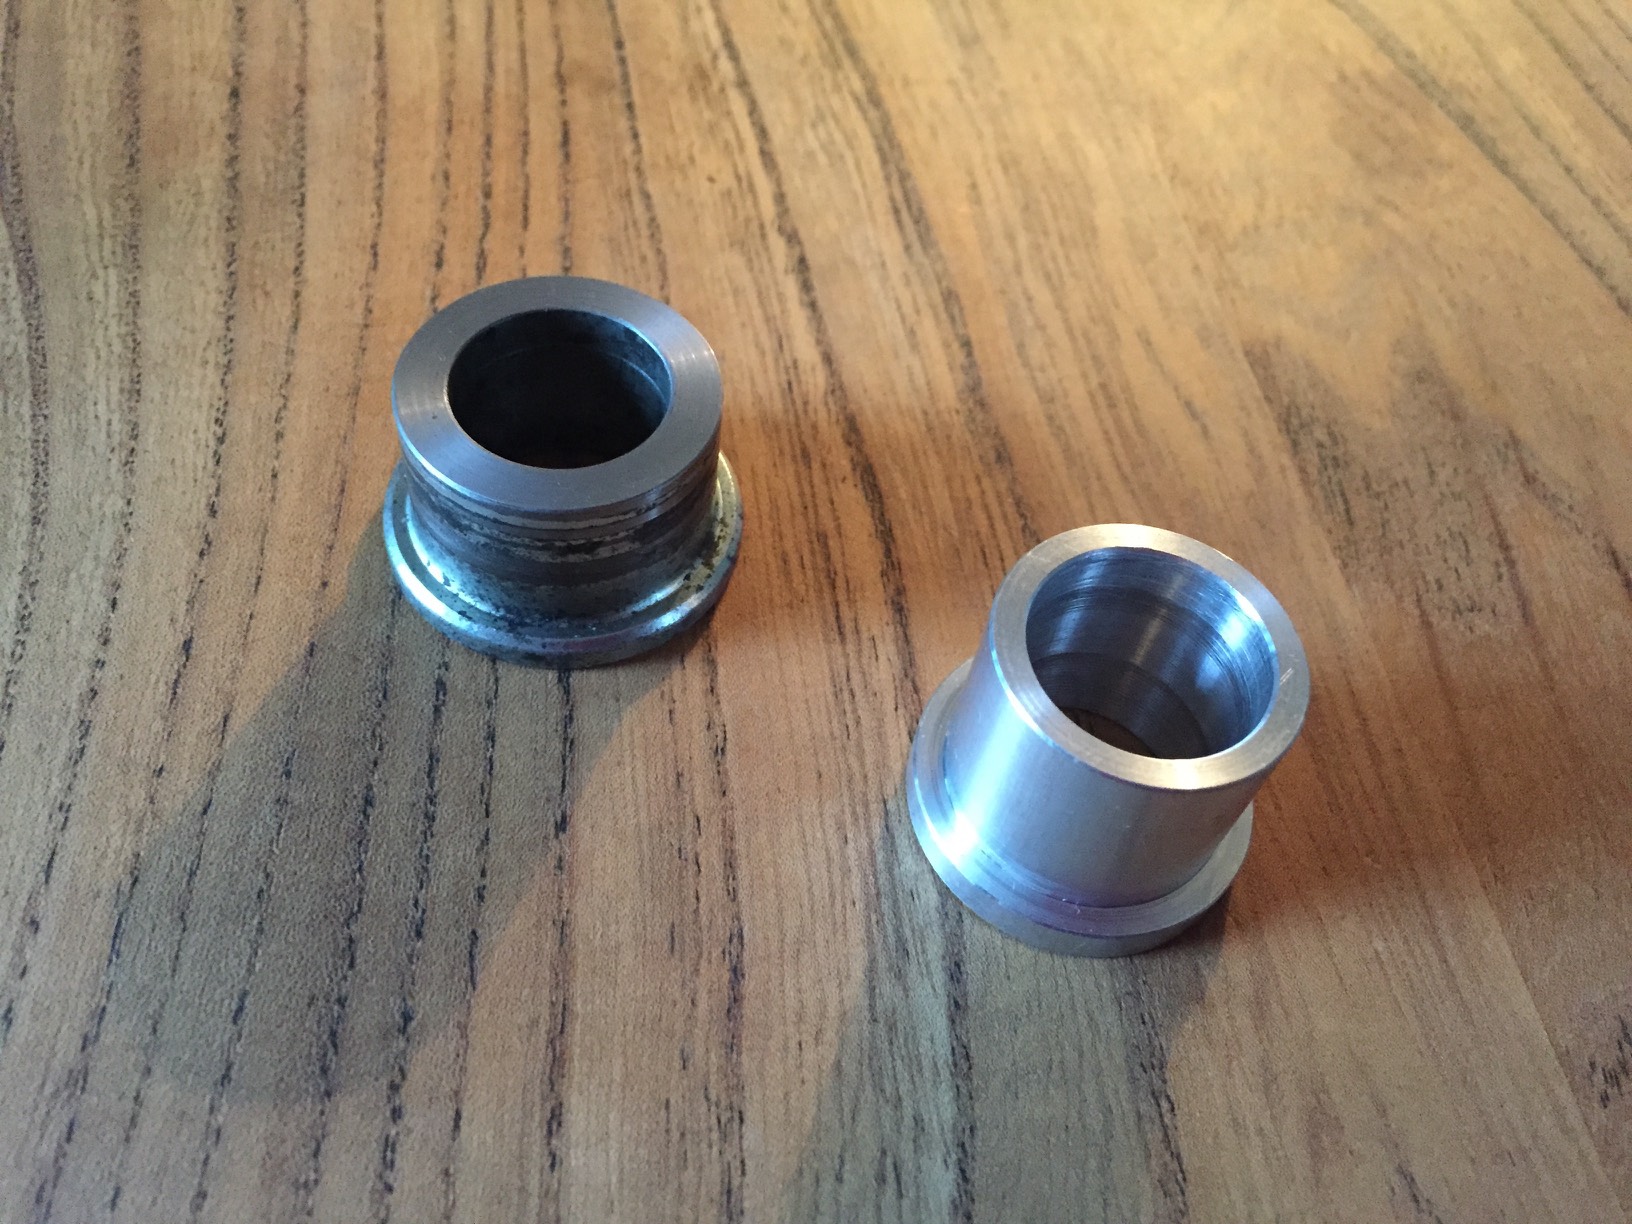
2. Front axle spacers.
The local engineering shop also made up two more spacers for me, once I had worked out what size wheel spacers I needed. I got them to machine down the existing spacer as it was quicker for them. They then created the second one.
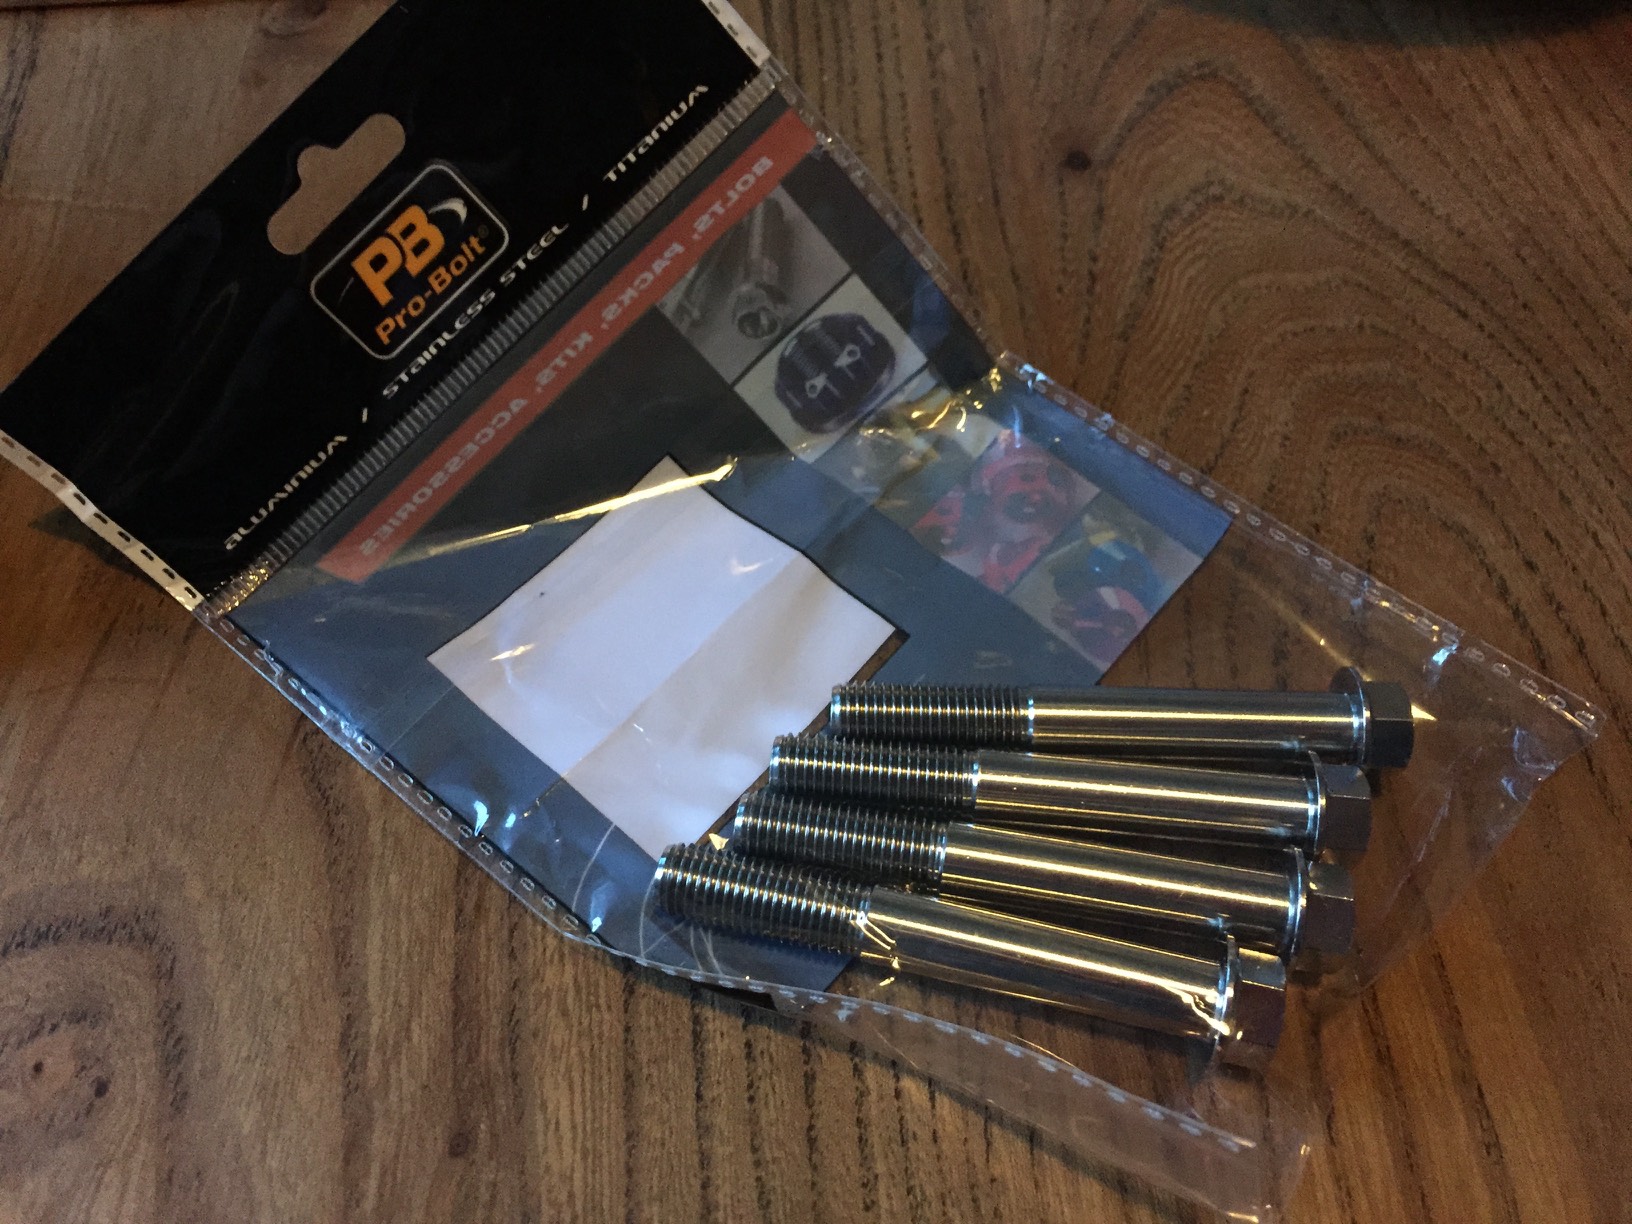
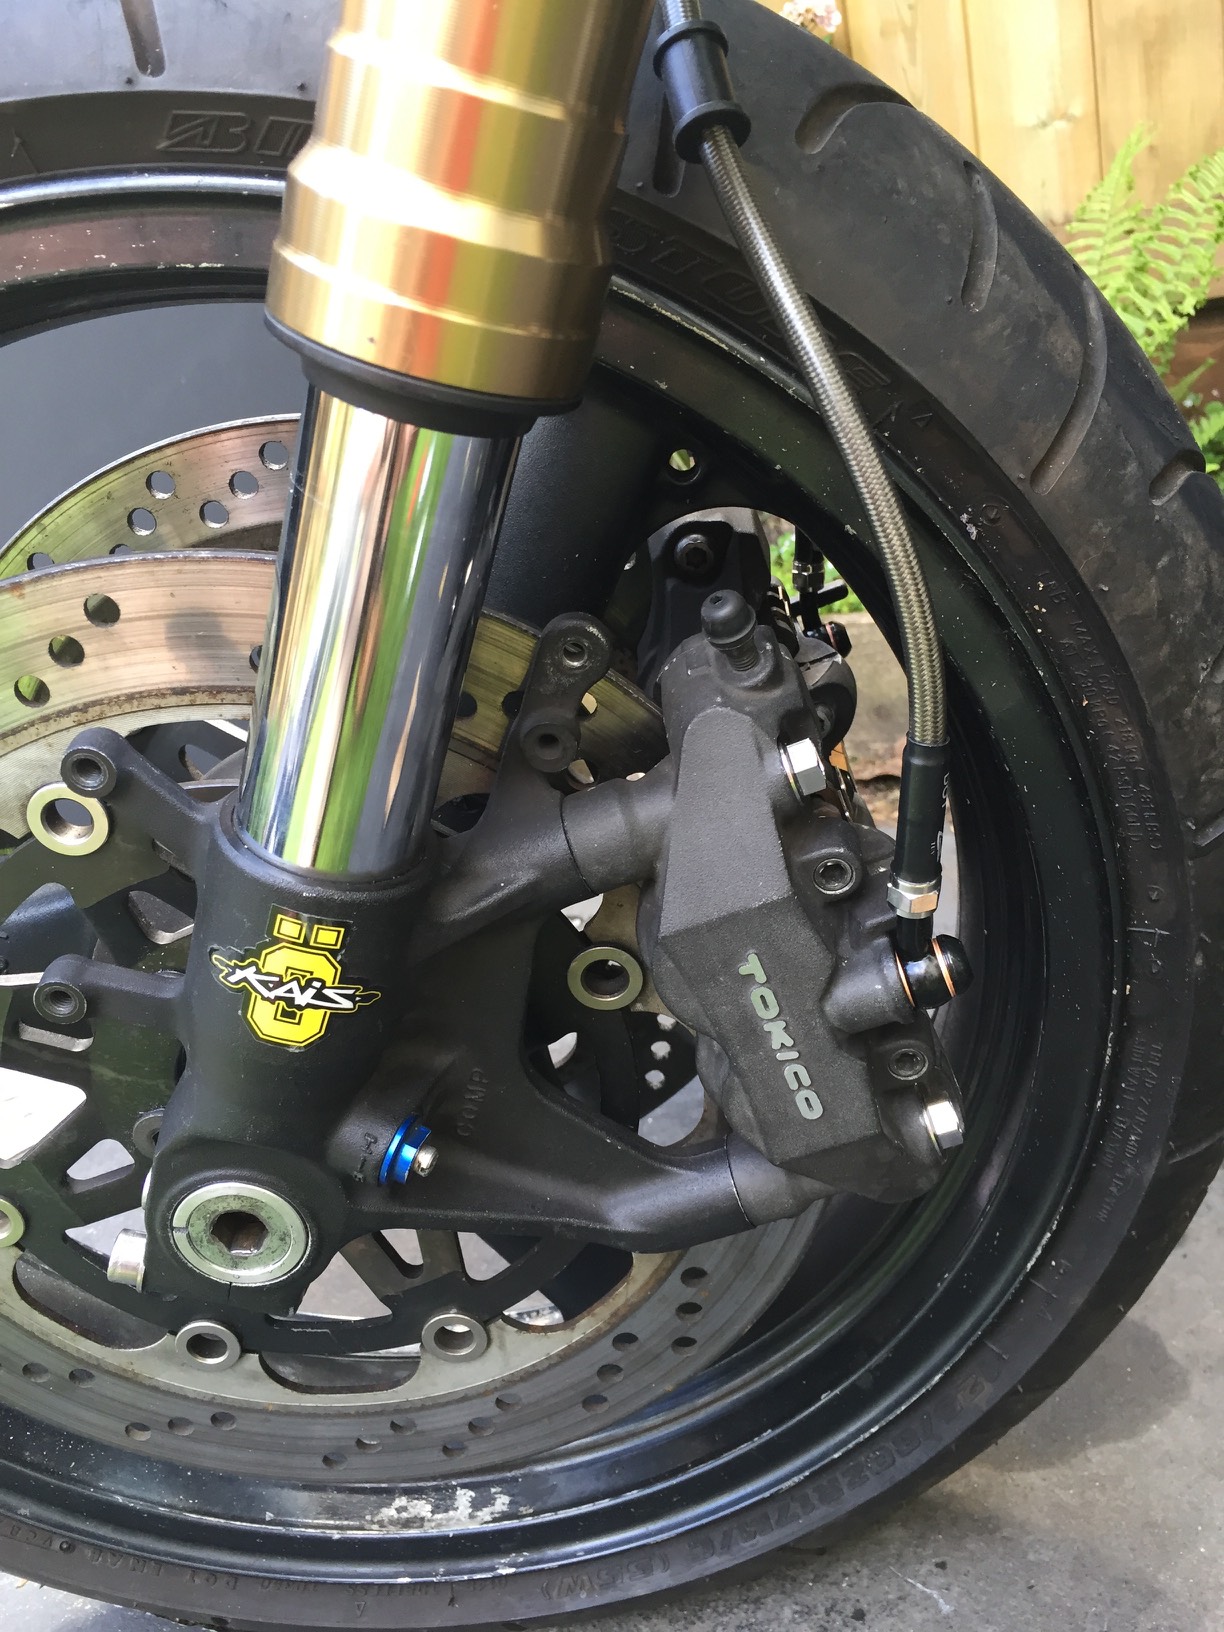
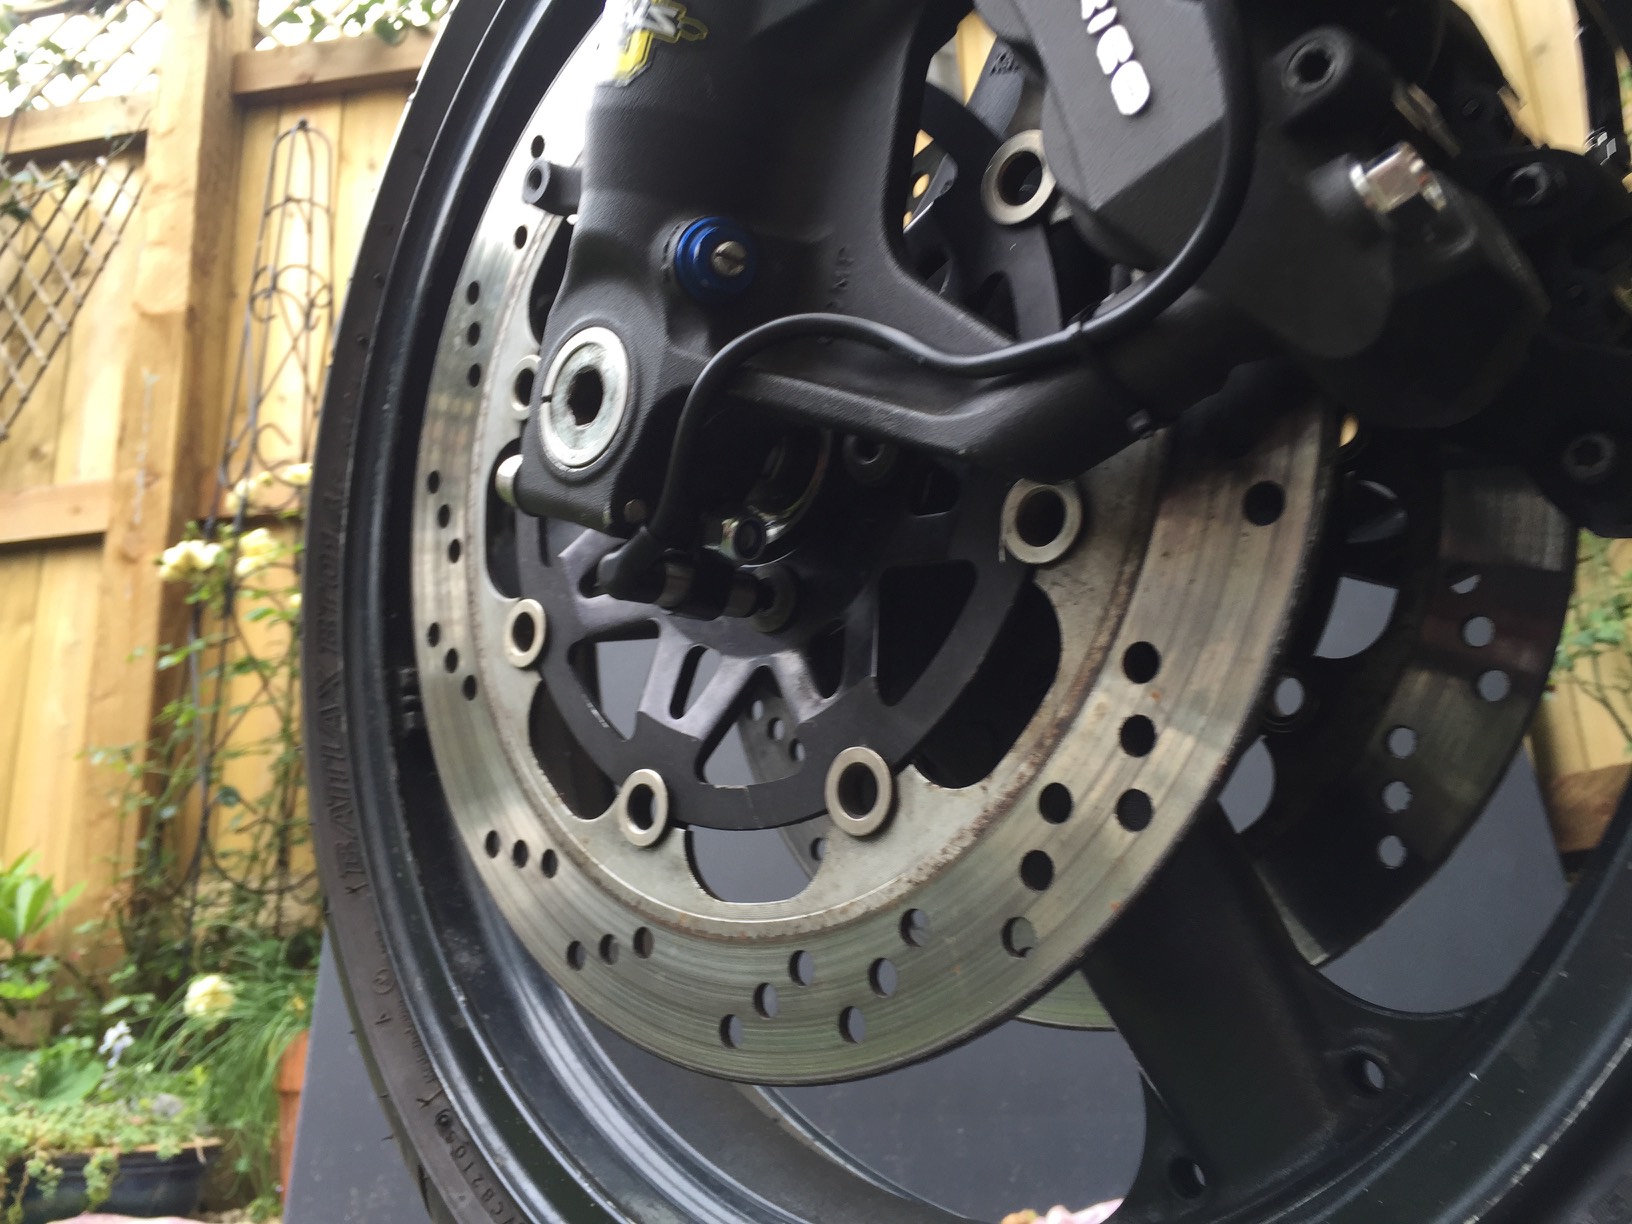
3. I picked up some new caliper bolts as the calipers didn’t come with any. This allowed me to fit the calipers and see if it would even work!
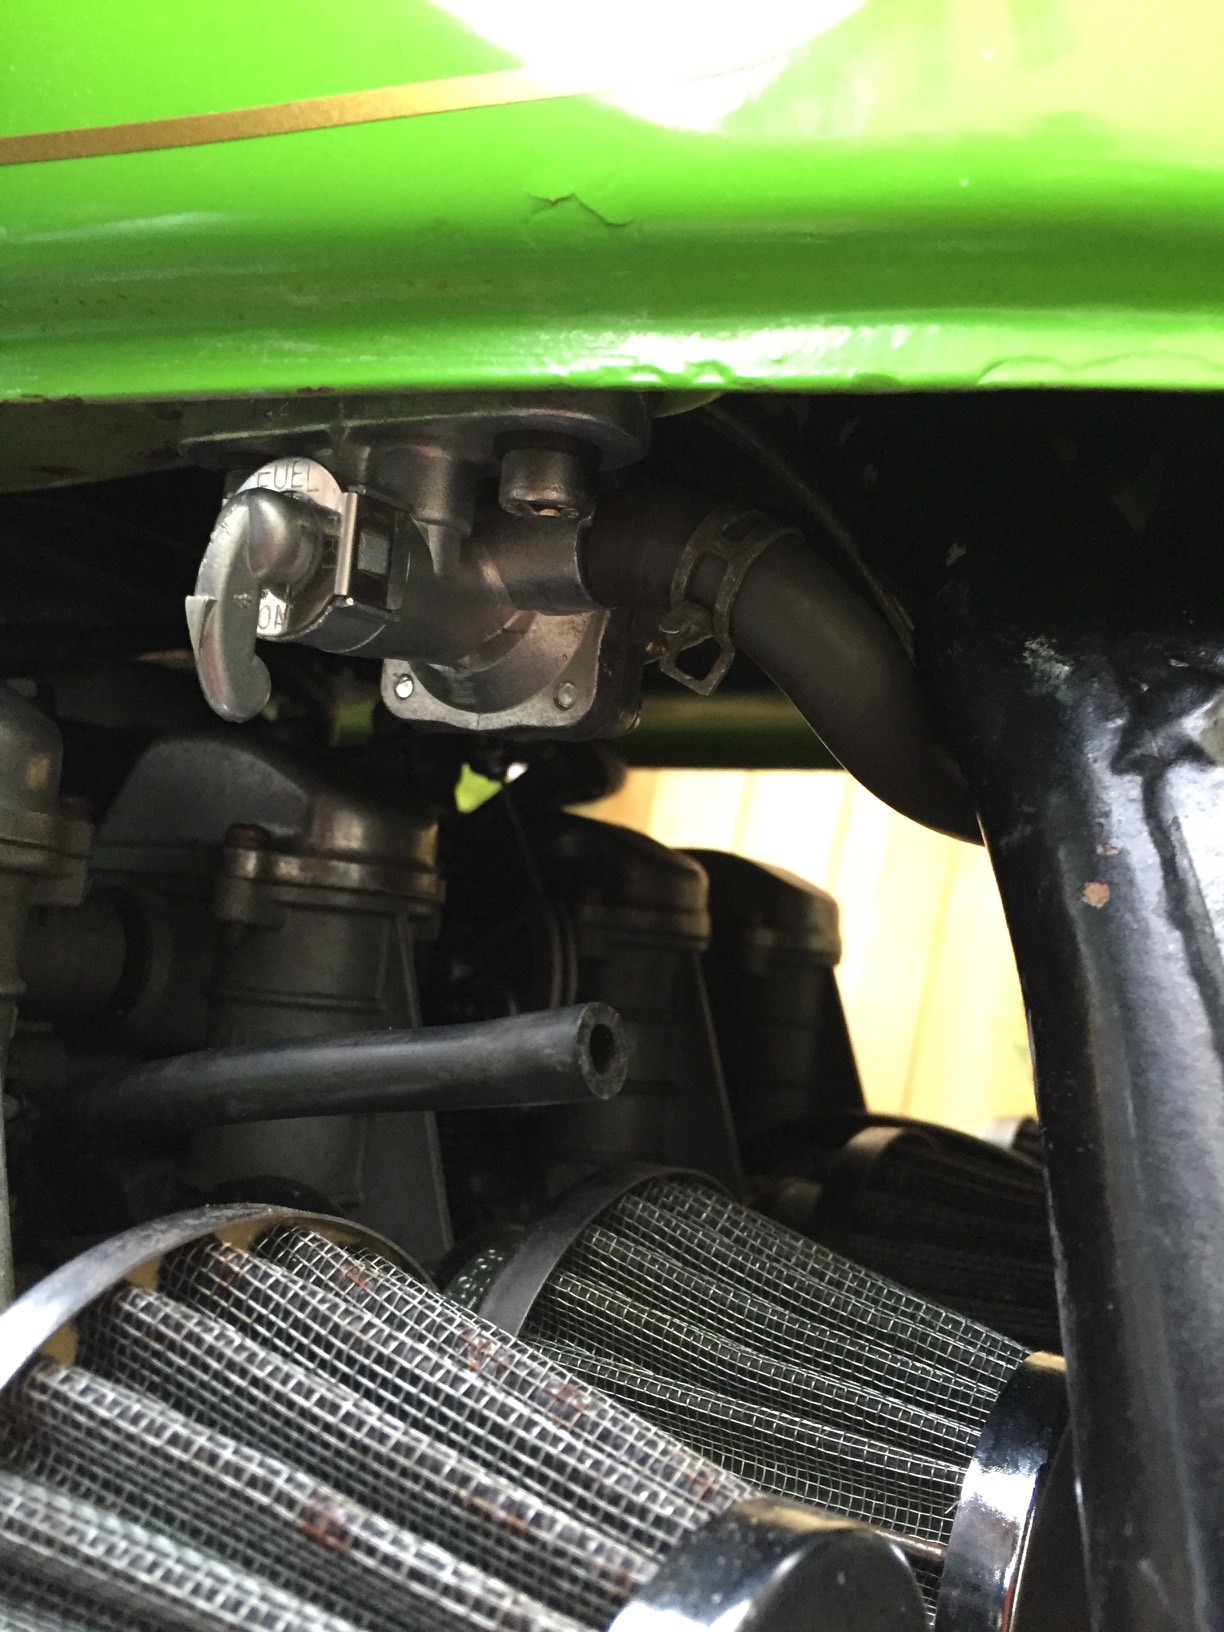
4. The original petcock was on it’s way out so I tried to find a suitable replacement. After much research it appeared a Suzuki GS450 one would work, so I ordered one. It turns out it will fit the tank perfectly, but you cannot get it the tank back on the bike! In then end I just put the petcock in with the tank in place. This creates future headaches when removing the tank, but it will have to do.
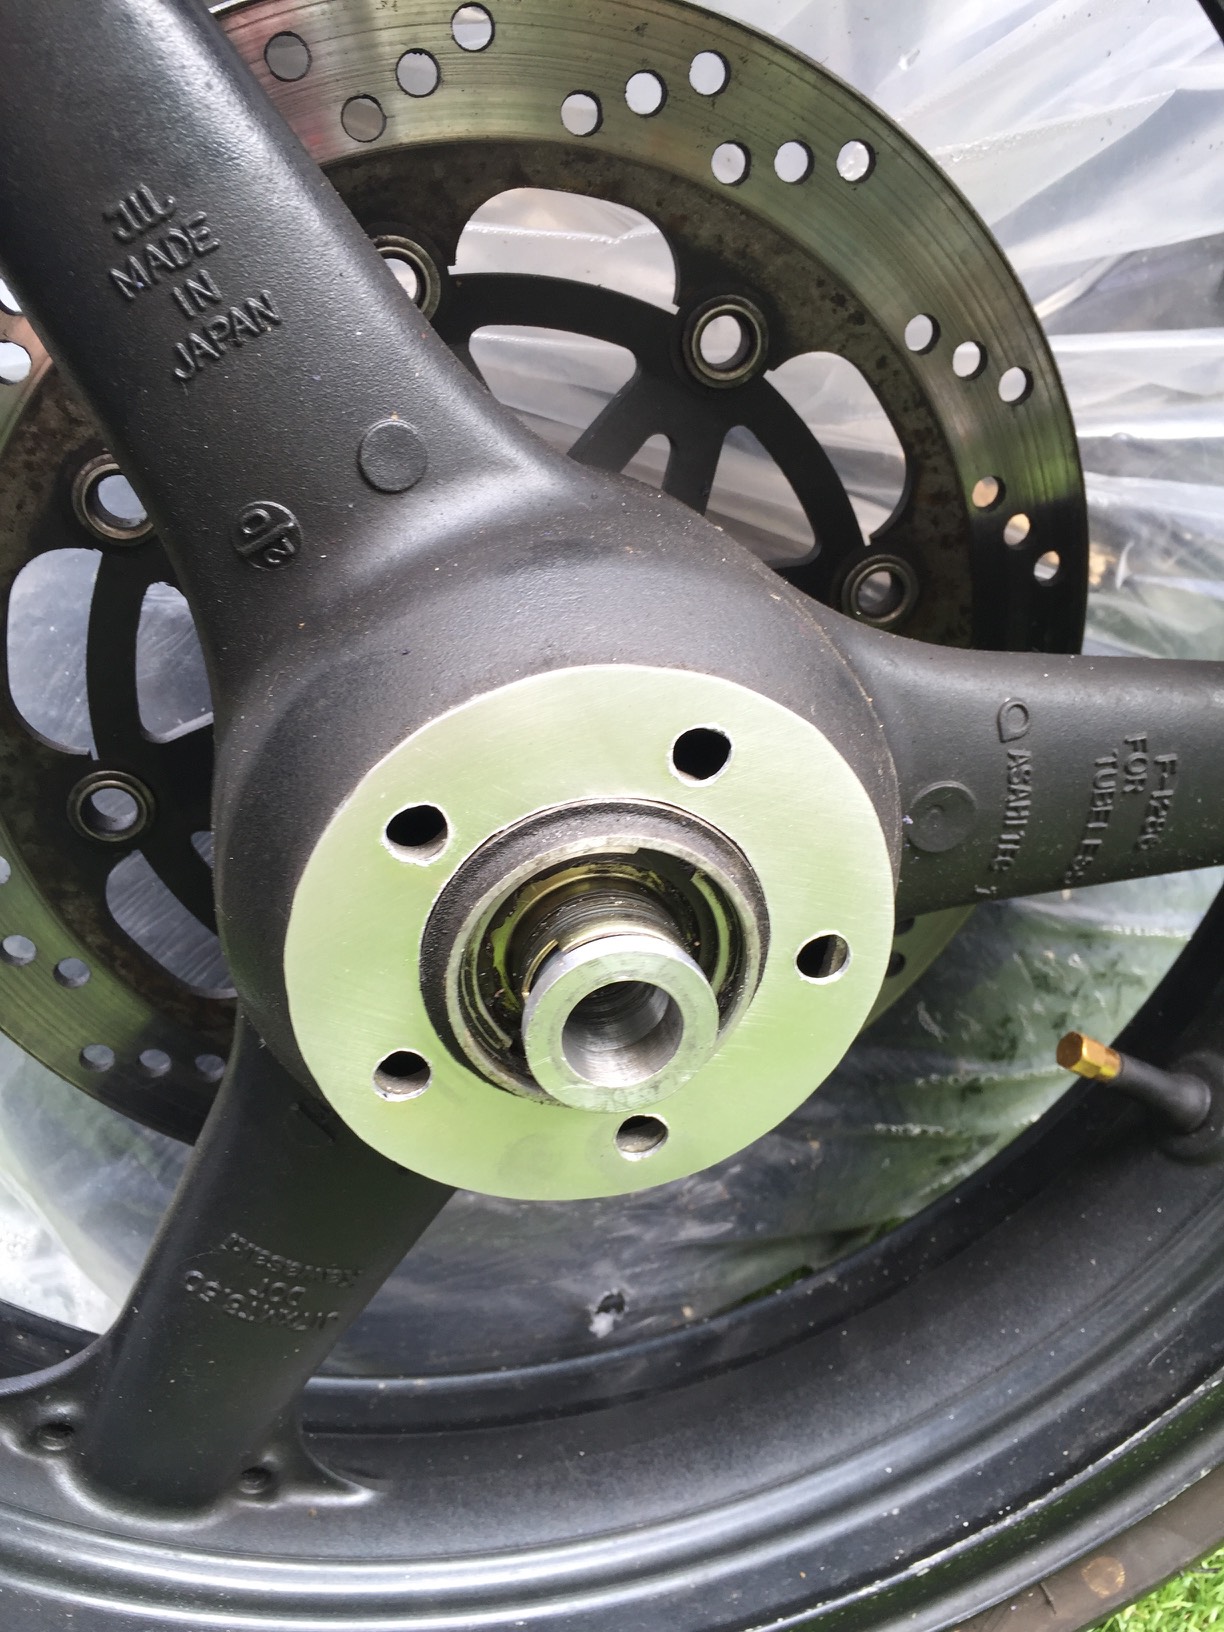
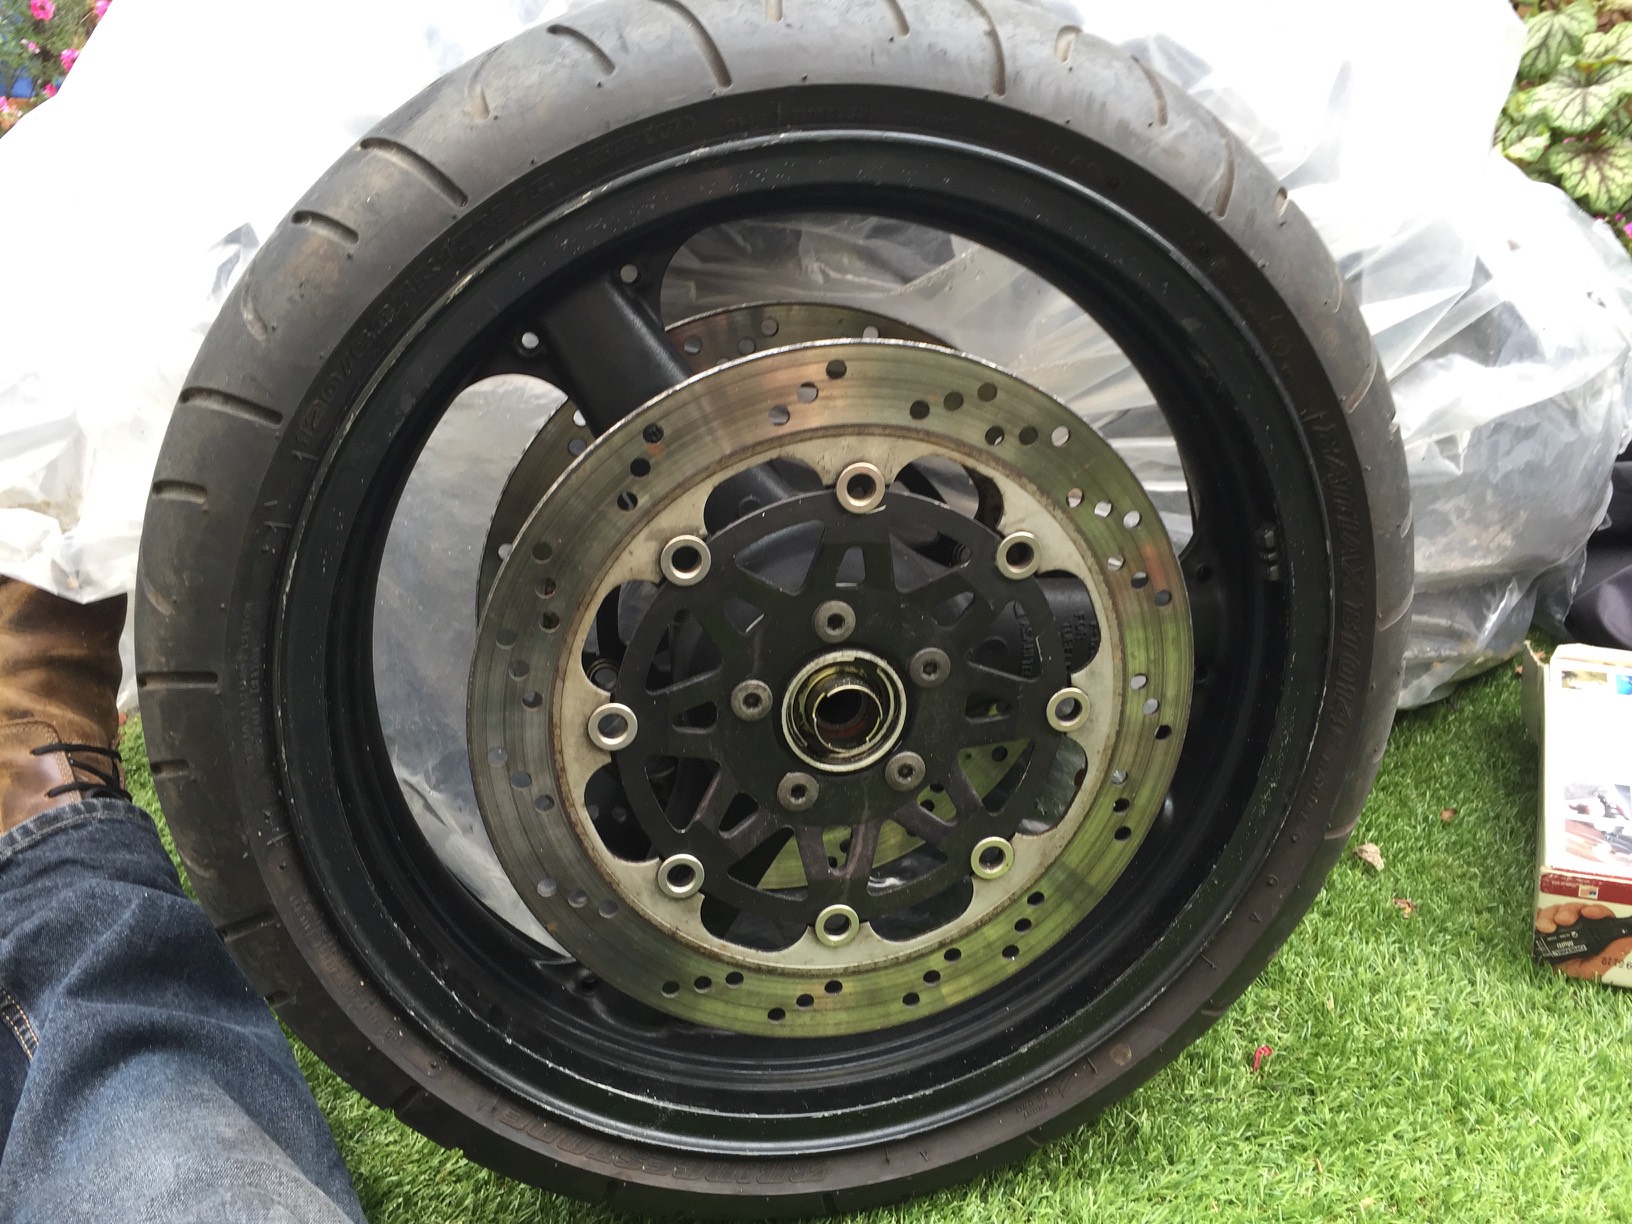
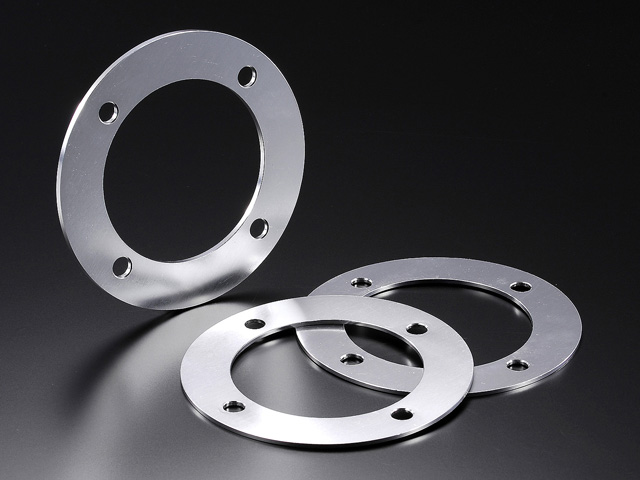
5. Disc spacers.
With the axle and wheel spacers in place I could finally work out what to do with the discs. As they were touching one side of the brake pads on each caliper. It was around 1.5mm out. I tried to find some suitable disc spacers, but couldn’t find any. In the end I just made my own. In the end they worked perfectly and didn’t take me too long to make.

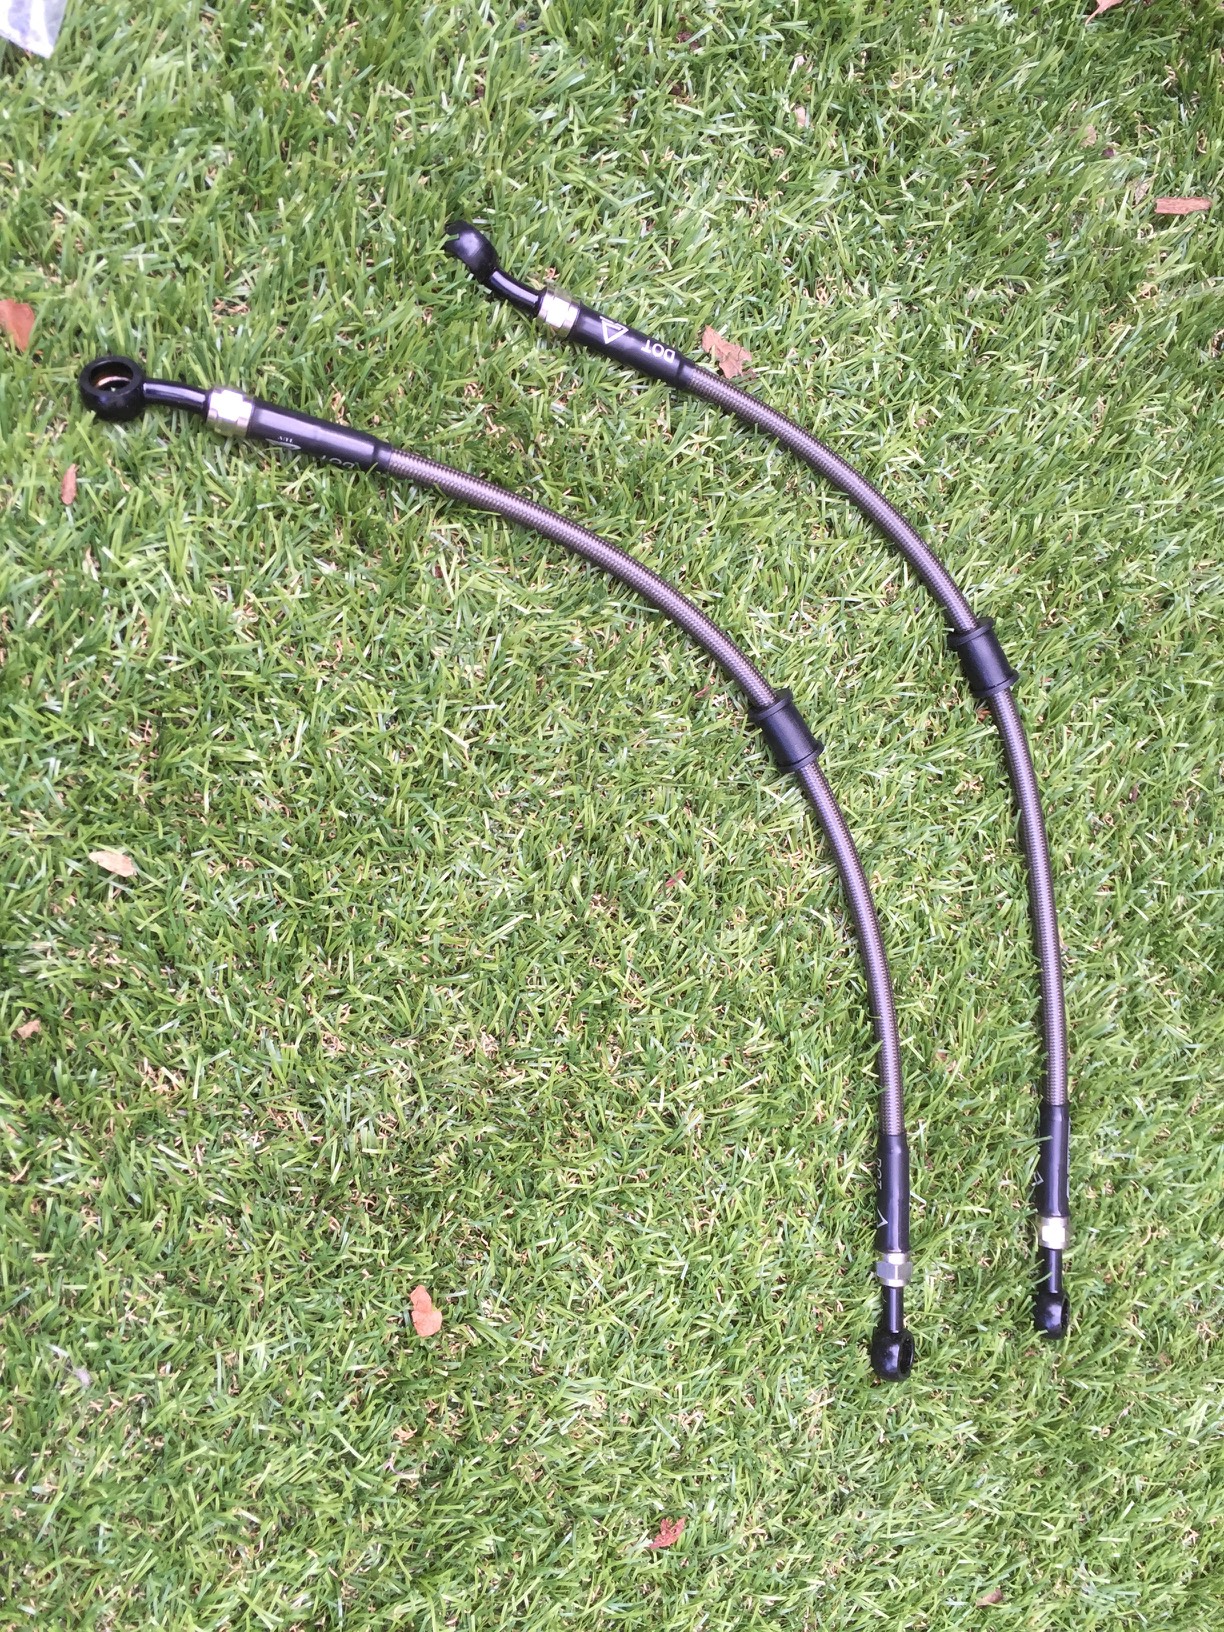
6. Brake hoses
With the fitment of the brakes I could finally get the brake caliper hoses ordered. I went with some nice Venhill ones like I had used before.
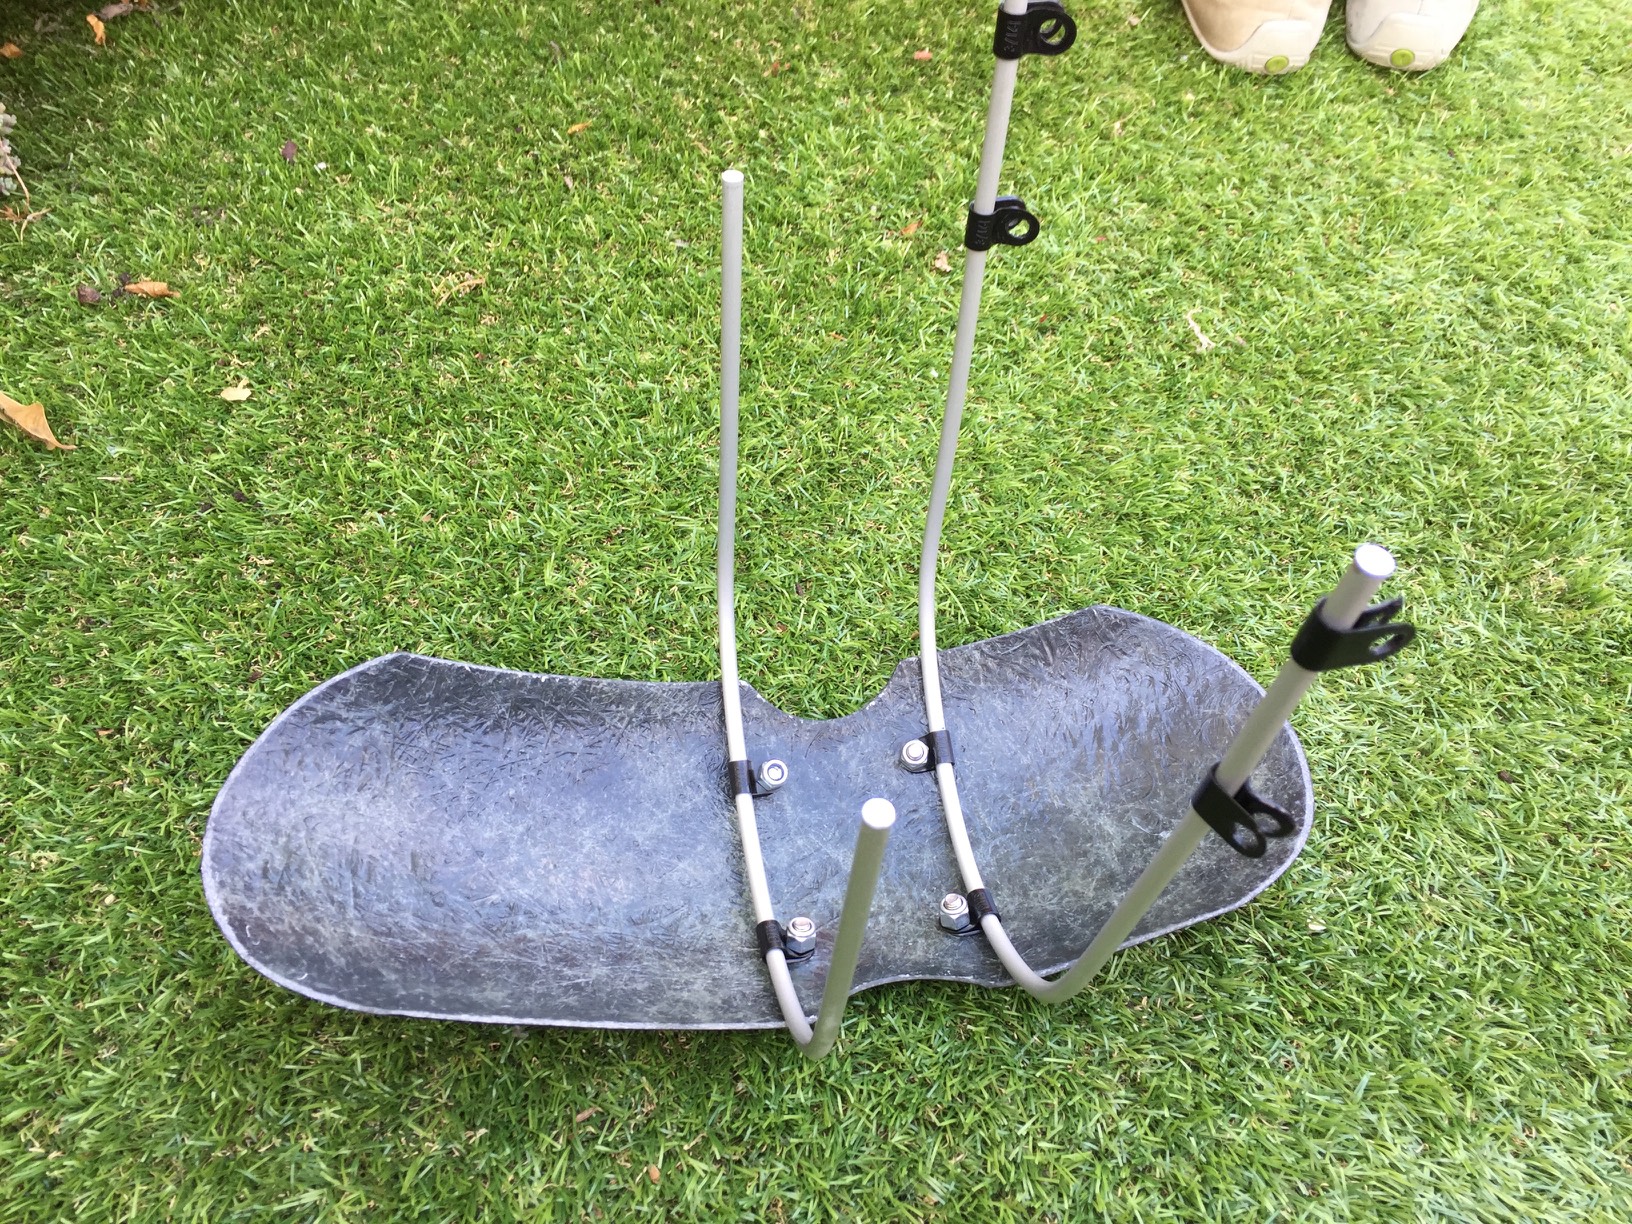
7. Mudguard mounts
I’ve not finished this yet, but after various attempts I think I’ve got the design sorted. It uses some round 6mm aluminium, I bent it to shape around the rear tire to get the perfect bend. I tried to hammer out mountings, but found it far to hard to be perfect. So now I am using some little brackets that I’m waiting to arrive. The pics give you an idea where it’s heading.
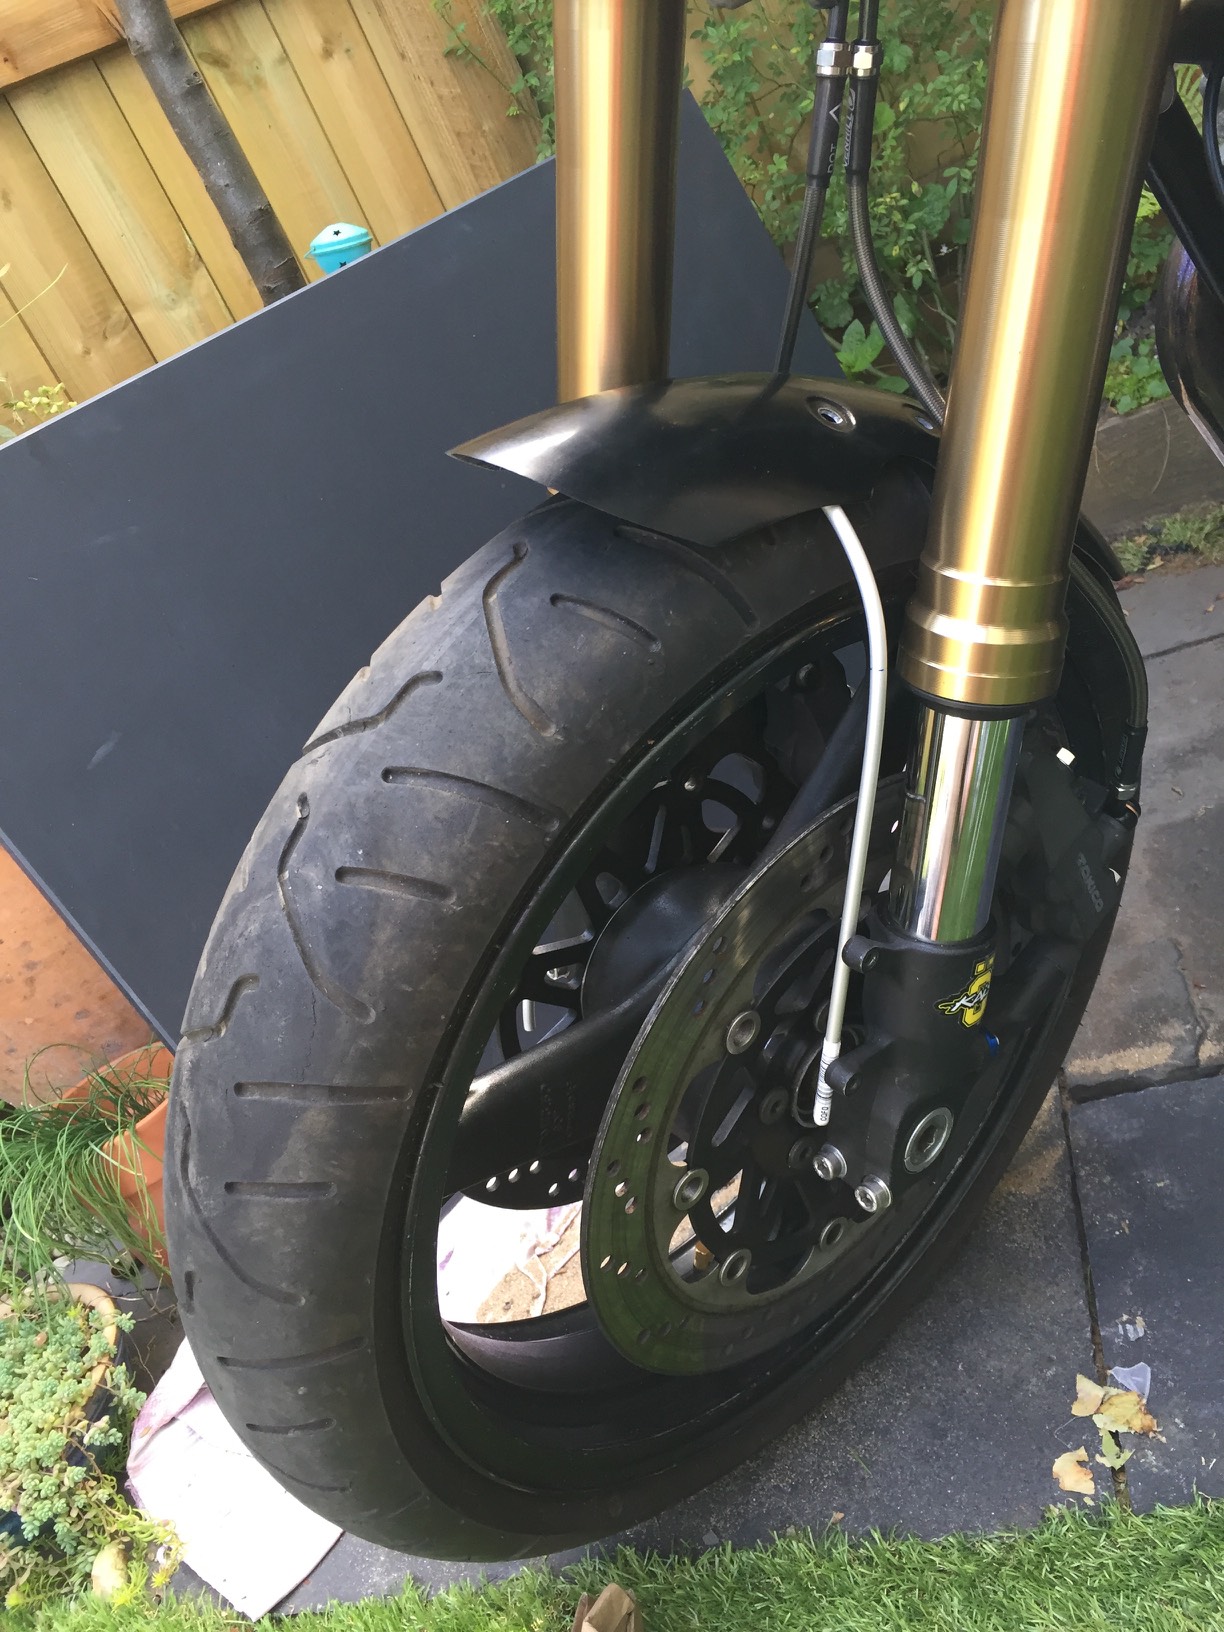

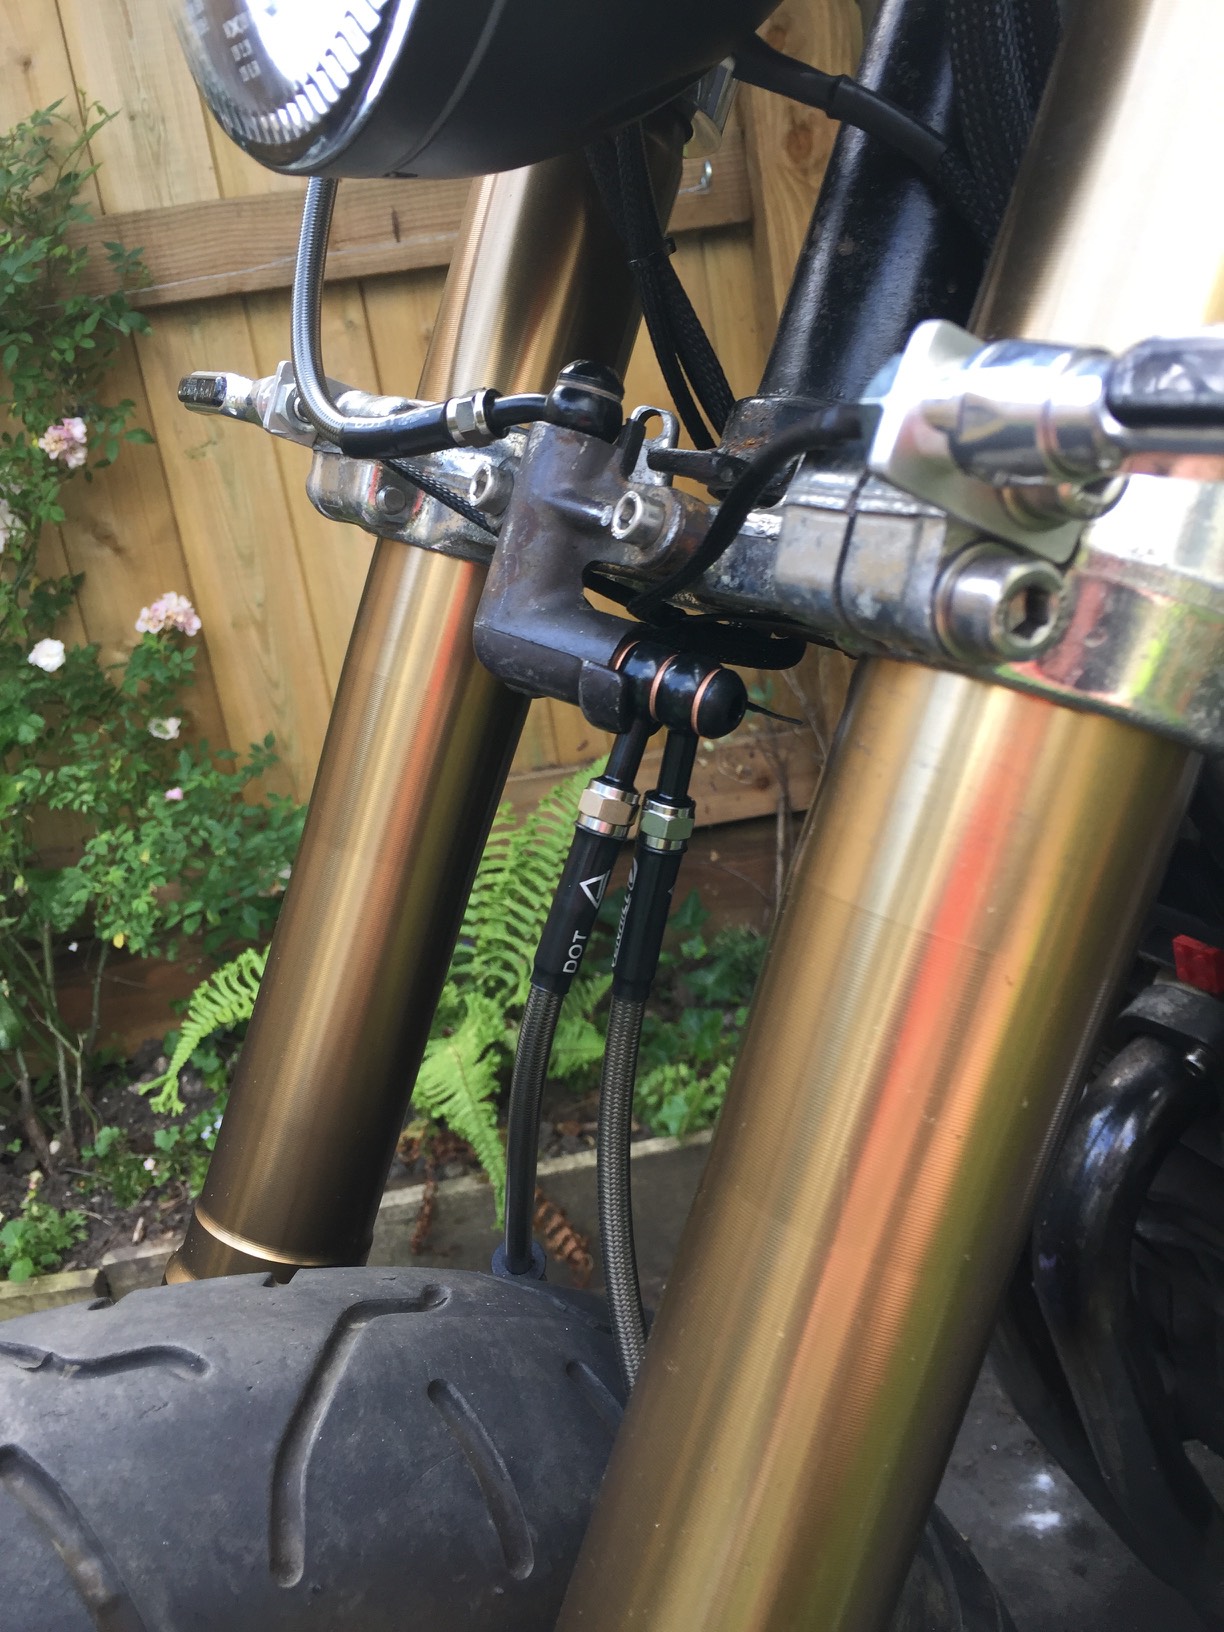
8. Speed sensor
The final job I’ve done was to find a place to mount the new magnetic speed sensor. In the end I’ve used a longer cinch bolt on the bottom or the forks. On the extra end section I’ve mounted the Koso speed sensor using the p clip to get it in the perfect place, I then routed the cable using the brake hose as a path for neatness.
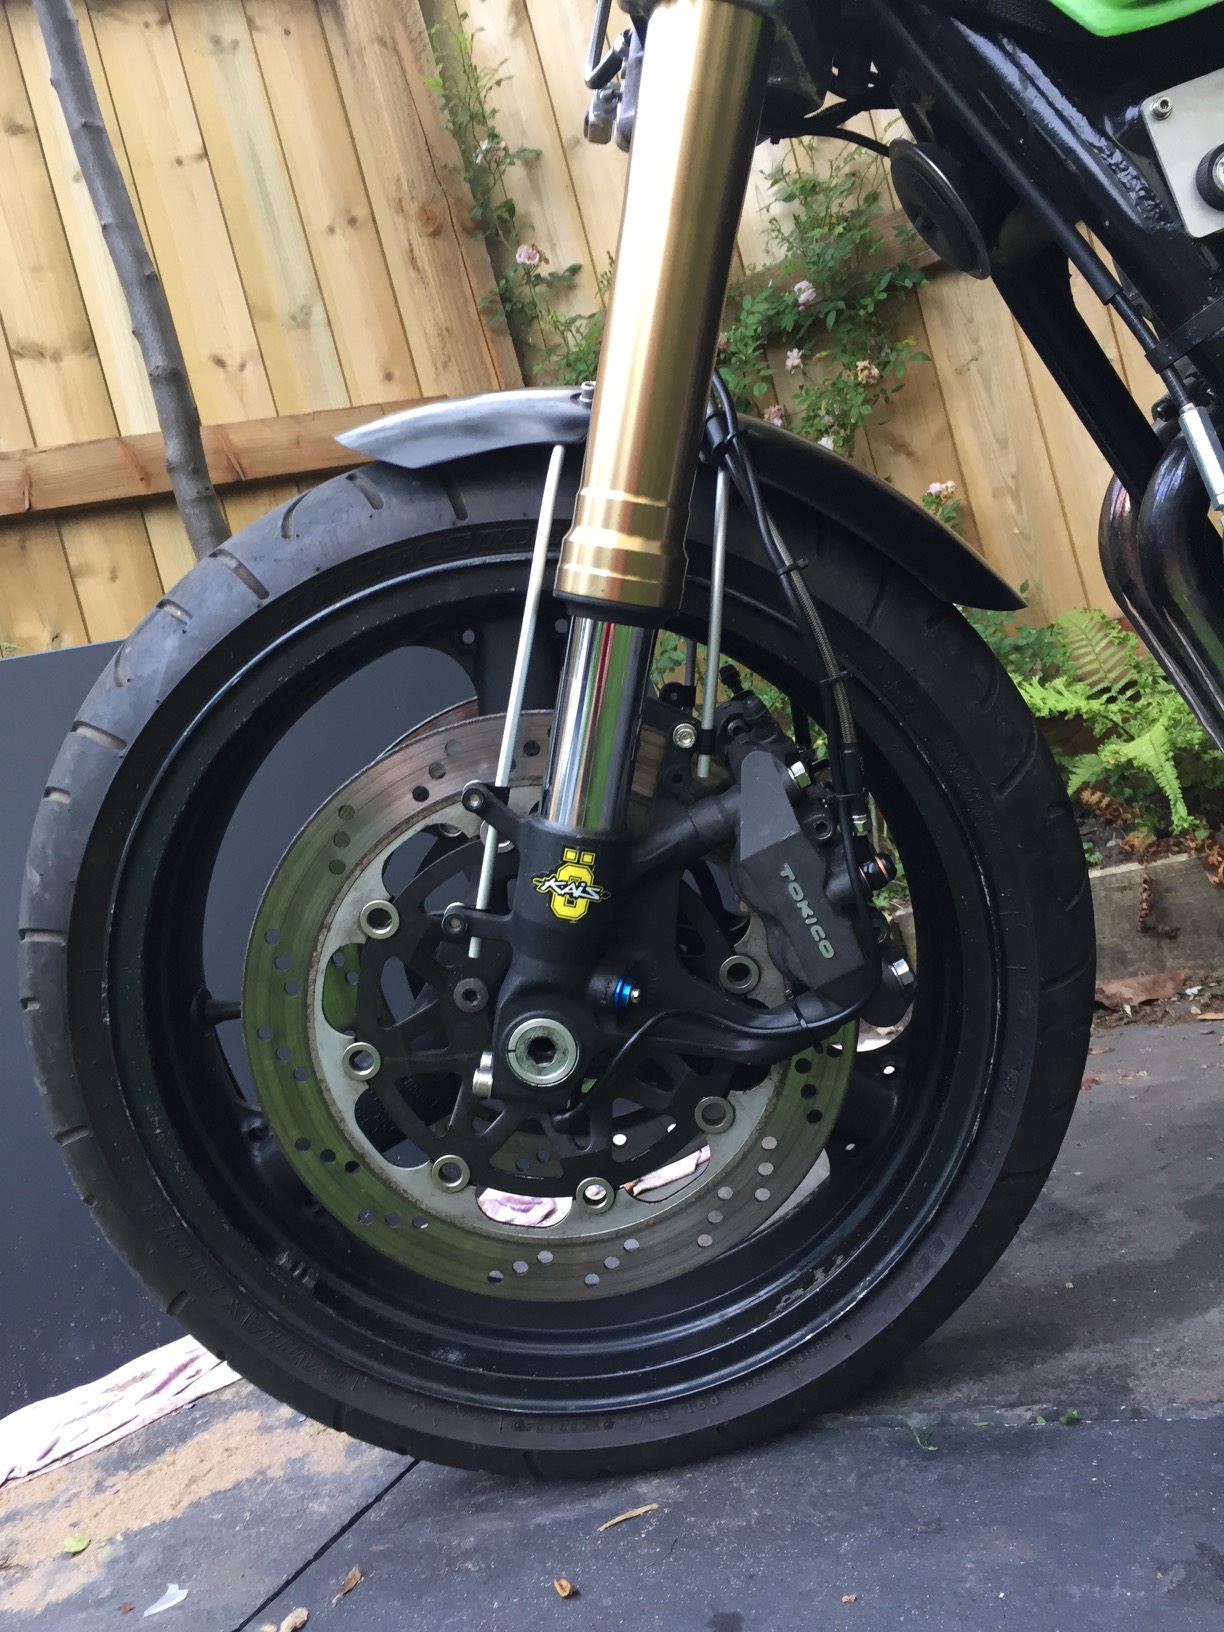
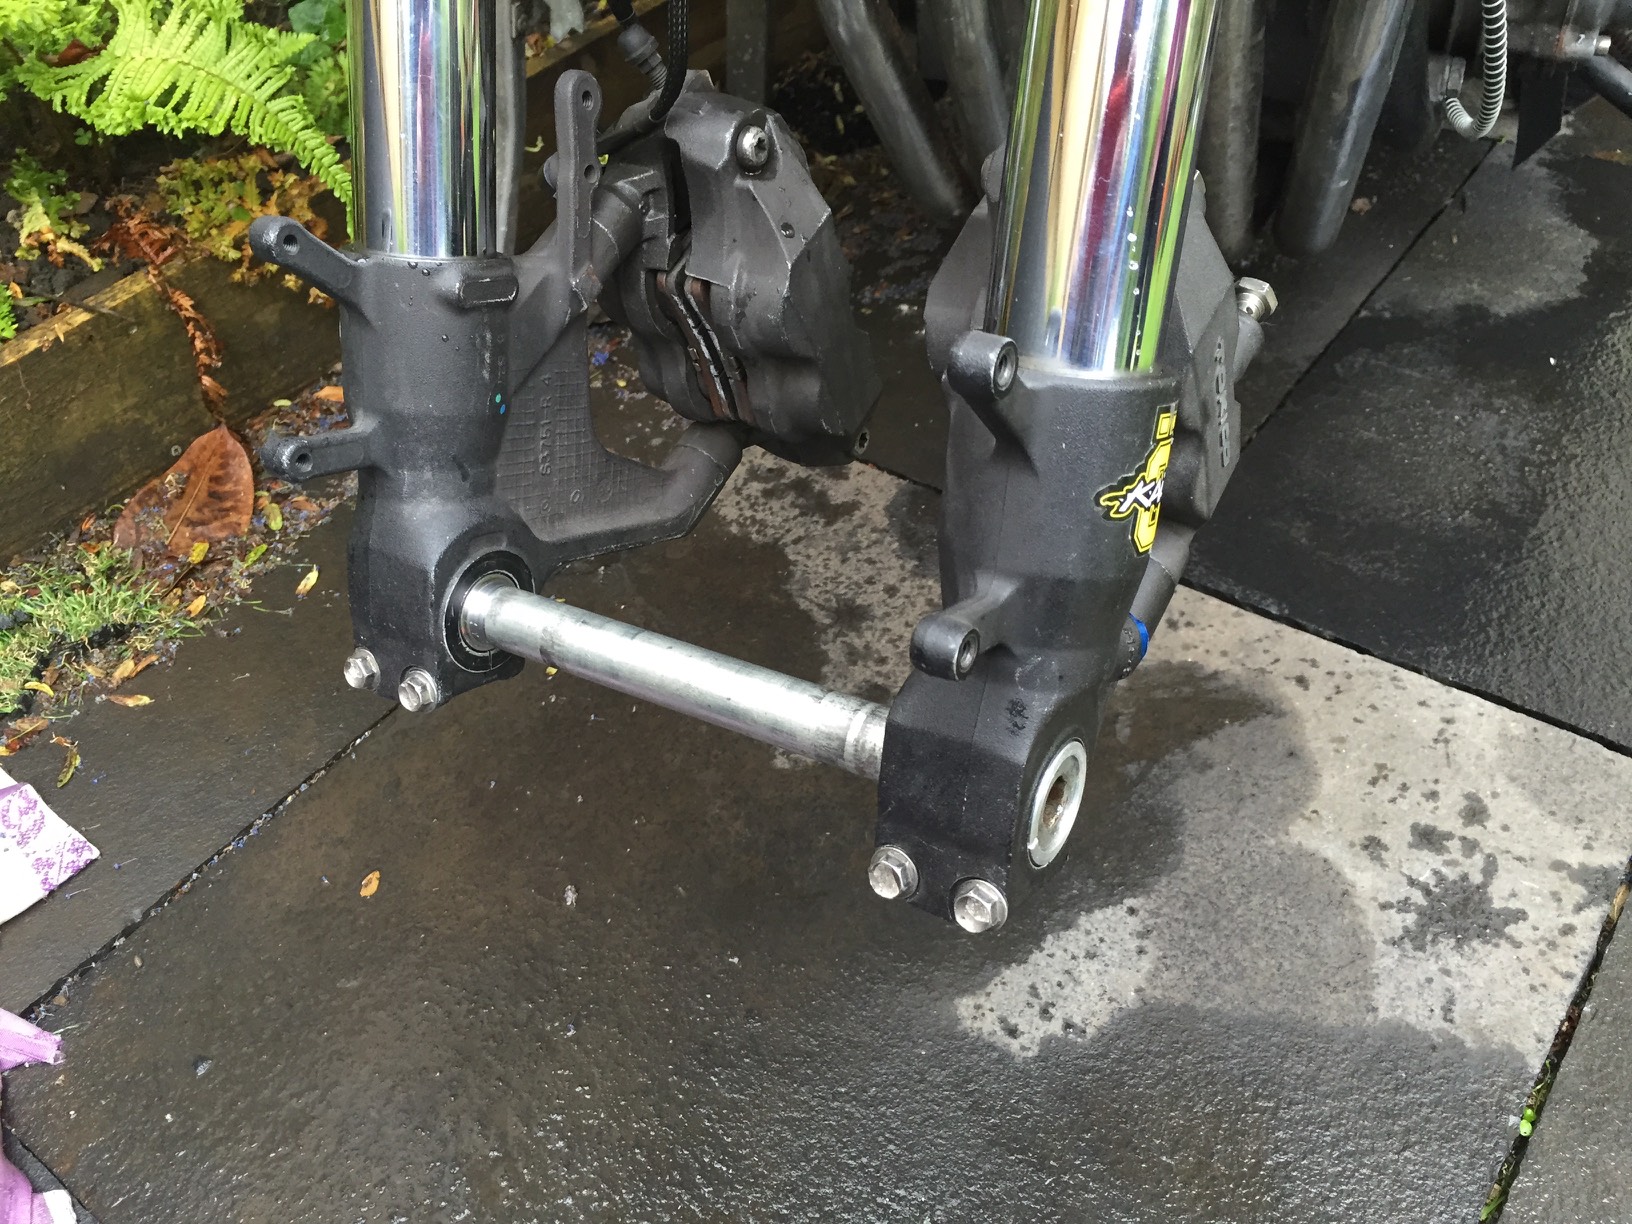
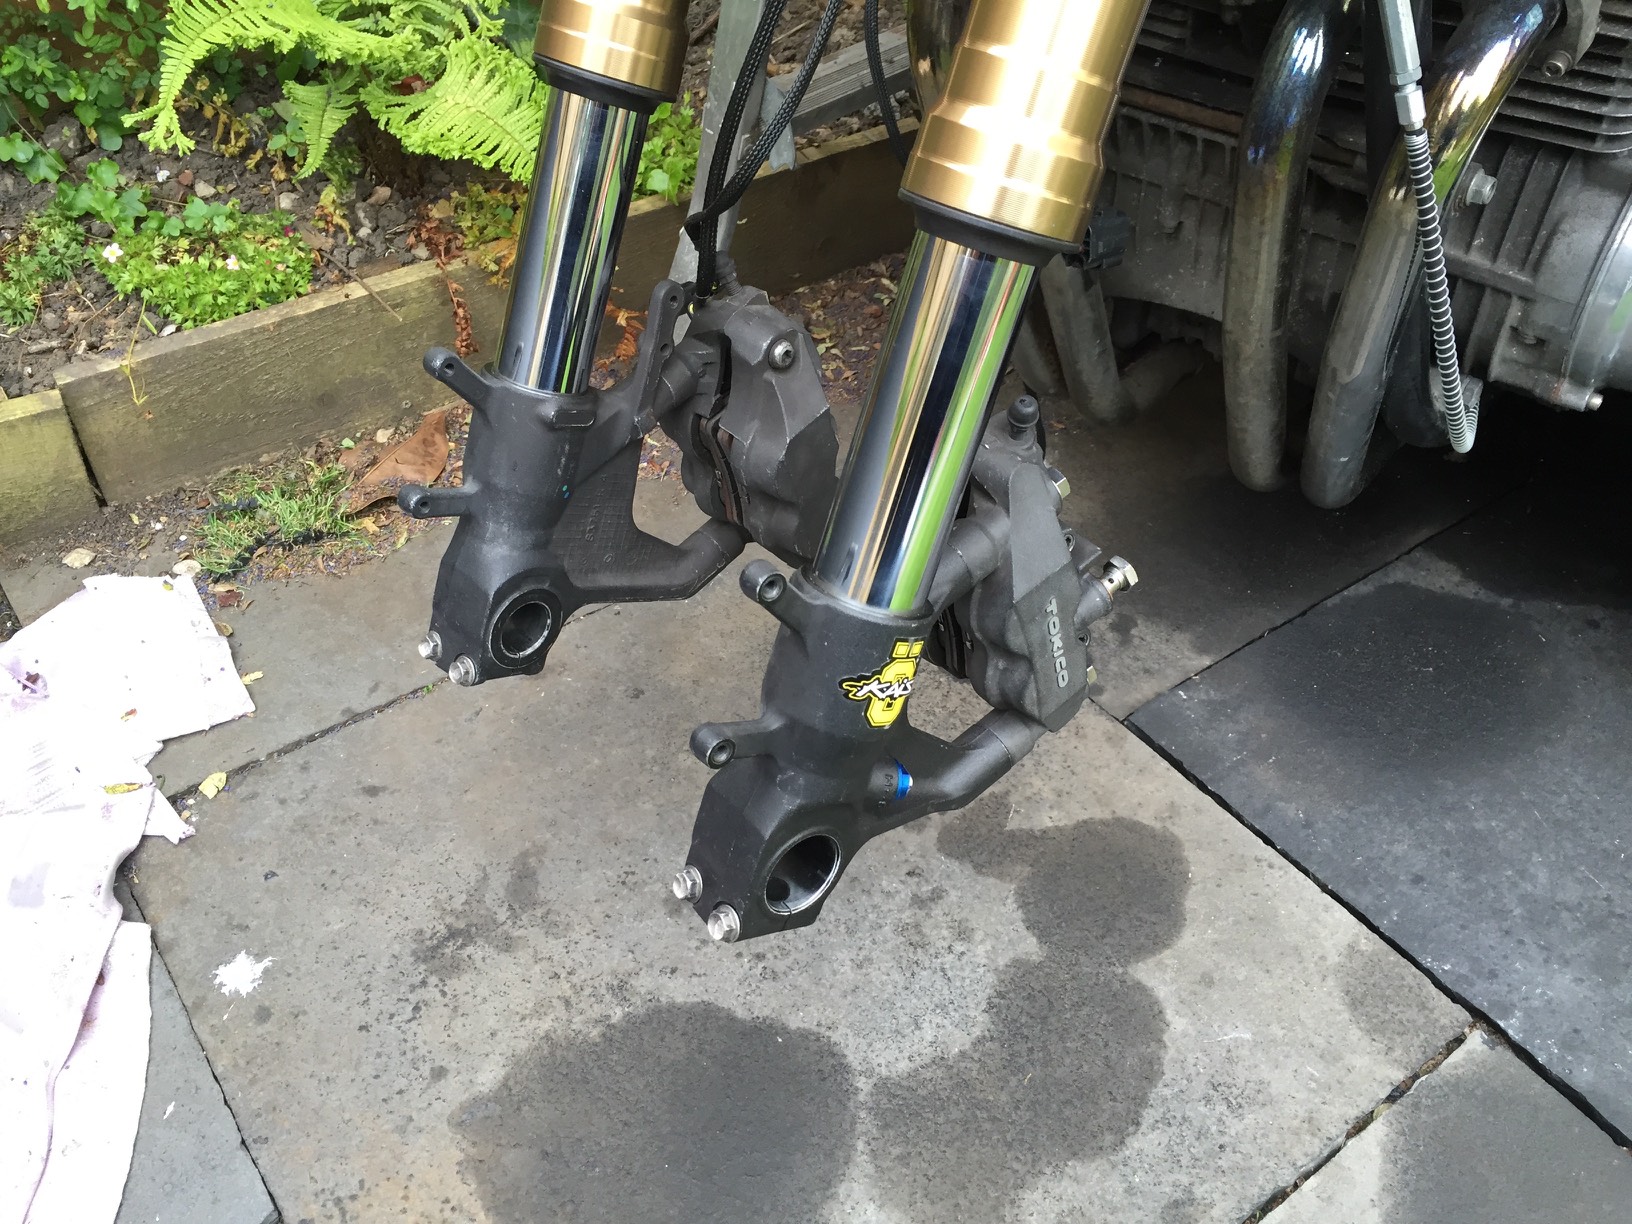
GSXR 600 Forks fitted
Well more forward progress towards the getting it back on the road. I had both the bottom yokes and front axle machined to fit the new GSXR 600 forks. They also made up a spacer to fit the larger axle hole in the forks.


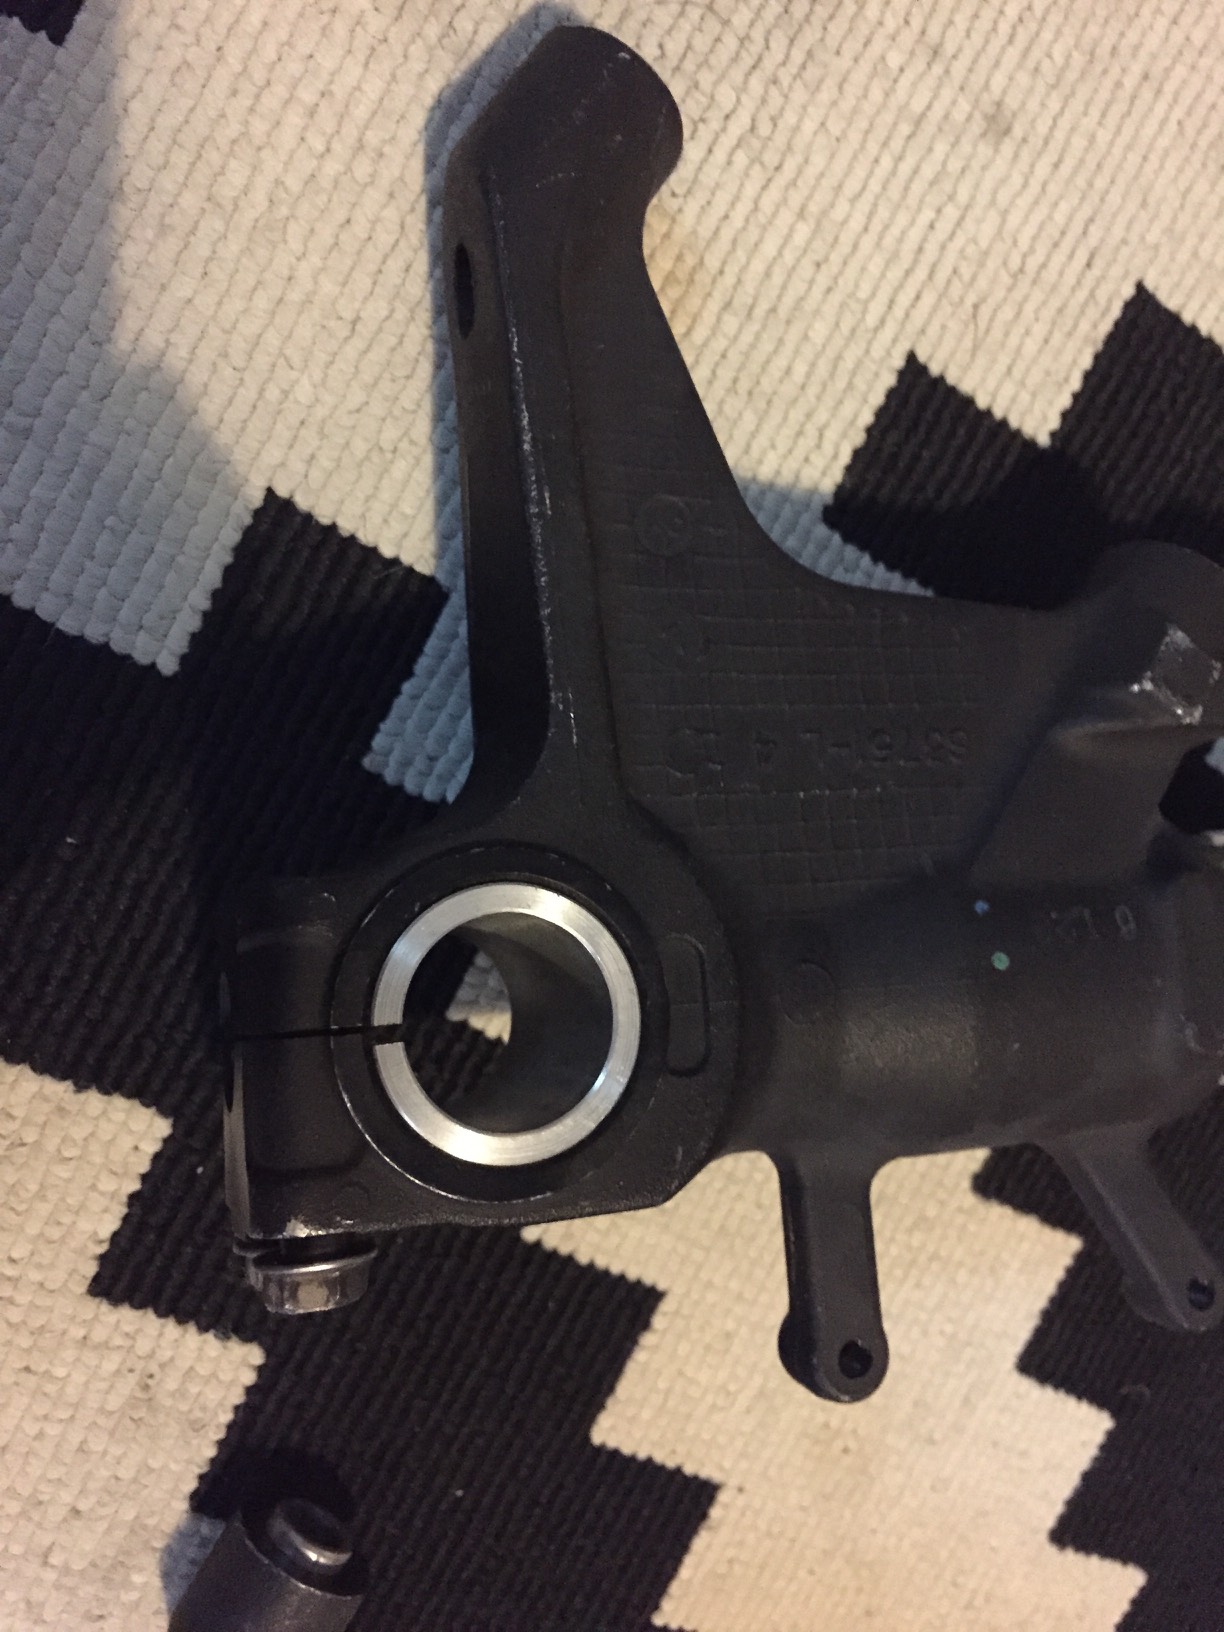
I could then try my first test fit of the forks to see if they would work

I then tried to fit the brakes and wheel and hit a major issue. The brakes wouldn’t go on! After 10mins of panic I realised I got the forks on back to front! What a bloody idiot. Anyway I swap the forks round.
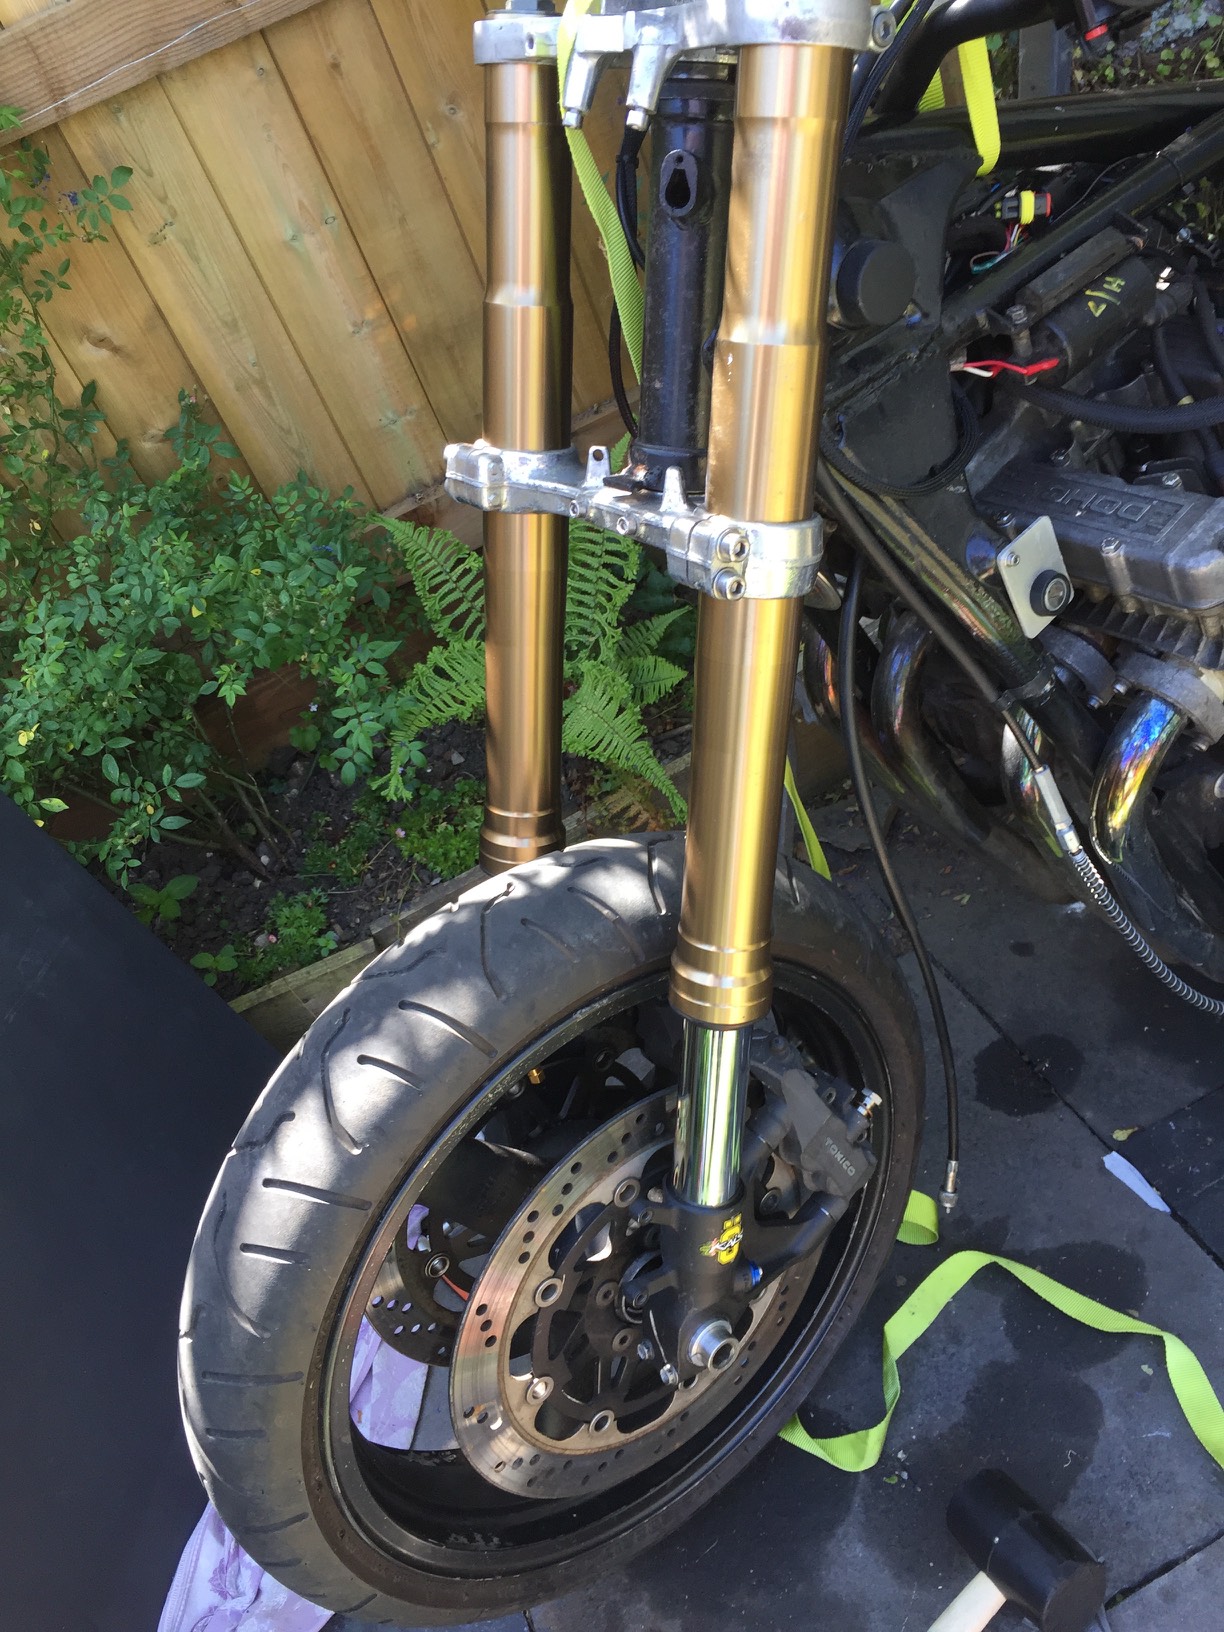
The axle is correct in the diameter, but too long, but the wheel fits in place and the axle works! I have taken it back to the machinist to get it down to the correct length.
I have a few more issues to now over come.
1. The original speed sensor will not fit so that has to go.
2. I will need axle spacers or the correct size to make sure the wheel stays in place.
3. Both front discs touch one side of the pads
These are relatively easy to over come.
1. The Koso DB-01R I have has a magnet sensor option which I can pick up locally tomorrow.
2. These will be hard to measure as the wheels are not identical either side, but once measured I can get some knocked up.
3. This is harder, my first reaction was to think about some washers behind the disc, but that seems like a terrible idea. So what I will do is make some spacers out of sheet alumnium that cover the whole of the contact patch. I’m waiting for the axle spacers and brake bolts to turn up before I start these. I’m thinking of something like the picture below.
I have also broken two things when putting everything back in place. I broke the starter button cable which is very annoying. I also found the mounting bracket for the Koso speedo was snapped off. I’ve managed to glue that back in place.
I should have the axle back later this week so I can get some more work done this weekend.
