


Wiring , headlamp and indicators
I’ve started work on the cable spaghetti, it’s not pleasant work, but who said it would be all fun!.
First job of the week so far was to sleeve the two indicators so that the cables would be less obvious. I also did the same to the new headlamp.
Next up I fitted them back on the bike. I was originally going to reuse the bolts from before, but in the end I decided to get some new ones so that I could use an allen key instead of a socket wrench. It makes fitting the indicators much easier. I also moved them to the bottom bolt so that the cable runs underneath and is more hidden.
Next I stripped back the loom so that I could see what is going on and if I can make any improvements.

There were a few iffy connections which I am working through. If I get good weather this weekend I will try to finish the wiring loom changes.
Poker II Keyboard
I bought it before xmas as my first mechanical keyboard. It was originally a German ISO keyboard Cherry Red. I used a UK ISO PBT keycap set from ducky as a start. I then added some PBT doubleshot keycaps from Massdrop.
Other additions are my lego keycap that I made, a red aluminium spacebar and newly arrived today was a Holyoops backspace key.
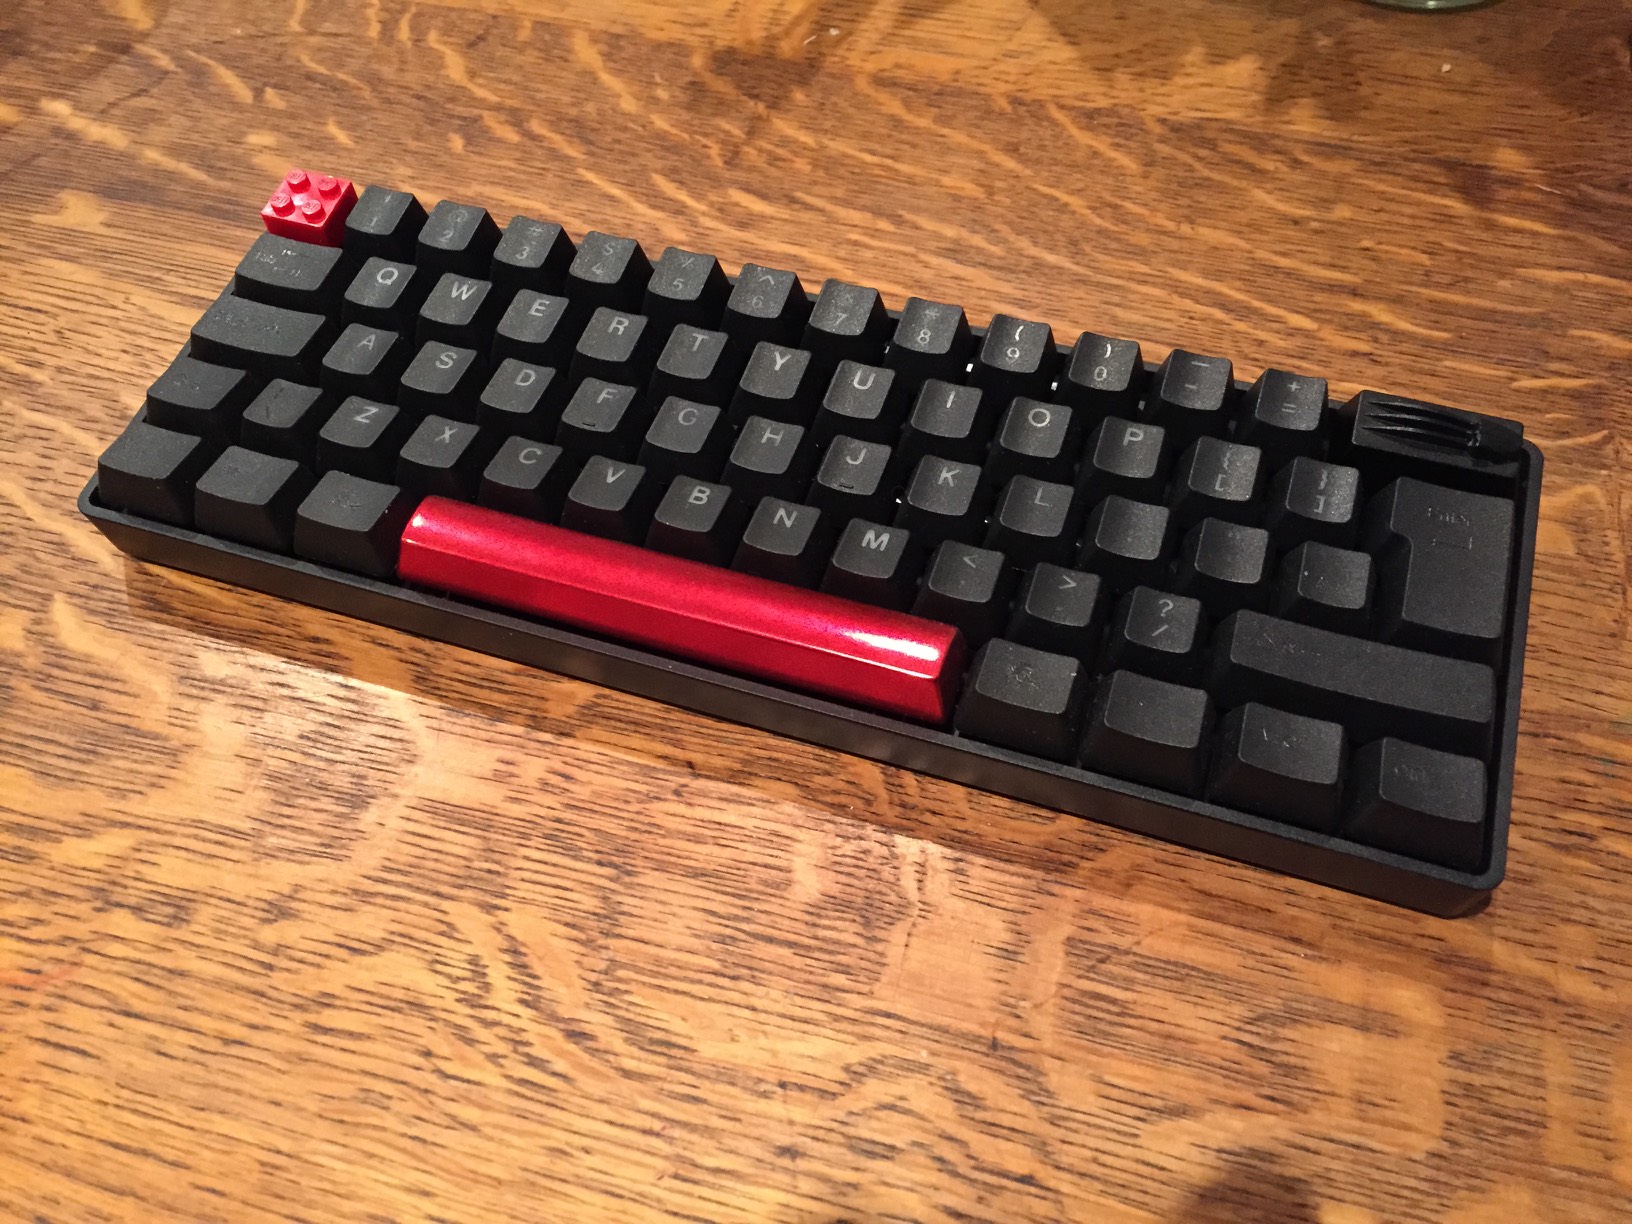
I want to get a silver aluminium case and red cable from Pexonpcs then it will be finished… maybe
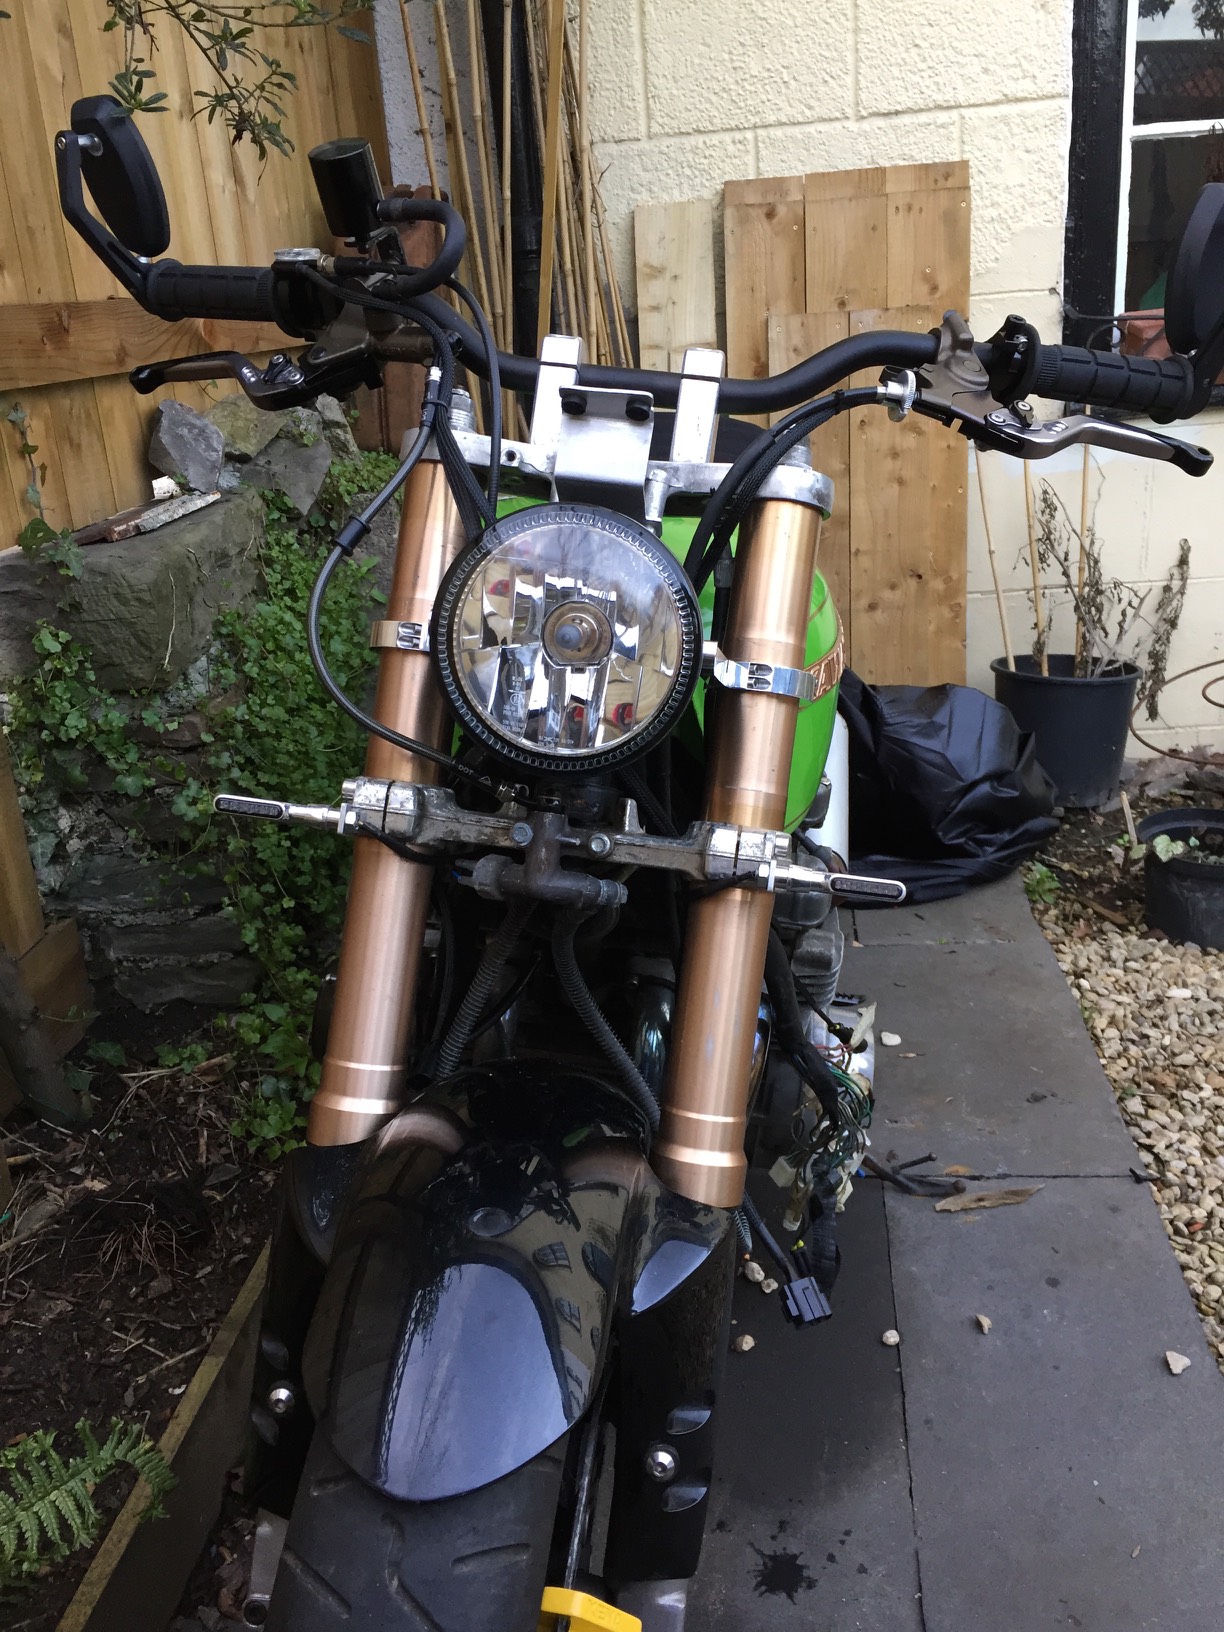
Headlight is on
Well I managed to get some more progress as the weather held off for 30mins. What I managed to get done was test mounting the headlight to make sure the brackets would work and they do!
First up some comparison shots of the old and new headlight. You can see just how much smaller the new one is.


I fitted the bracket off the bike first, to test it would work

Then I got it fitted to the bike. I love it! The pictures came out blurry unfortunately. I will have to take some better ones when I’m next out there.


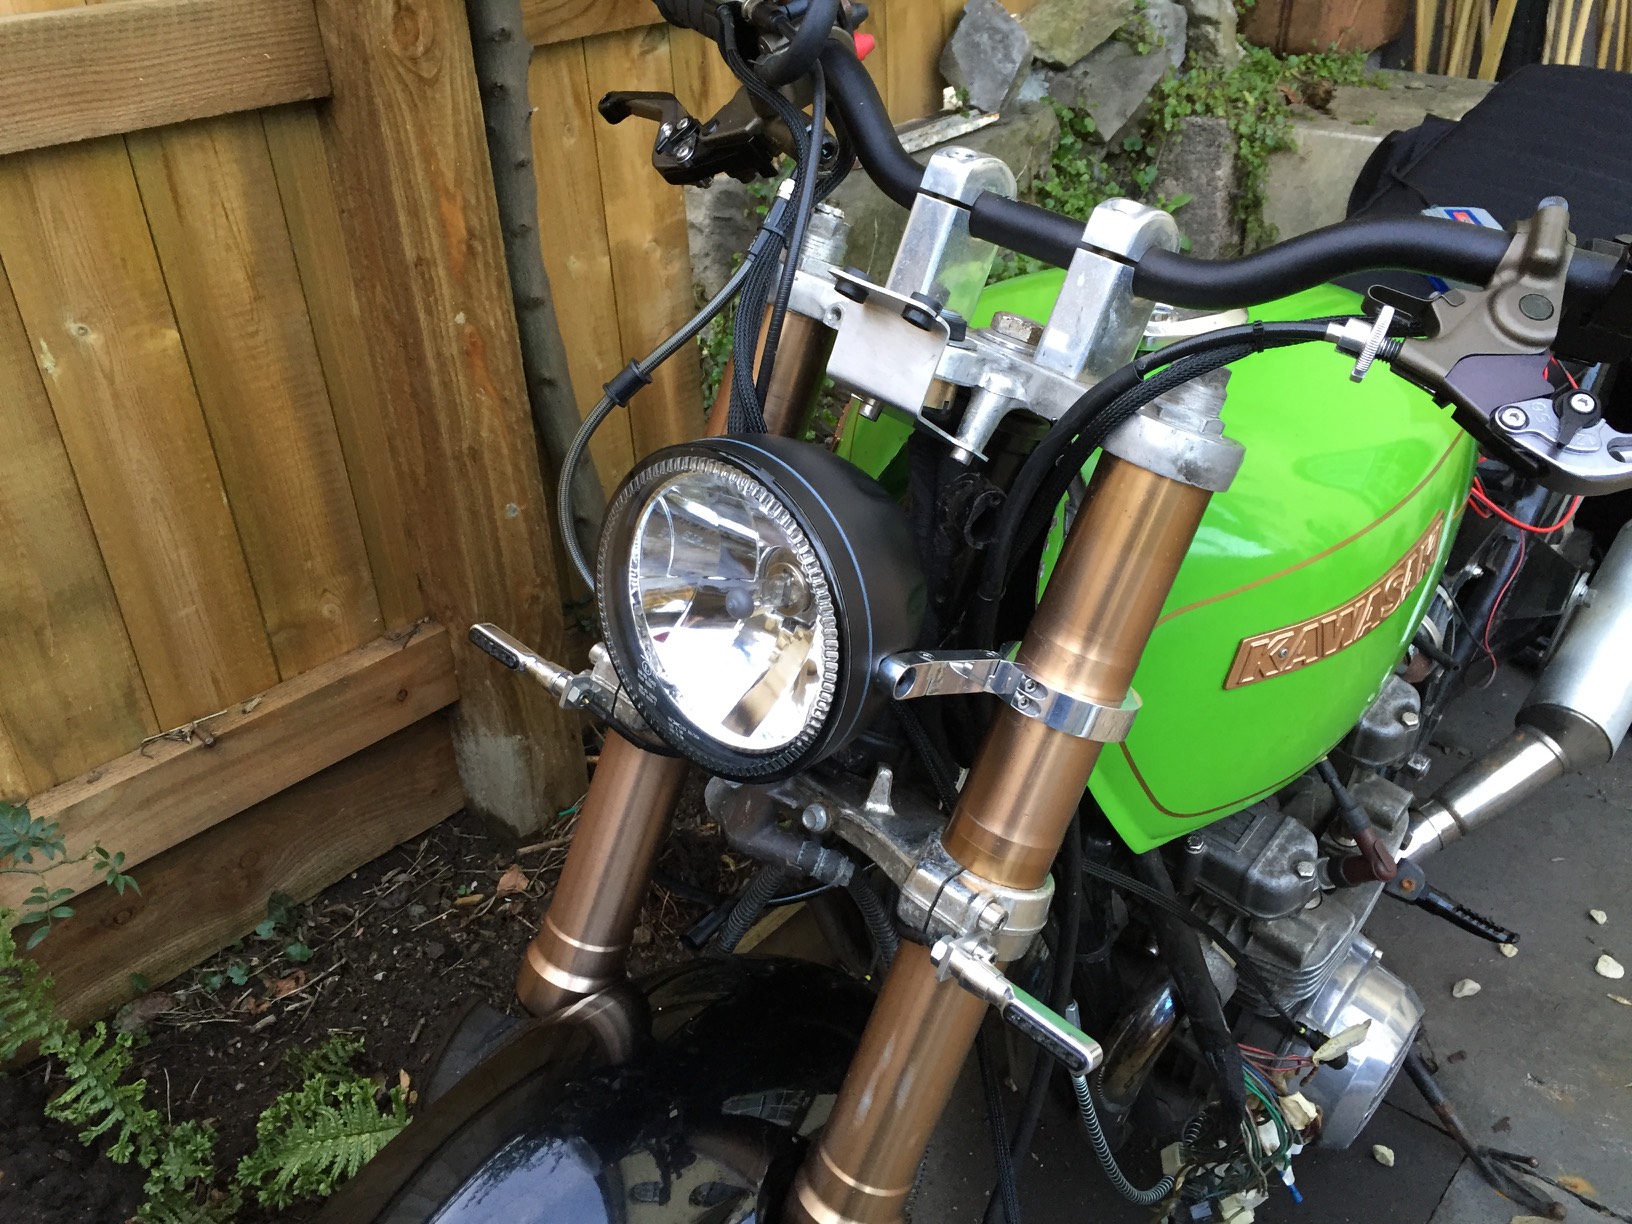
Indicators Back on
Well the first hurdle is over. I’ve found a new mounting point for the indicators. I actually prefer them here instead of attached to the headlamp brackets. All I did was remove one of the fork bolts and make a bracket for the indicators on each side, using the bolt to attach them directly to the fork. I will need to dress the wiring and make that as hidden for each indicator next.
1: Remove the existing headlight and all wiring

2. Mock up some little brackets
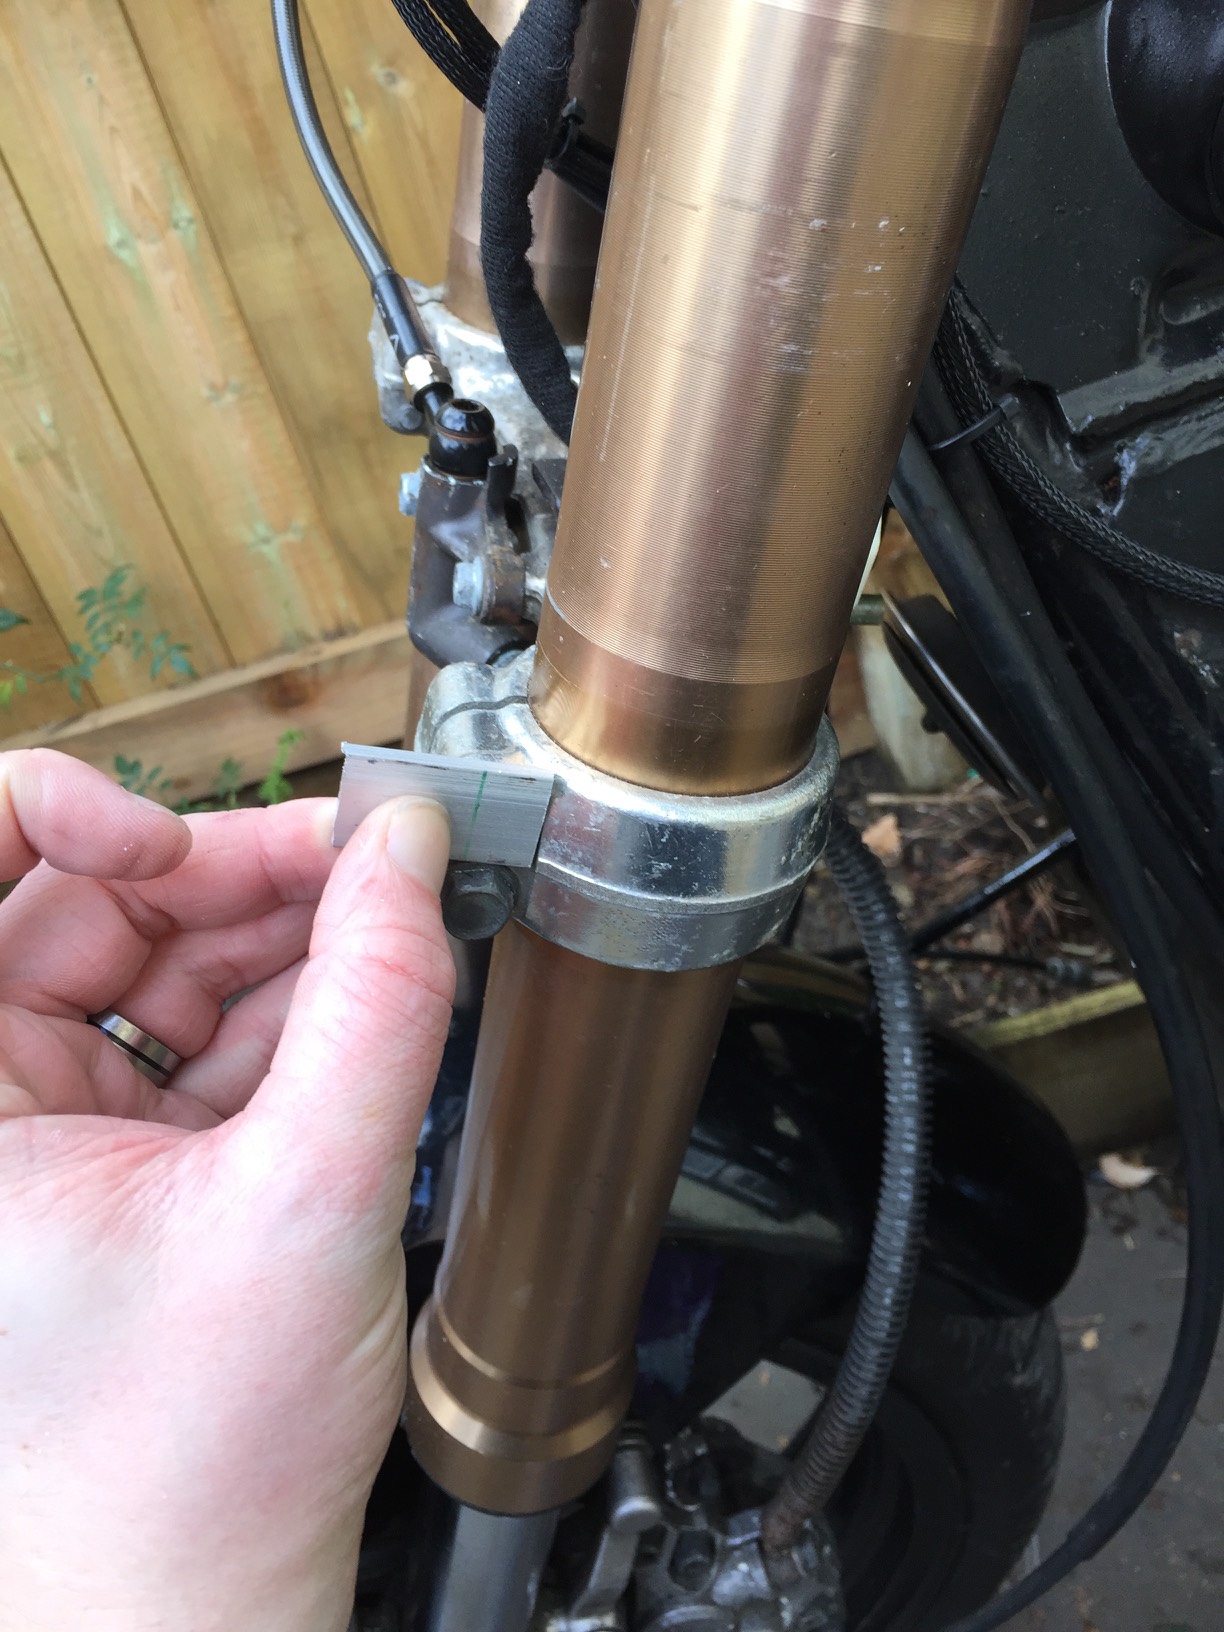
3. Brackets done and in place
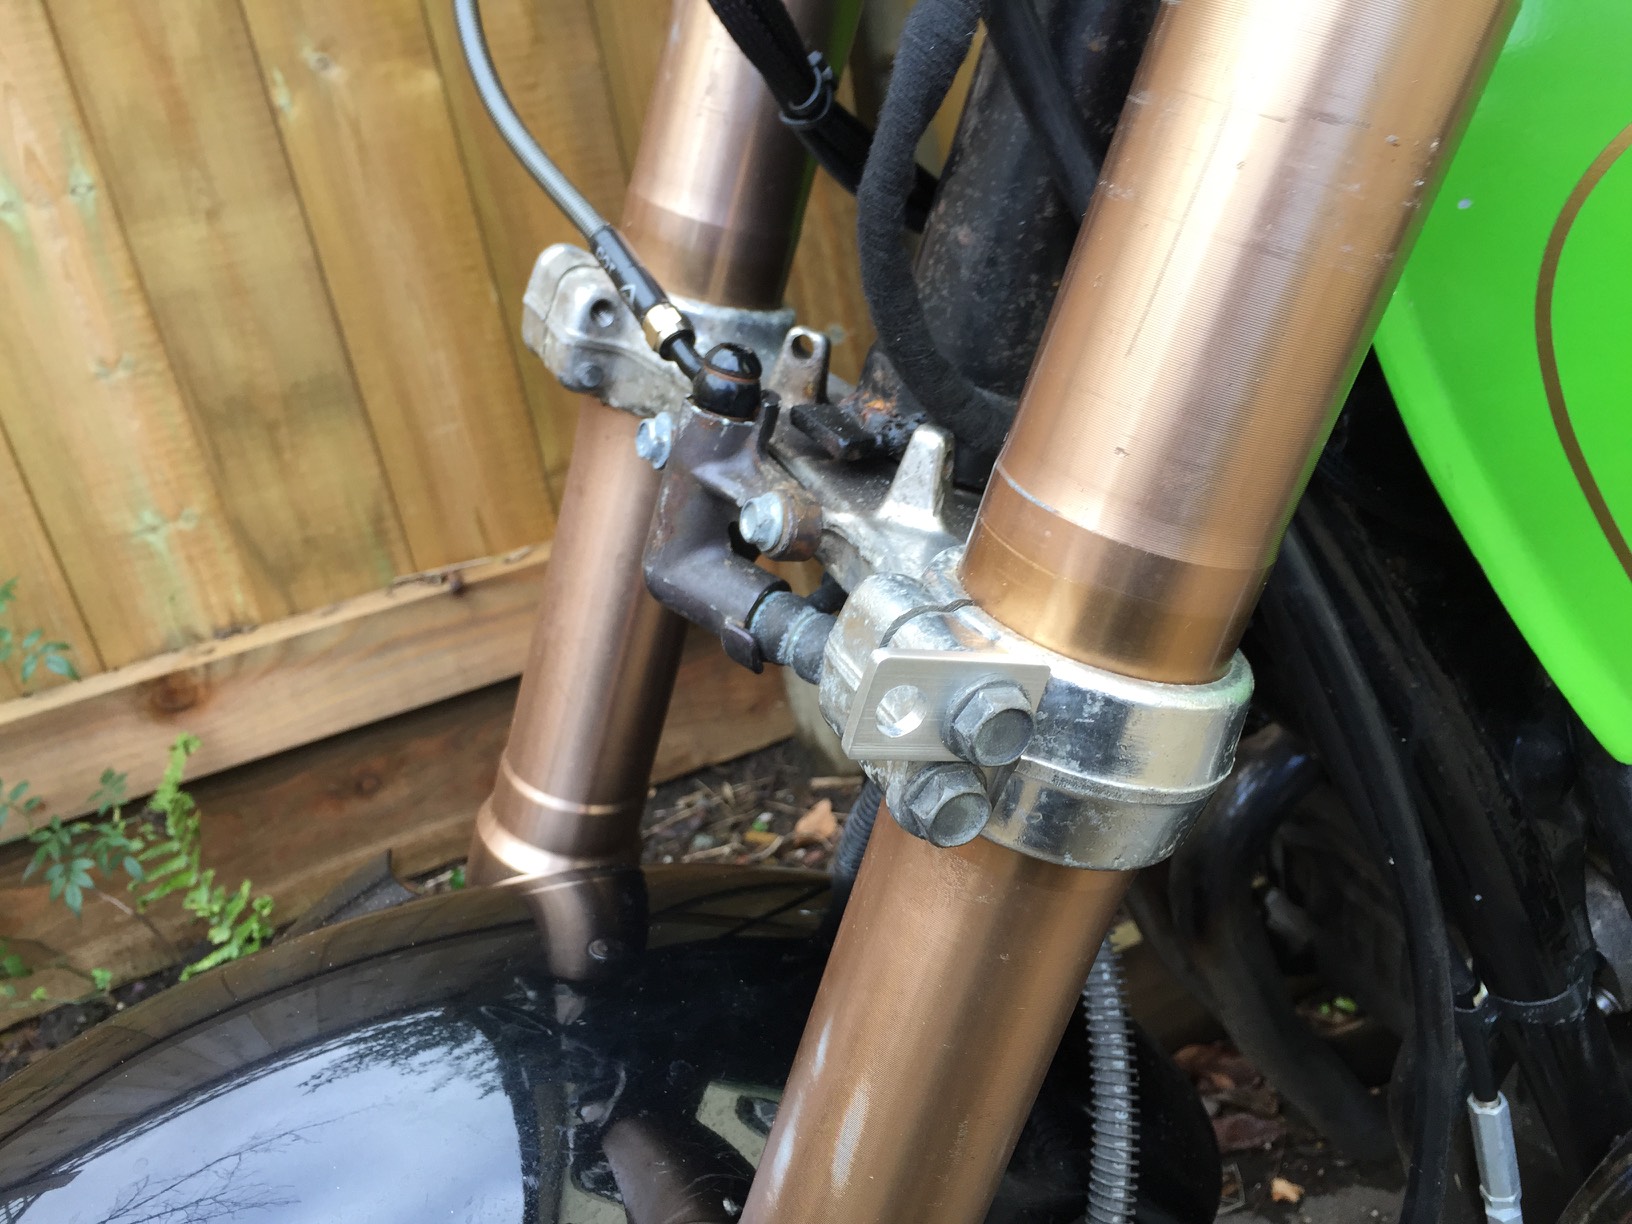
4. Fit the indicators and see how it looks.
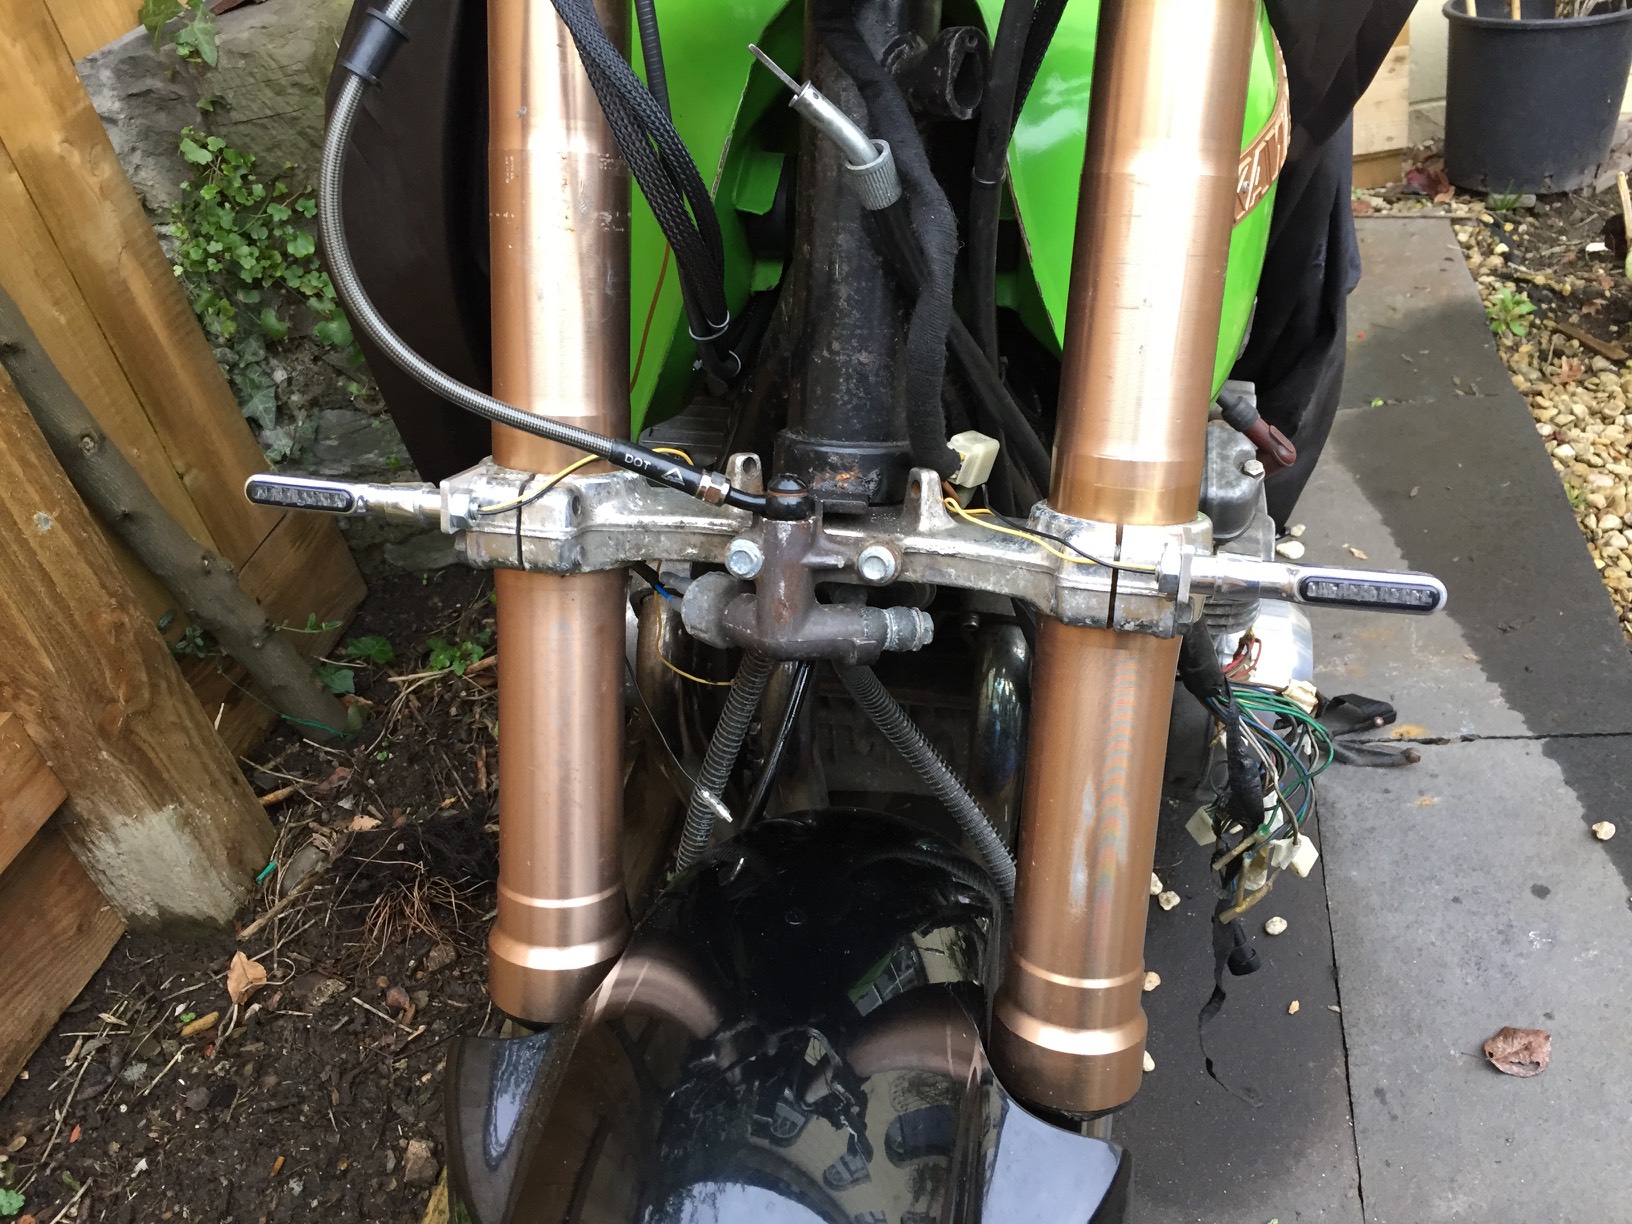

I also held the new headlamp in place to see how it looks on the bike.


The weather has now turned, so I’m not sure if I can get anything else done this weekend. I’d like to see to some of the wiring spaghetti if I can.
Headlight woes
Currently here is the problem. As it stands now there is all this mess of cabling in the current shell. Which is 7.5inches in diameter. As you can see it’s a total mess. I’ve cleaned up the speedo cabling, which was the worst of the looms, but there is still more that needs to be attacked.

The new headlight has a ring of LED’s around the outside just inside the shell casing. You can make them out in this picture here:

The whole thing is designed as a sealed unit that is not used to hide the cabling. So I think moving the cables back towards the tank area is the best plan of attack.

If the weathers not tipping it down, I will try to find some places to hide the wiring mess. I’m thinking maybe somewhere underneath the tank would be the best place. As it is hidden from view, but is close to where the existing wiring is. Maybe even in some kind of box to keep the connectors out of the worst of the weather.
Headlamp headaches
Well the headlight has turned up this morning and it looks great.
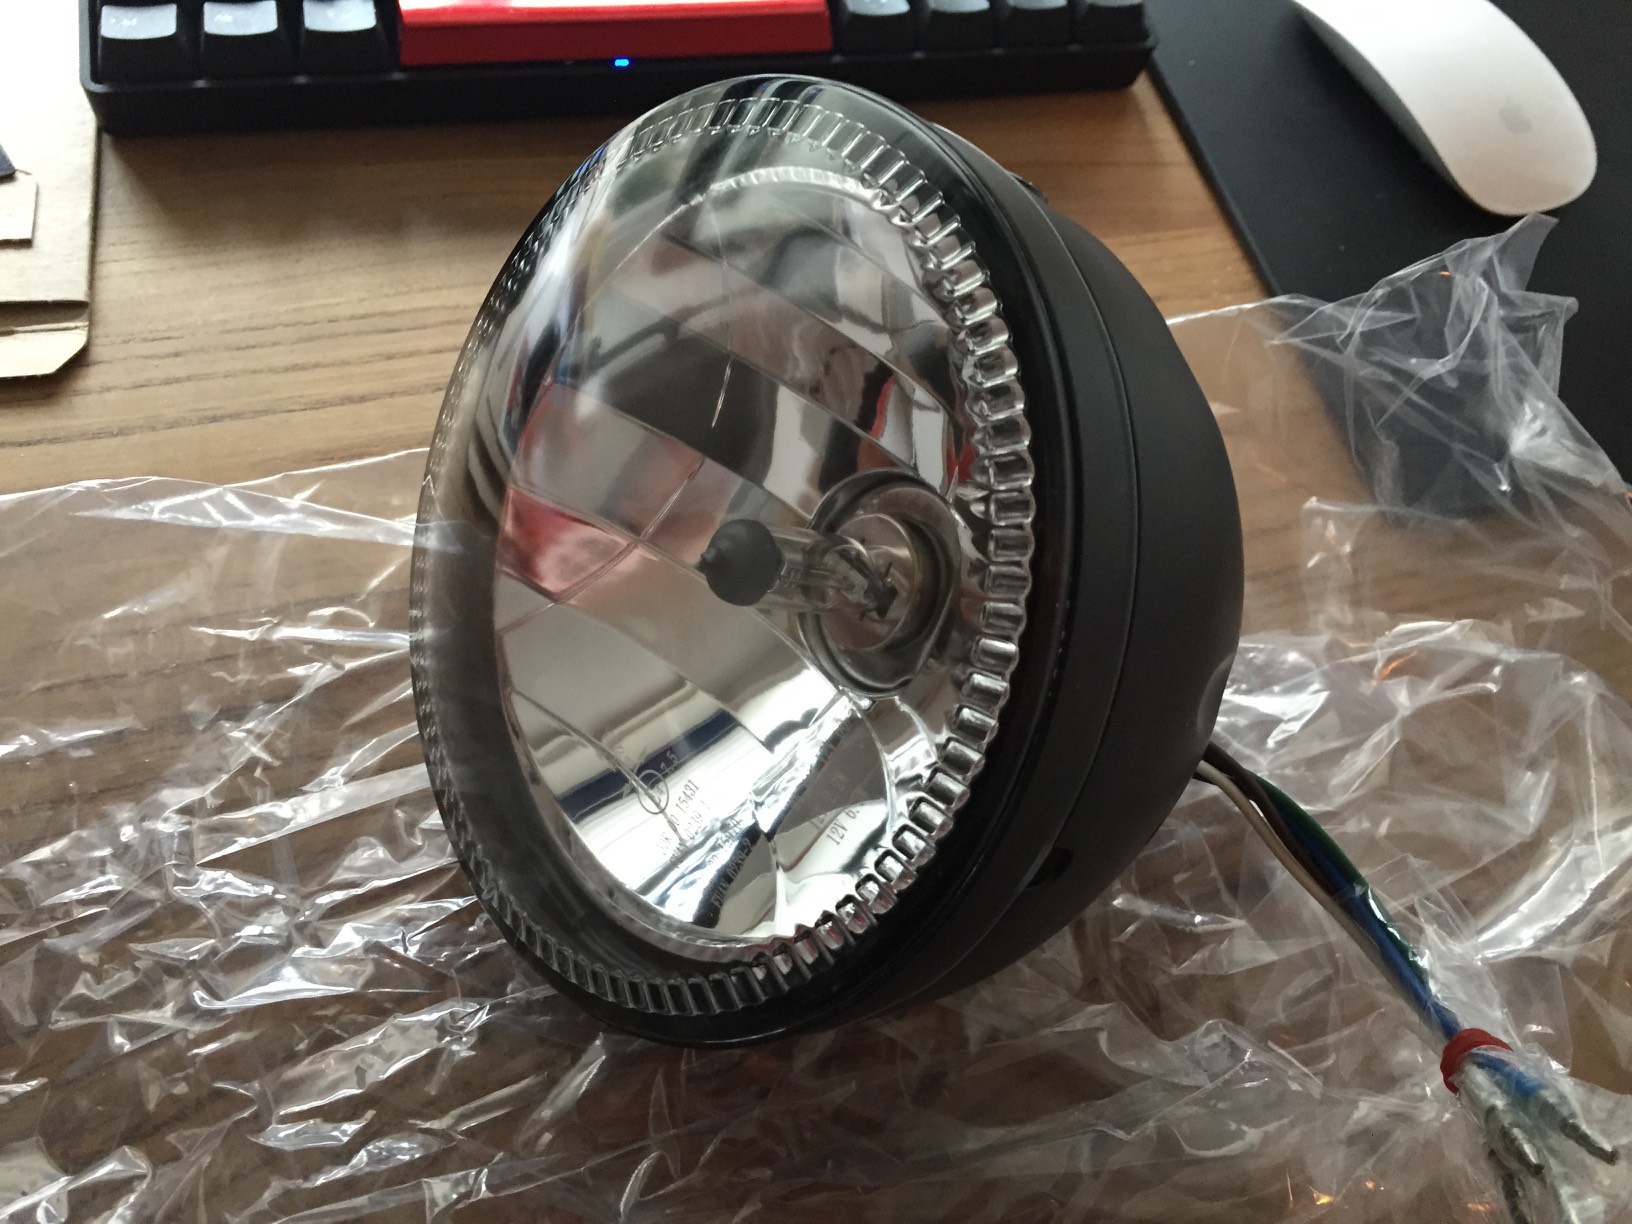
There is one thing that I wasn’t expecting. That is this headlamp has no space for the tons of wiring in the current one! Arggggh! Add to that the mounting system I’m currently using will not work as this uses smaller bolts and has no way for the indicator wires to go.

So I will have to think whether this can work, or do I have to modify it too heavily. I think I can work out moving the current wiring to somewhere else. The issue is where and how then do I mount the headlamp and indicators.
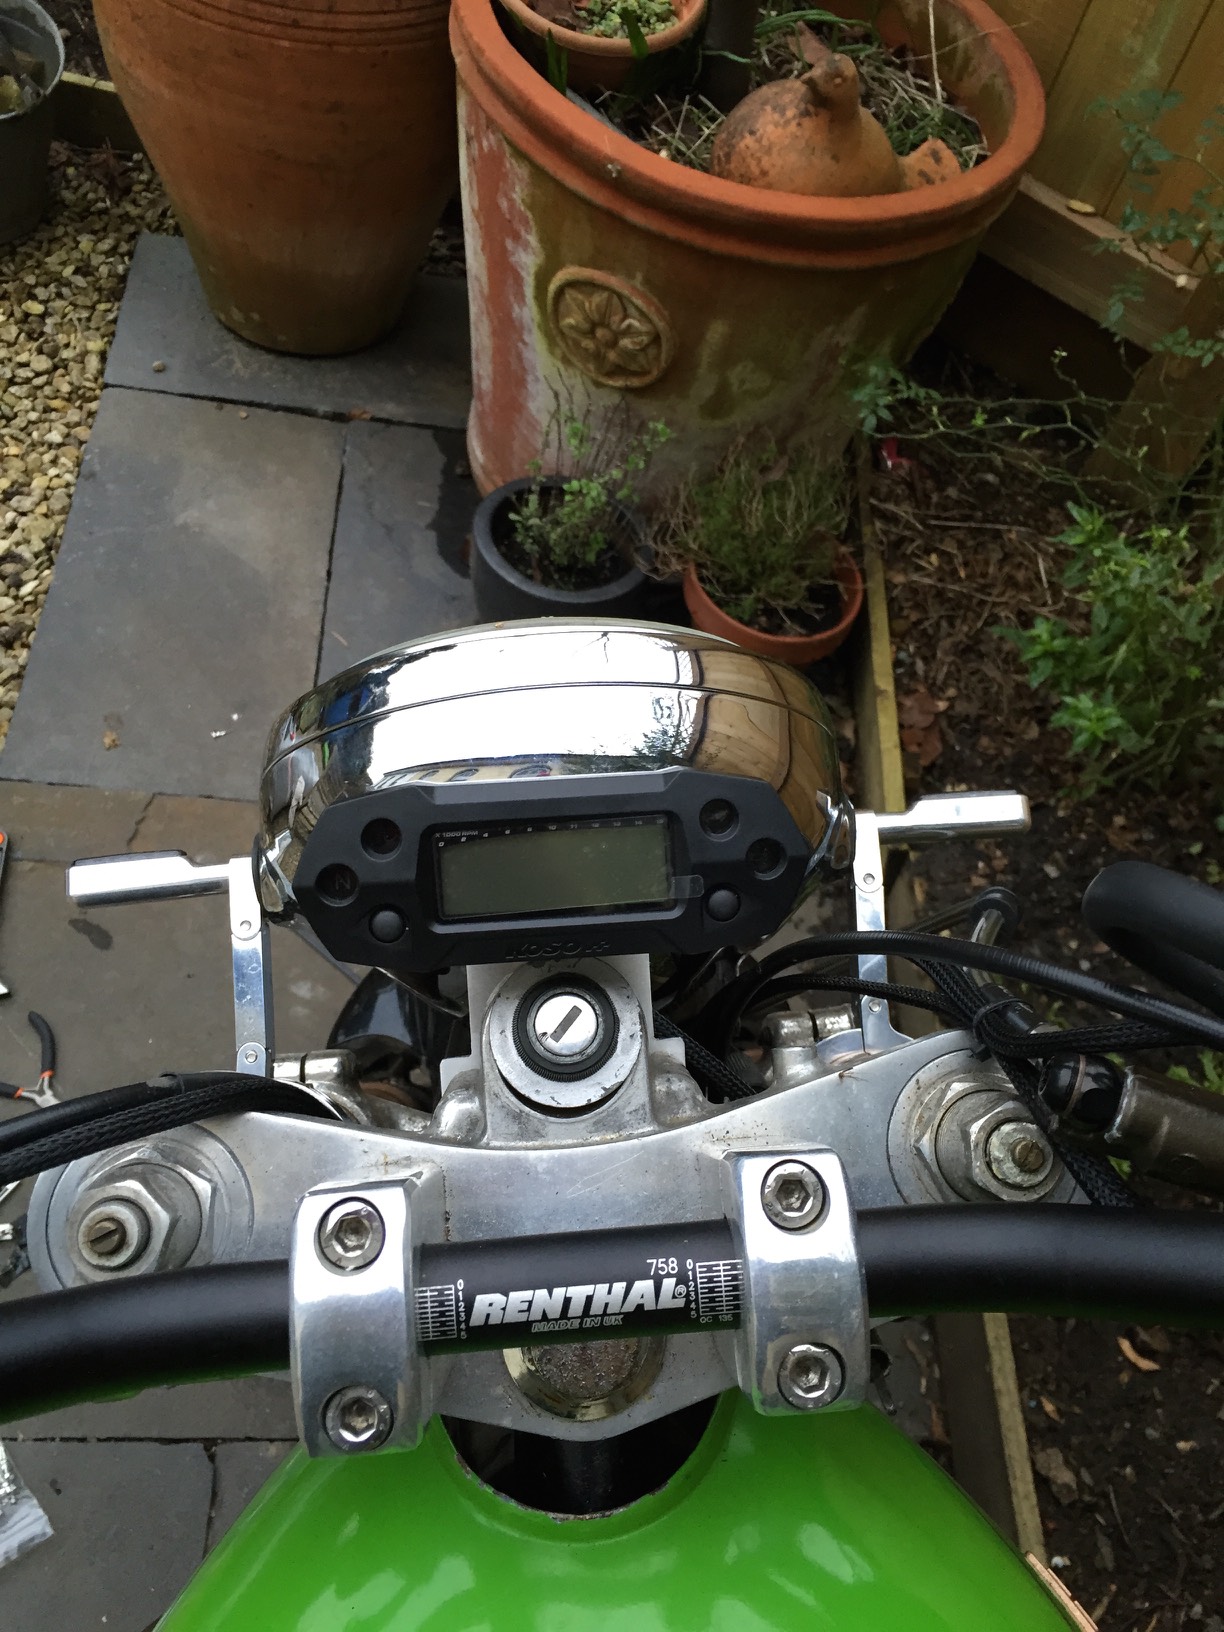
Speedo Bracket Fitted
I’ve managed to do a few more bits on the bike. I’m awaiting a few more parts before I can the last few bits done before getting it on the road.
I’ve fitted the speedo bracket into place using the existing bolt holes. I was going to paint it, but actually it looks better in silver. So I’ve left it like that for the time being. I plan on changing this in the future when I get rid of the ignition switch for an m-switch.


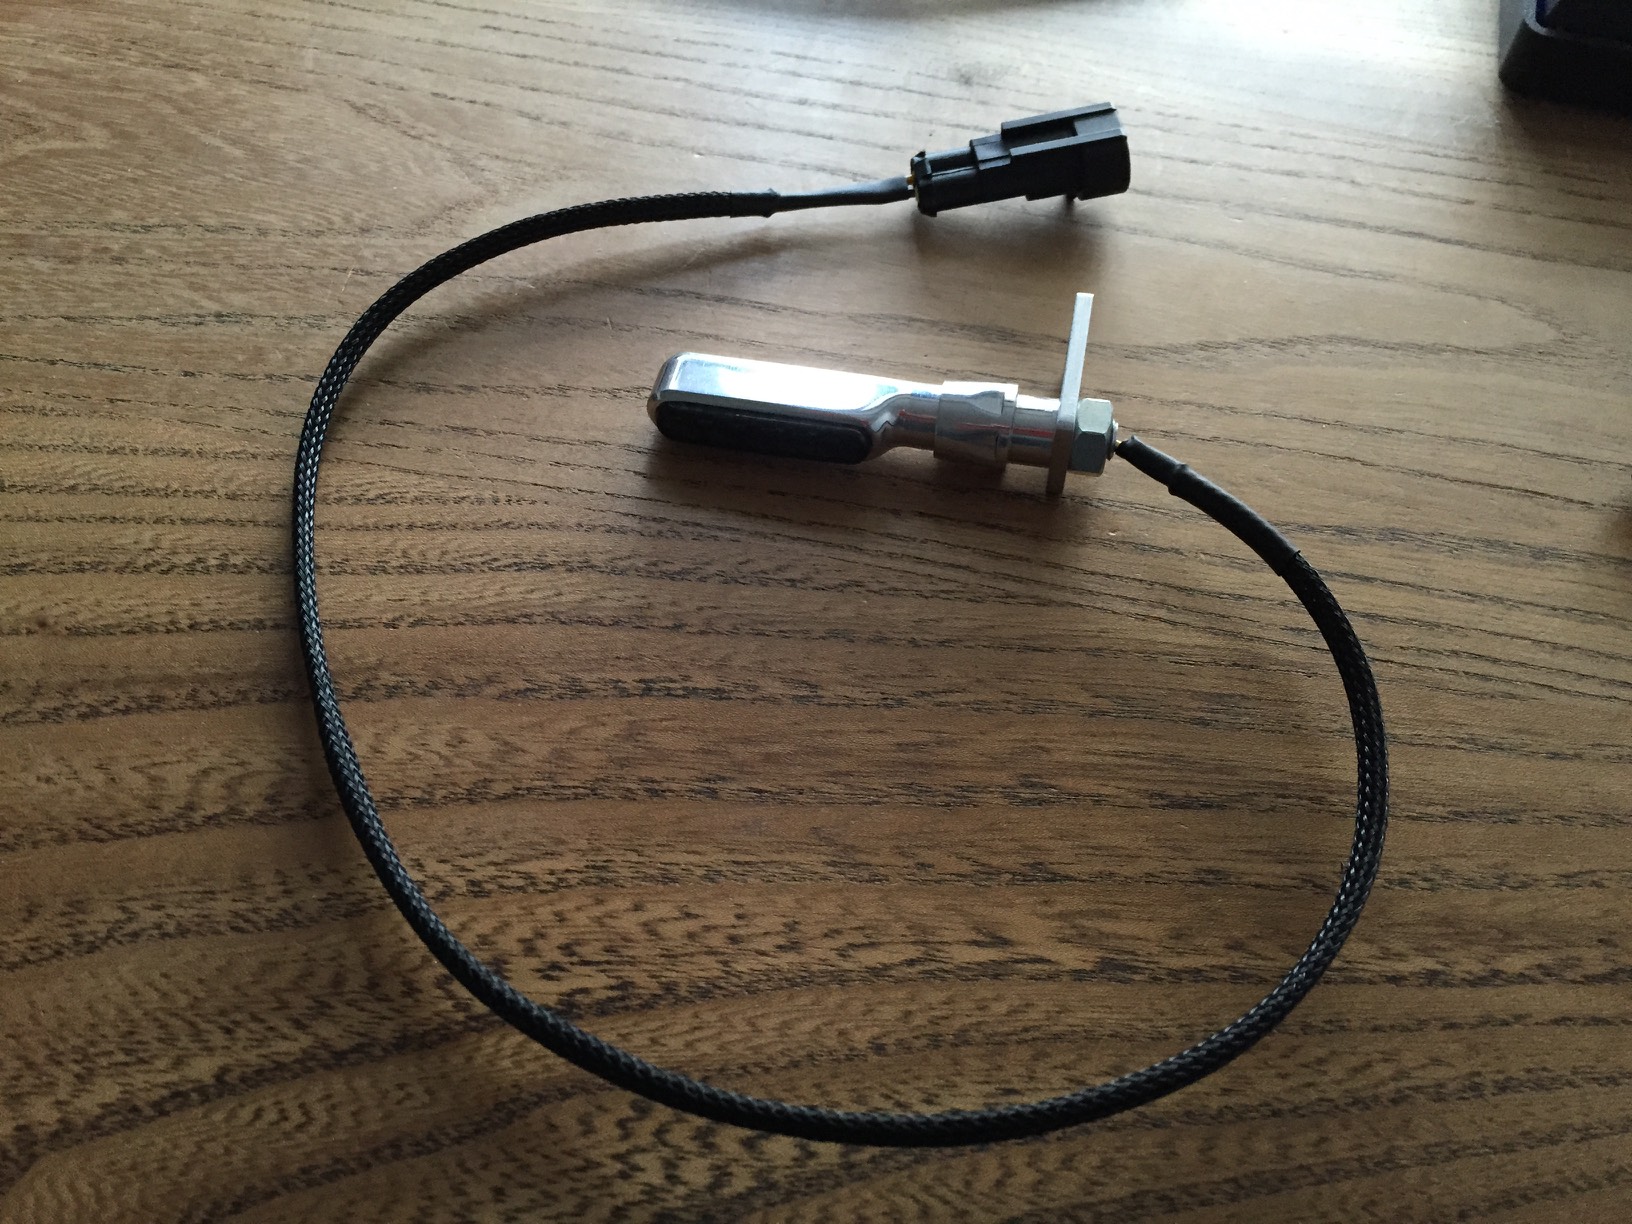
I’ve rewired the front brake switch to something less dodgy. I’ve also ordered a new headlamp.

It’s smaller than the current one and has led’s in a ring. That should look nicer and be safer.
Wiring Hell
So, it’s been quite some time since I have updated this thread. I have made some progress on the bike. However not as much as I’ve hoped for. It’s still not on the road, but closer than ever!
The major issue has been some wiring gremlins. Some caused by me and some caused by some shoddy work in the past. I got a couple of wires wrong when hooking up the new controls, which I fixed quite quickly. However there was a very bad short which caused smoke to appear from near the speedo and fry the main fuse. After much poking around with the multimeter I realised that the speedo wiring was to blame. I found a really awful mess of cables hidden under some tape. Really really shoddy work, some of which was touching the frame of the headlamp and causing a short. So instead of waiting to fit the new speedo I’ve ripped out the old dials and wiring and started doing it now, as the wiring would have taken ages to fix properly.


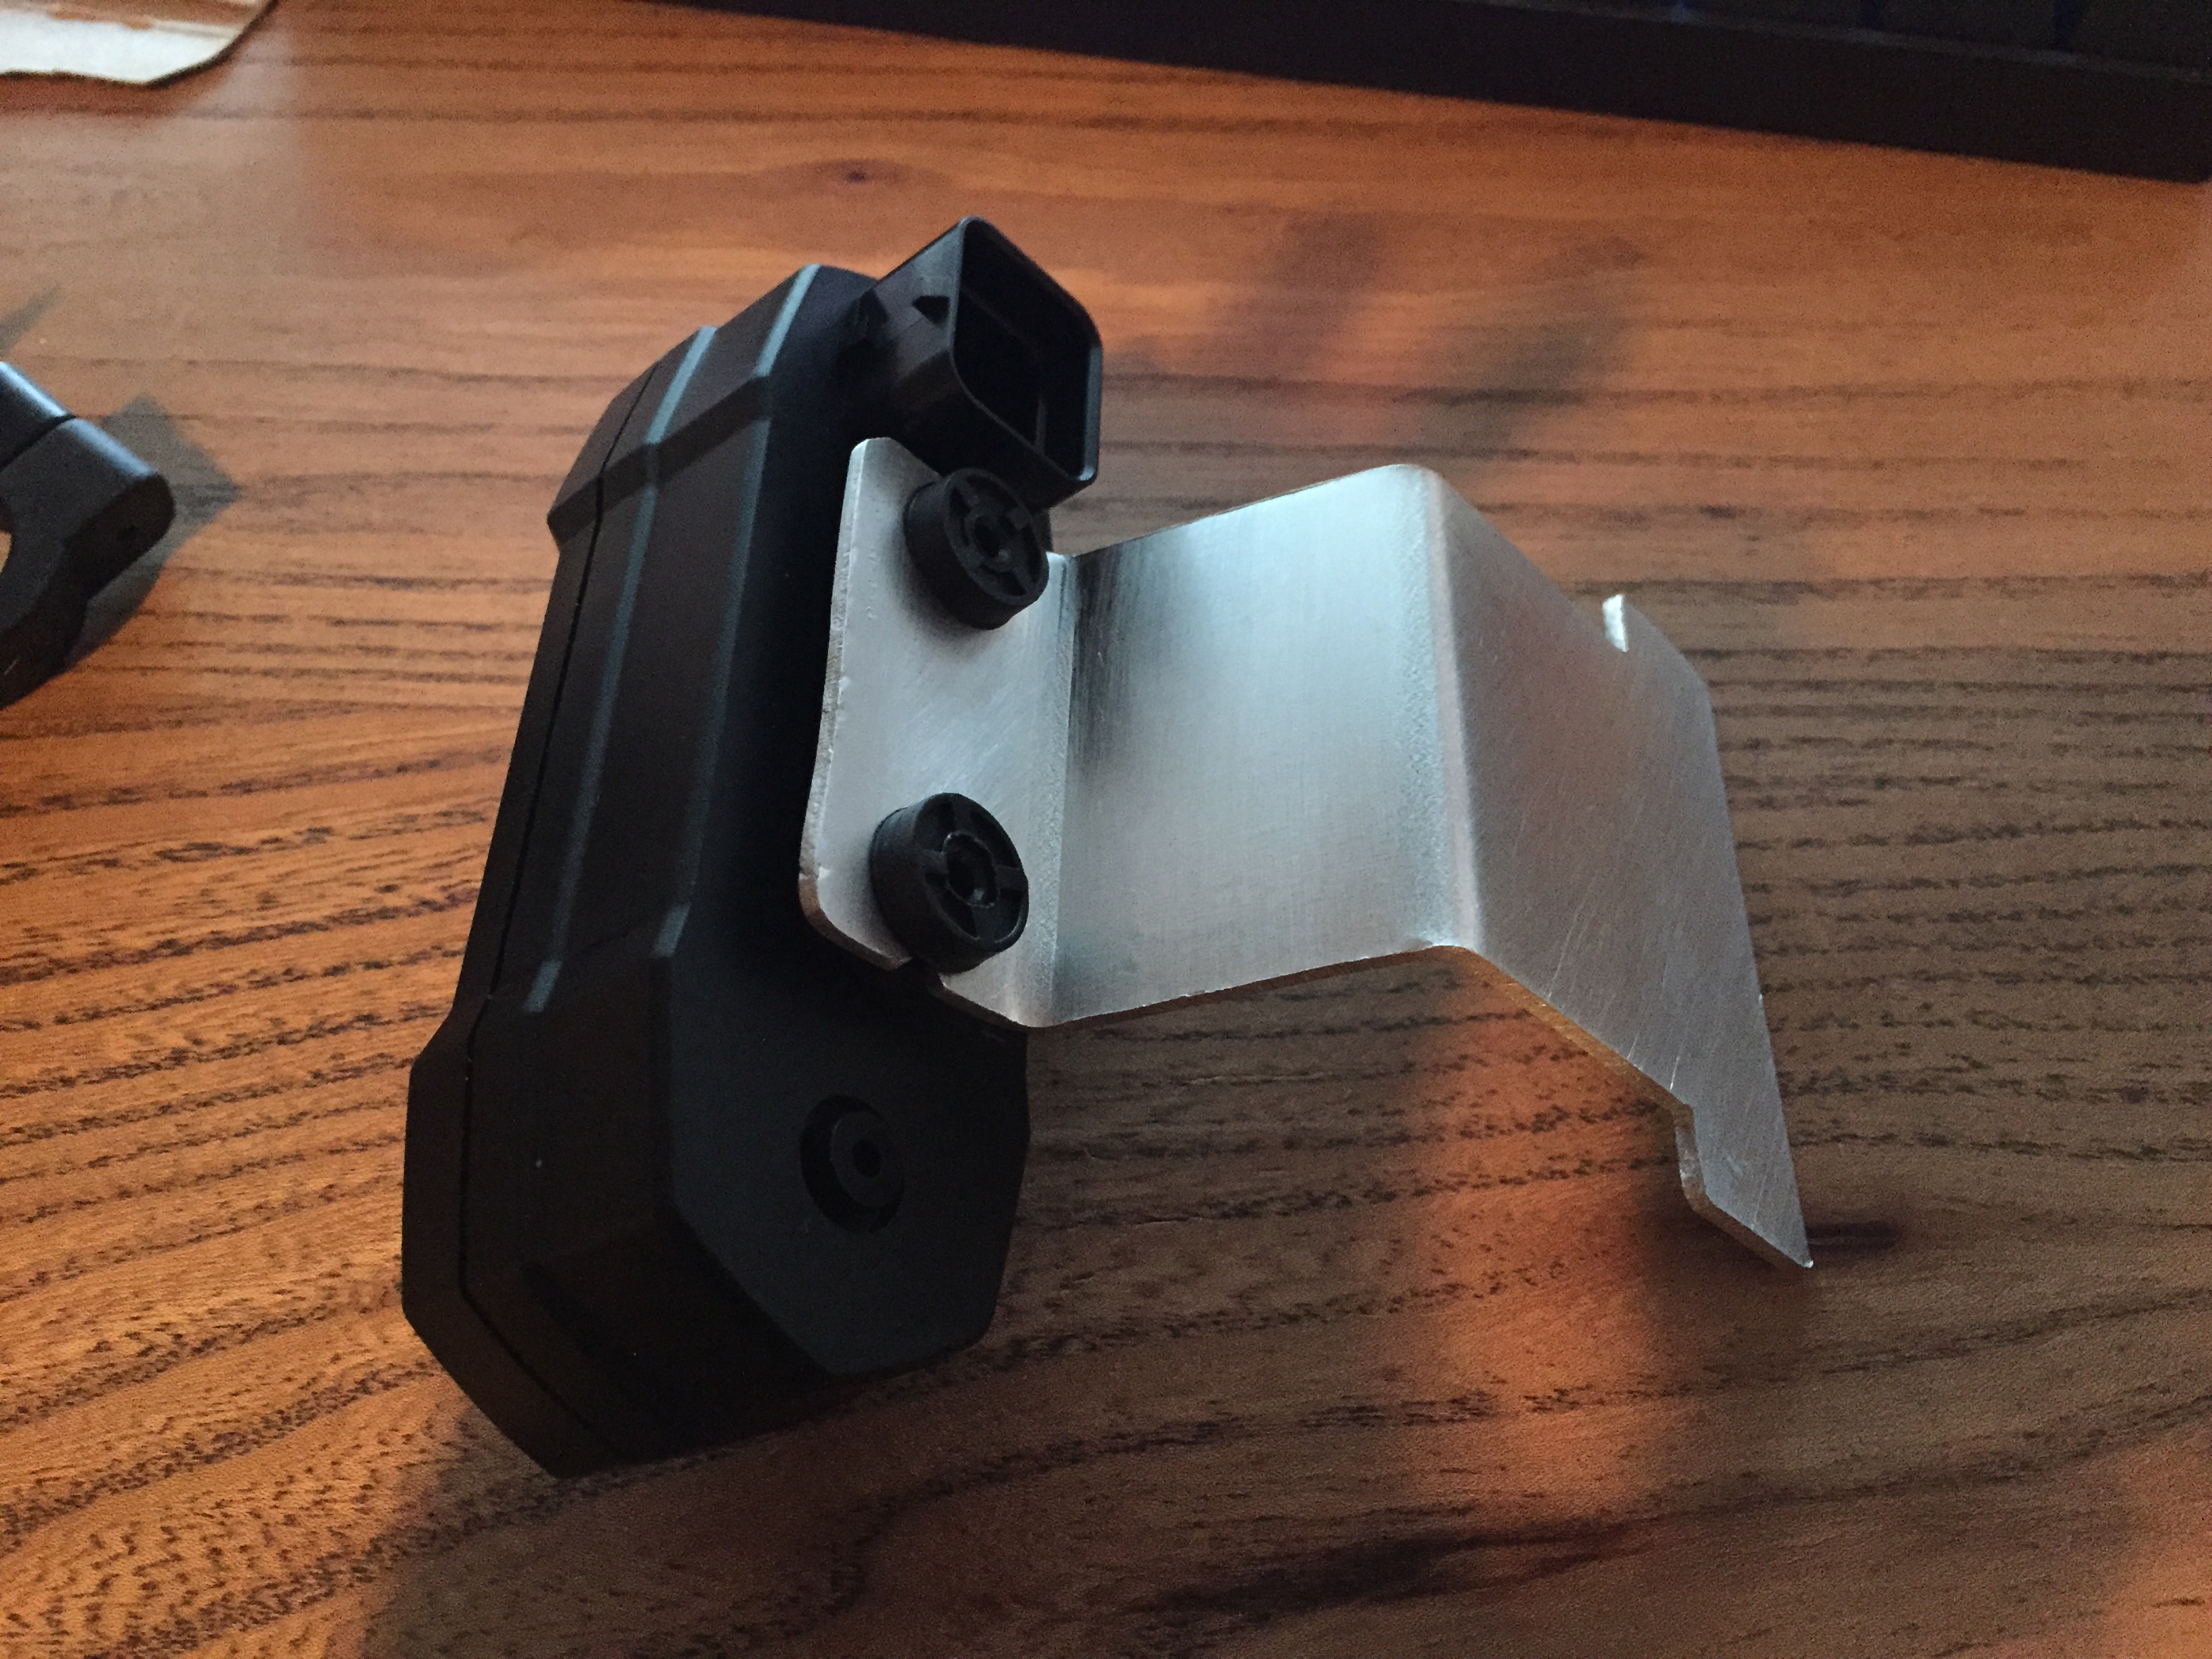
Next up I needed to create a bracket to mount the new speedo in place.
Here it is as it sits now, it needs painting and preparing, but I’m very happy with it.

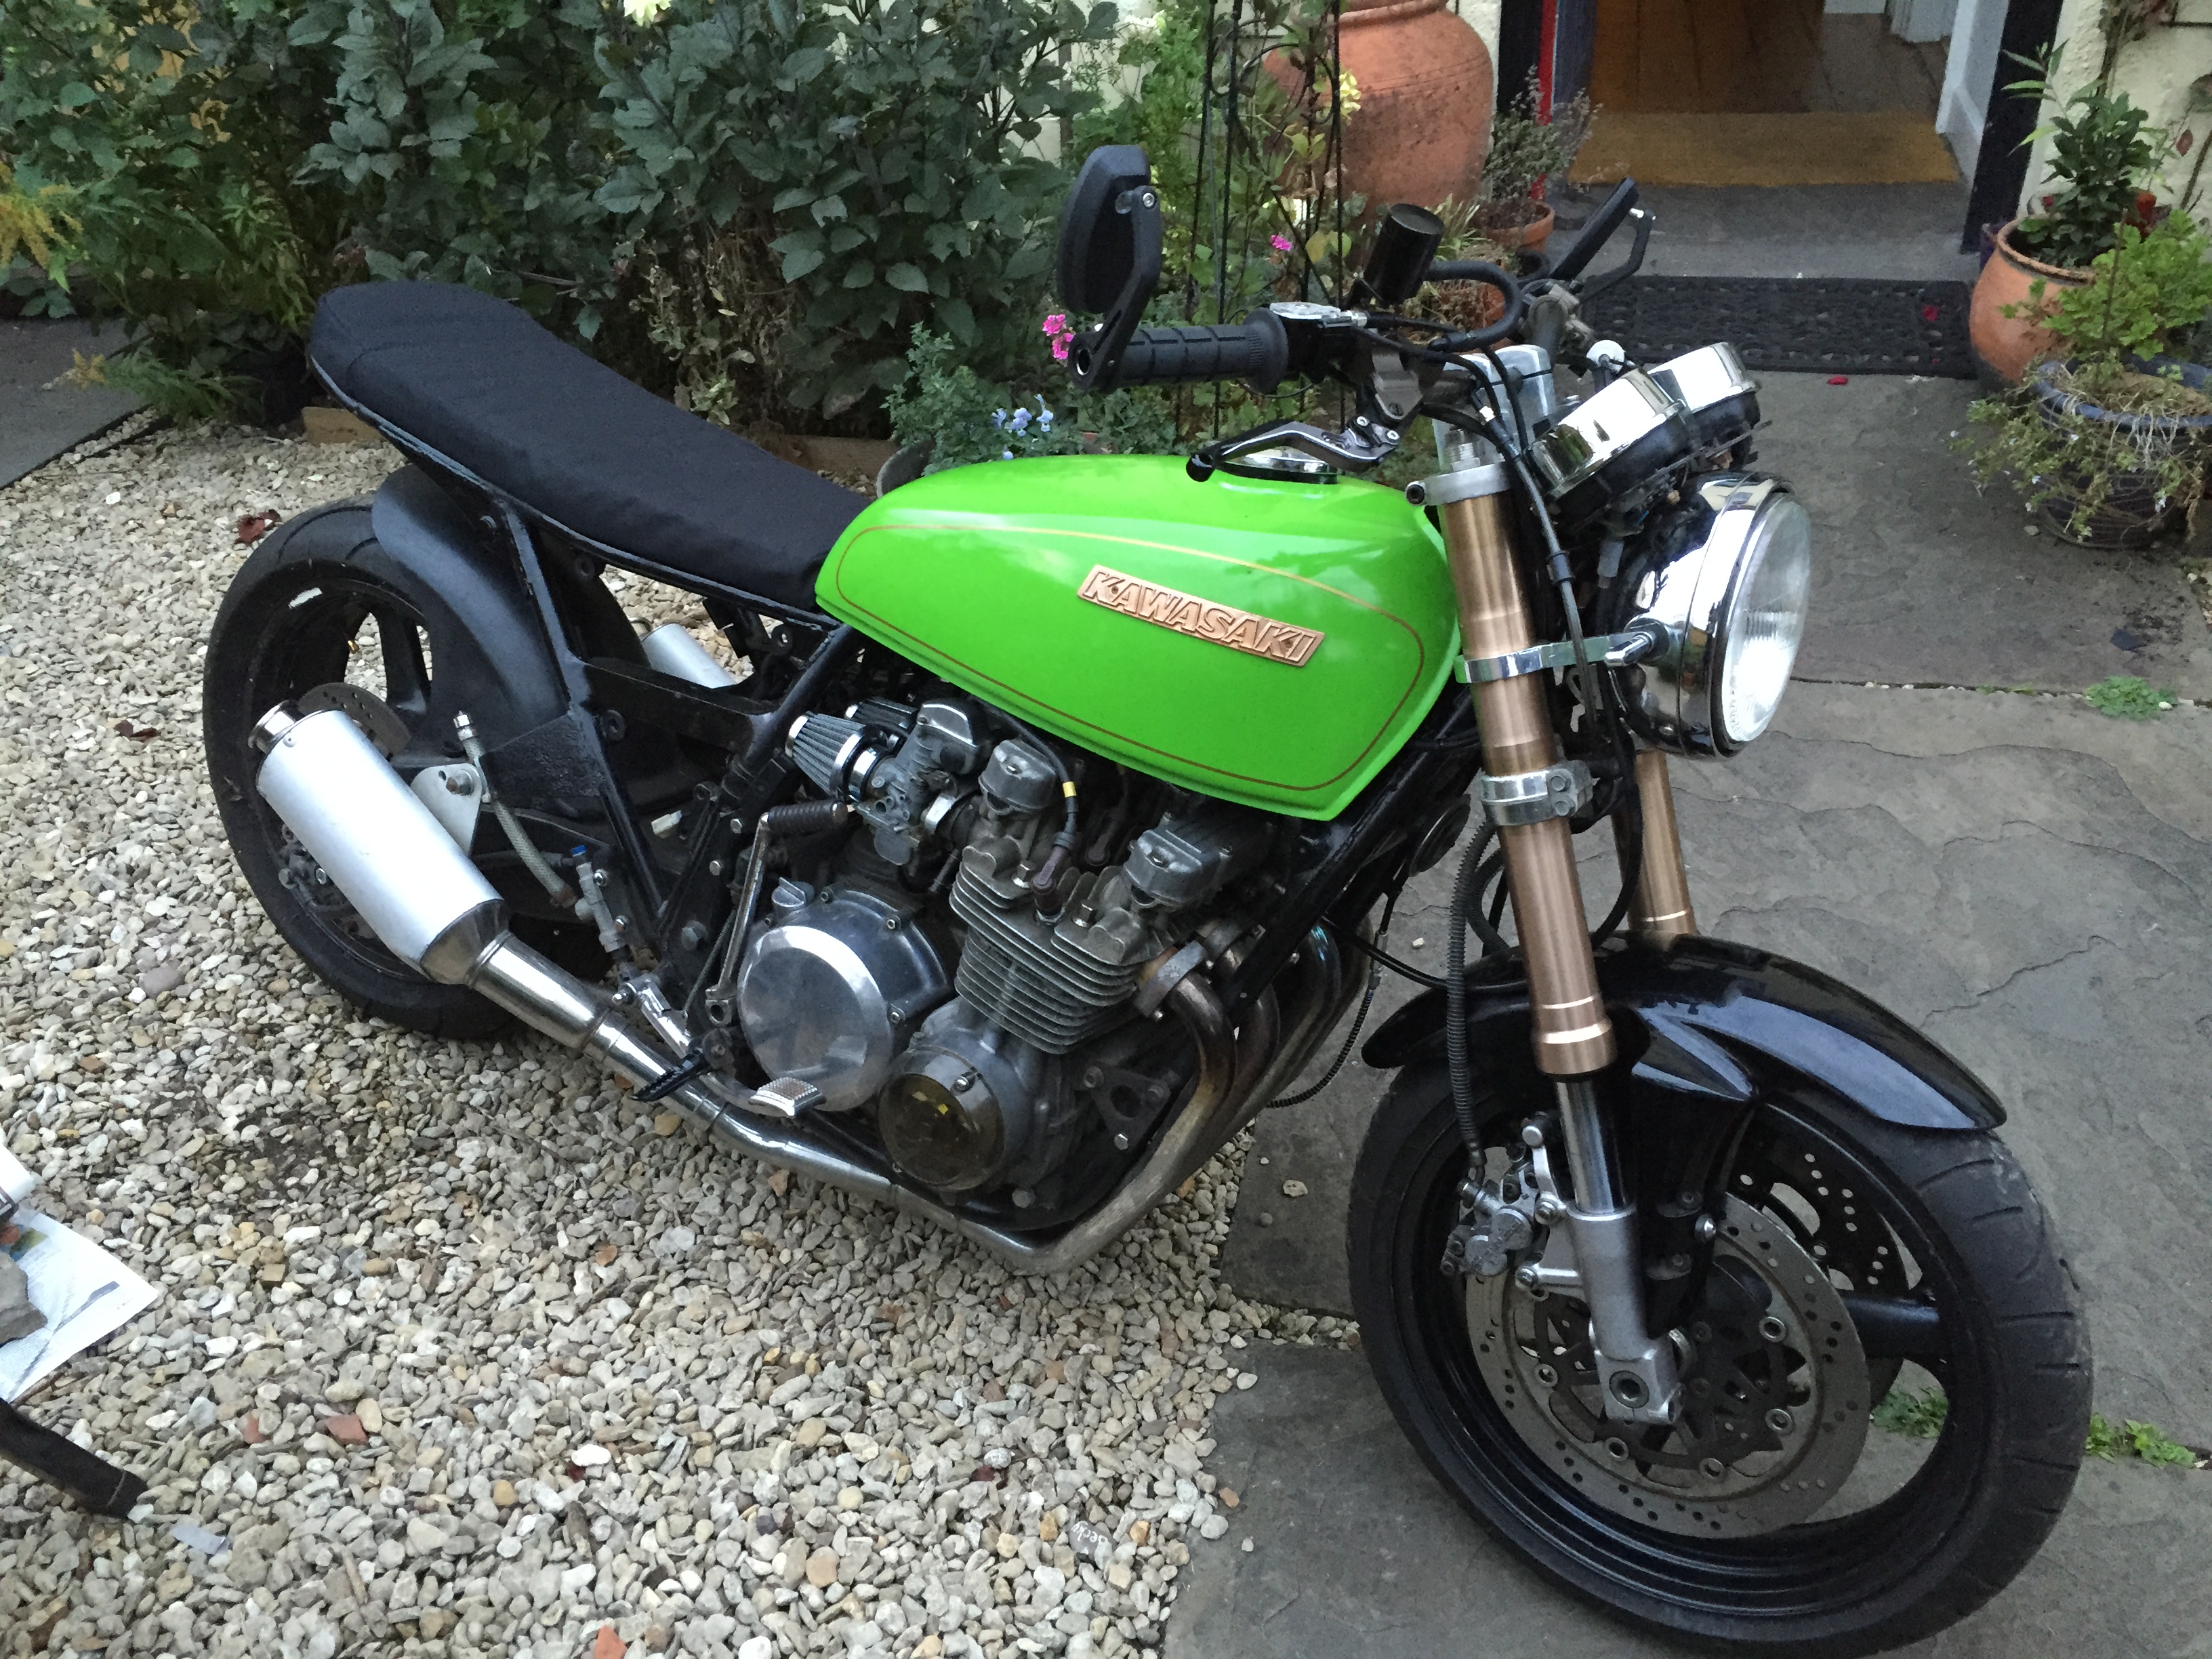
The other major job ticked off the list is the seat. With the superb skills of my wife the seat is now fully in place. It was a pig to fit, but I’m really happy with how it looks.
Seat being fitted


The seat is in place.


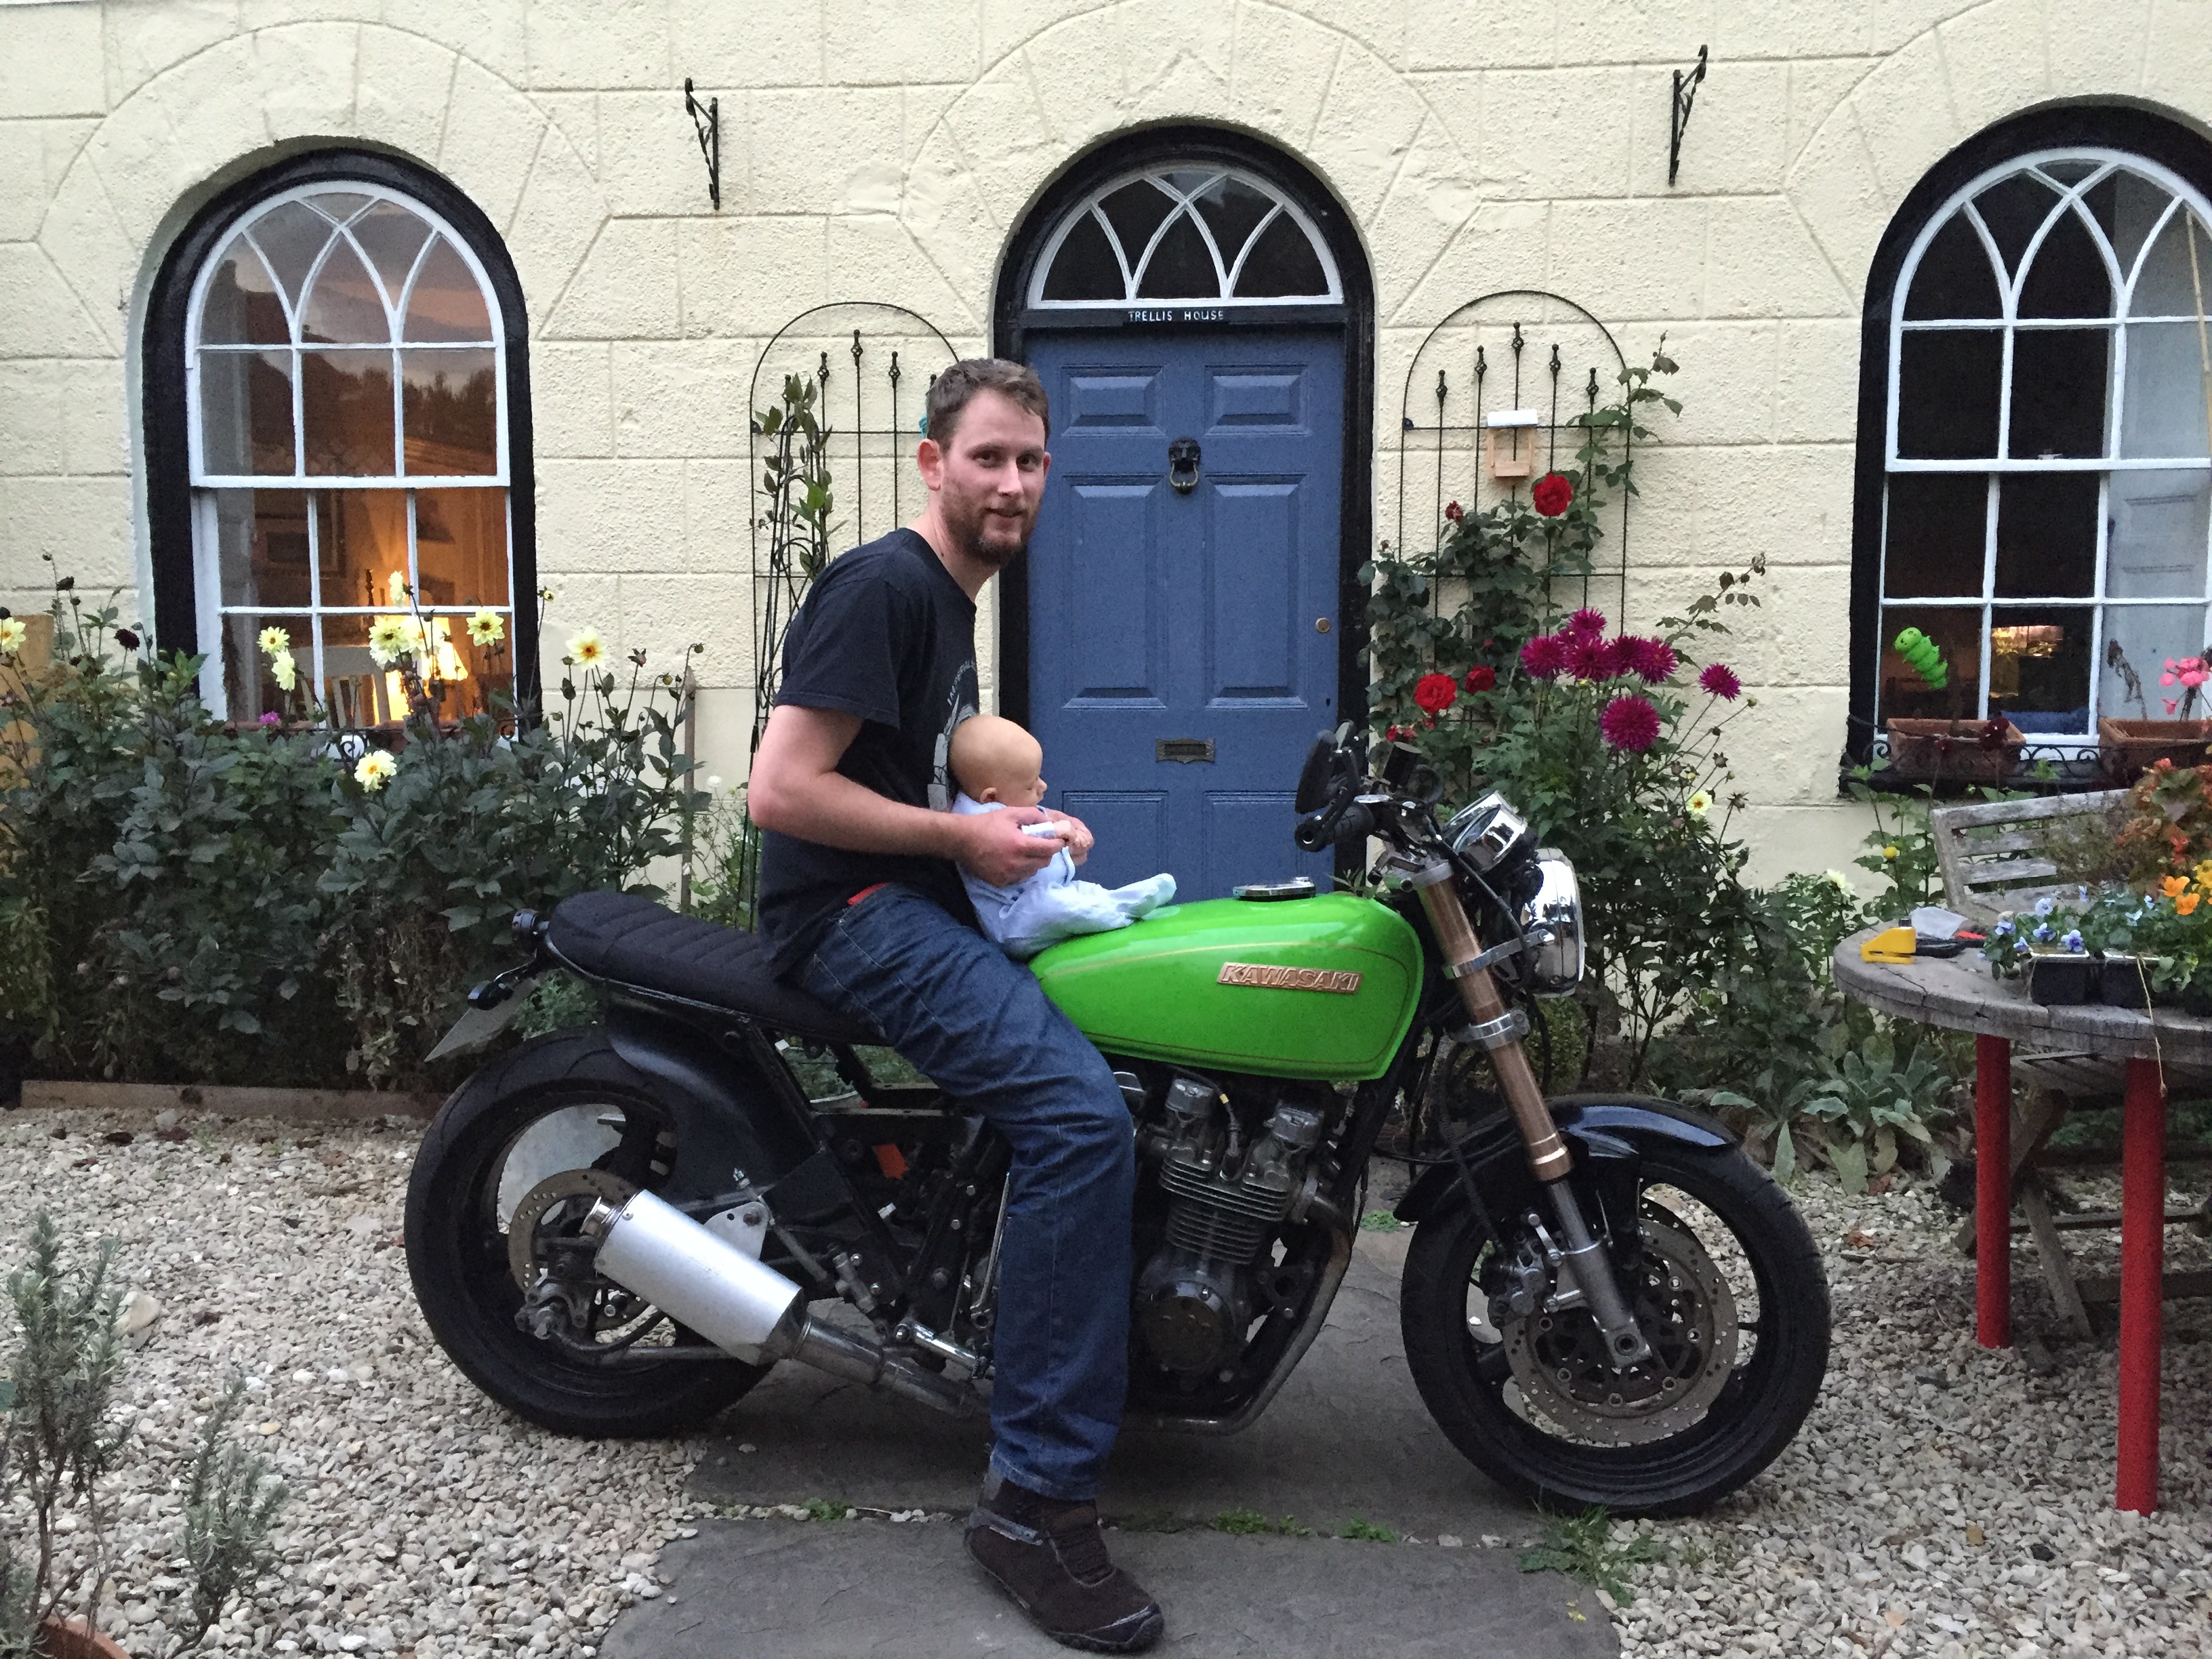
Got to make sure to start the little un on bikes as young as possible!
The next week or two is time for me to do some other wiring jobs. I need to wire up the new speedo and get that working. I also need to replace the current fuse box as it’s in terrible shape.
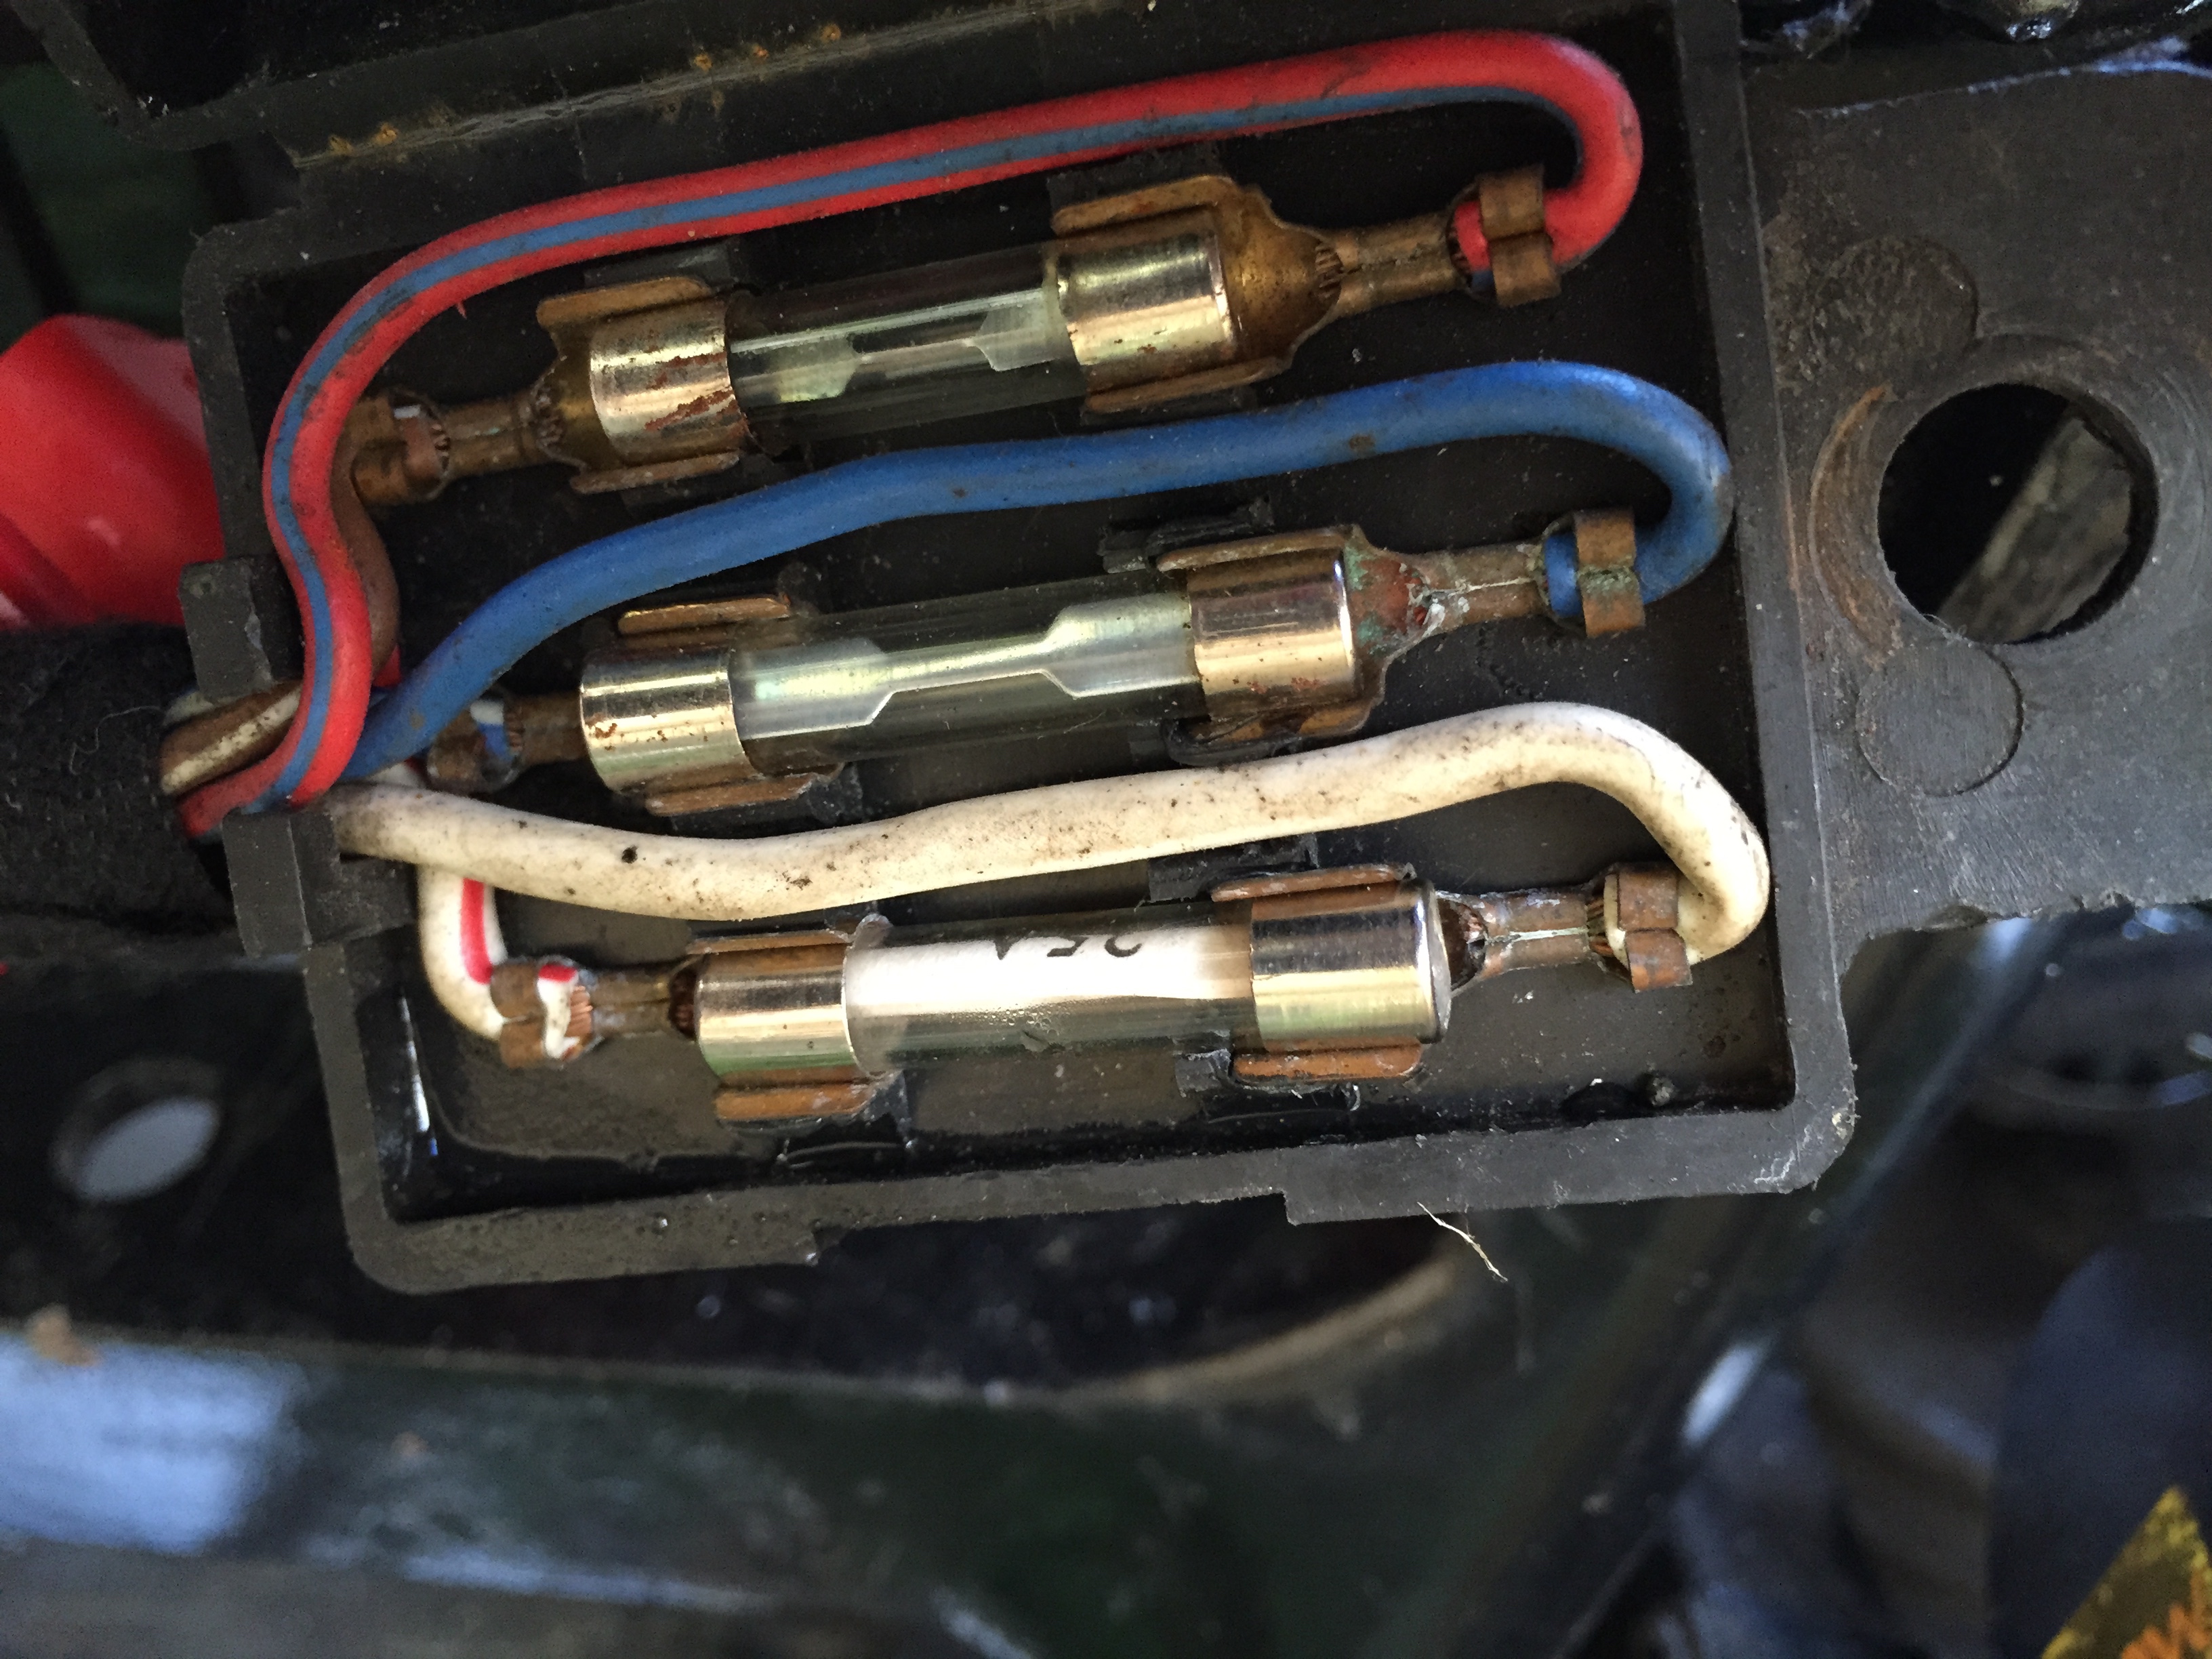
I’ve picked up this blade style fuse box to replace it with

That and the other wiring I’ve done will fix the headlamp issues I’ve been having. I’ve managed to fit a relay that fixes my led indicators which was one more job done.
