Skip to content

Posts tagged ‘MiniITX’

3
Jan

Cubit 3 and Cubit 5 Cases

I’ve recently managed to source both a Cubit 3 and Cubit 5 case from ebay(hoojum), so I thought I would post these of the black version and of the far smaller cubit 3.

Hoojum Cubit 3:

Hoojum Cubit 3 MiniITX Gallery

Hoojum Cubit 3 Case Gallery

Its a tiny but very heavy and cool looking mini-itx case. It looks flipping amazing in the flesh. Installation isn’t as easy as say a full atx case but its not bad. I had a few teething problems with mine but I think this is due to it not being an off the shelf hoojum but a demo machine. I had to redrill the hdd mounts for the 3.5inch drive I was using and the front circuit board needed a wiggle to get it into place

Gallery | Specs


It can take all kinds of mini-itx boards/ a slimline optical drive and either a 2.5in or 3.5in hard disc drive (You could fit two in with some modding of the shelving system.

Everything is built on little shelves then slide into place, cabling is a bit of a problem but with some planning it can all be squeezed into place.

Having had a play with this system I will shortly be using it as the basis of my new modding project. It will feature watercooling and a very powerful but tiny system. Keep your eyes peeled for more news 😉

Hoojum Cubit 3 MiniITX case

Hoojum Cubit 3: Front

Hoojum Cubit 3 MiniITX case

Hoojum Cubit 3: Front

Hoojum Cubit 3 MiniITX case

Hoojum Cubit 3: Back

Hoojum Cubit 3 MiniITX case

Hoojum Cubit 3: Inside


Hoojum Cubit 5:

Hoojum Cubit 5 case Gallery

Cubit 5 Shuttle Case Gallery

The cubit 5 is a replacement case for pretty much any shuttle system. It had two front plate designs to cover the differing designs shuttle use.
Like the smaller Cubit 3 case is very heavy but very well built. Its far better than the standard shuttle cases.

Gallery | Specs


I’ve transferred my SB61g2 based system over to the cubit 5, it has a AT x800xt , p4 3Ghz 2GB of Corsair DDR XMS ram, Seagate 200Gb sata HDD and a Panasonic DVD Writer (Slimline)

The build process for the cubit 5 is similar to the cubit 3 bit is a bit more fiddly and fitting all the shelves in is a bit of a battle. Again the case looks great but I had a few teething problems, firstly the IR cover was too big and had to be filed down to fit, secondly getting the psu into place was a pain.

Personally I think they should ditch the card reader as it just spoils the lines but other than that its a good design.

There is plenty of room inside more than a shuttles I would say, I plan on watercooling this system soon and there appears to be enough room to have it all internally.

I had a few issues with cooling but it was mainly down to speed fan not working. Now that I’ve sorted that out it works much better and I’ve had no crashes.

Hoojum Cubit 5 Shuttle case

Hoojum Cubit 5: Front

Hoojum Cubit 5 Shuttle case

Hoojum Cubit 5: Front

Hoojum Cubit 5 Shuttle case

Hoojum Cubit 5: Back

Hoojum Cubit 5 Shuttle case

Hoojum Cubit 5: Internals


Pictures of them side by side:

To give you a good comparison of the cases differing sizes I’ve take some pictures of them to show you.

Hoojum Cubit 3 & 5 cases

Hoojum Cubit 3 and 5: Together

Hoojum Cubit 3 & 5 cases

Hoojum Cubit 3 and 5: Together

Hoojum Cubit 3 & 5 cases

Hoojum Cubit 3 and 5: Together


Hoojum Cubit 3 & 5 cases

Hoojum Cubit 3 and 5: Together


1
Jan

Project Focus

Project Car Pc

Project Focus Summary:

MiniITX motherboards have changed the modding scene dramatically a motherboard this small means you can squeeze it into much smaller places. In this mod I took a Ford Focus Shell from a radio controlled car and fitted a full working PC inside. This project has featured in Custom PC magazine.


Project Focus: Full Project Log

2003-03-03

Project Car Pc


Introduction:

The traditional beige personal computer has been going through a dramatic change over the last few years. Following on from Apple’s lead in great looking non beige boxes people have realised that a computer can look good and still do its job. The modding communities have taken the lead and have made the manufacturers sit up and take note. Idea’s that were not even conceivable 2 years ago can now be accomplished very easily. There are now motherboards that take up approximately the same space as a tradition CD ROM drive. This leads to lots more places/ways you can build a pc.

For Project focus I exploited the new MiniITX form factor and set about building a computer that from the outside would look like a model car. Using a body shell normally used in the world of radio controlled cars means that some of the luxuries of a normal pc case are not available,but what you sacrifice in size you more than make up in looks and individuality.

This is not the first time that a PC has been made to looklike a model car, there was originally a larger MicroATX car pc’s that were manufactured commercially for a short while. Then along came a modder under the name of BlueSmurf. BlueSmurf created a project for the manufacturer VIA based inside a Volkswagen Beetle radio controlled car shell.
This gave me the idea to create one of my very own.

I started this project more by accident then any long term plan. I having seen Project Jelly Bean by BlueSmurf which was so neat and clean and having a spare MiniITX board going spare so had to find a use for it, Project Focus was born.

Walkthrough

The board itself was a Via Epia 5000; this mainboard is a mere 17cm x 17cm in size. Included is a 533 MHz processor actually soldered into the board so upgrading it is out of the question. Importantly the board has On-board audio, graphics and Ethernet LAN. This means it’s a complete solution; all you need is to add SDRAM, PSU and a hard disk to have a working computer. The whole ethos behind this form factor is small size, low power consumption and minimal cooling requirements. It’s not going to win any prizes in the raw speed stakes but it’s a good platform for modders.

The part that is most important in this project was the shell itself. There are many different sizes of radio control car shells, the most common of which is around 200mm in length; there are much larger versions that are 280mm in length. With the motherboard only measuring 17cm square the smaller version was most suitable. I just had to pick a shell I liked and that would allow me space to fit the components. I needed one that was fairly high at the rear; looking on www.apexmodels.co.uk there are several manufacturers that make these shells I chose HPI ones as they are good quality and come in lots of different shapes. I narrowed the choices down to two; the Peugeot 206 WRC and the Ford Focus WRC. I’ve always been a keen follower of the World Rally Championship and love the look of both of these cars. In the end I chose the Focus as it has the most space to play with. While I was buying the shell I picked a nice blue metallic paint for the shell. I could have gone with the full rally look but I preferred the more subtle colour it would also reduce the number of stickers I would have to use.


Project Car Pc
Project Car Pc
Project Car Pc
Project Car Pc


Once I had purchased the shell I was free to source all the other parts. Normal ATX parts were out as they are too large. The power supply I located was a cheap 200W MicroATX PSU. Next I looked for cheap laptop parts, I was after a hard disc and optical drive, and I managed to source a second hand 6 gigabyte laptop hard drive and a laptop DVD-ROM drive. These are about half the height of a normal drive so they are very small. Laptop parts are not connected in the same way as normal IDE devices they have a different pin layout this meant converters were required to hook them up.
At the time it was hard to source any in the UK, nowadays they are available from a multitude of stores including; www.kustompcs.co.uk.

The hard disc version requires a normal four pin Molex power connector and the optical drive one uses a floppy disk style power connector. They are plugged into the back of the drives in the same way the cables normally are then the cables are plugged into the converter.

Once I had all the parts I required I ordered some 2mm thick aluminum sheet from www.maplin.co.uk. This was going to be used as the base for the project. I measured out roughly the layout of the shell and cut it out with a reinforced cutting wheel tool on a Dremmel. I could have used a jigsaw but I’m a fan of the Dremmel tool as it’s the tool I most used to. Once I had the rough shape I used a file to tidy up the base so that the shell would fit cleanly over the top. This took a few hours of tiring work but it was worth it.


Project Car Pc


At this stage I wasn’t sure what I was going to do with the wheels, I had managed to purchase a set of white spoked wheels from a local shop, I had sprayed them silver to look more like alloy wheels. I took the tires from an old radio controlled car and glued them onto the wheels. I decided that the best way to fix them in place was to use normal bolts and have some metal at right angle to the base. My first thought was to use an L shaped bracket but I decided I could use the existing metal in the base. I measured the place where the wheels were going to go, and cut two slits the thickness of the wheels into the base. Next up I used the trust hammer and my front door step to bend the metal to 90°. This took some time to get it perfect but it worked very well.


Project Car Pc
Project Car Pc


I was finally able to lay out the components for the first time; this I quickly realized was a problem. The PSU was too high; it simply wasn’t going to fit. Luckily, I had found out that there was a much smaller PSU now available. The 55W Morex PSU uses a small circuit with an external brick much like found on Laptops. This freed up space inside and I was able to cram it into place. The layout I chose was to have the hard disc and PSU underneath the mainboard with the DVD drive at the rear and spacers to raise the mainboard high enough.


Project Car Pc
Project Car Pc


For the electronic side of things I bought two switches and wired them onto the mainboard and mounted them at the front of the base. All along I wanted to light the shell with headlights and brake lights and internal lights also to show of the interior. Using 5mm LED’s I had two white LED’s as power LED’s shining at the front and two red LED’s as hard disc LED’s at the rear. In the interior I used four blue LED’s to show everything off.


Project Car Pc
Project Car Pc
Project Car Pc
Project Car Pc


The last few jobs in order to finish was to finish the shell, I did this exactly as you would for a normal RC car it took a couple of hours. I also cut out a small hole where the number plate would be, this would be where the cables would feed through.


Project Car Pc
Project Car Pc


I finally got to boot up the machine for the first time and it didn’t work. After much swearing and cursing, I had found the problem was the PSU shorting out on the base. A quick covering of tape later and everything worked fine. I had a working PC that looked just like a model Ford Focus. At the moment the specifications are: Epia 5000 mainboard, 192Mb SDRAM, 6 Gigabyte hard drive, DVD-ROM drive and a 55W Morex PSU. I tend to use it as a silent downloading machine which I can leave on all night if necessary.


Project Car Pc
Project Car Pc
Project Car Pc
Project Car Pc


Project Focus: Remaking the chassis

2004-05-21

Well, this is now my fourth project running concurrently so I will apologise for gordy modding overload hehe. Due to a forth coming event I needed to look at project focus and give it a good tidy up. While I was at it I decided I may as well give it a proper make over and clean up.

Here is the project as it was this morning and when you all last saw it:

Click on the thumbnails for full 800×600 shots


Project Car Pc
Project Car Pc
Project Car Pc
Project Car Pc


Project Car Pc
Project Car Pc
Project Car Pc
Project Car Pc


I took everything out to start the chassis a fresh, I will be using aluminium sheet with L shaped aluminium sections riveted in place.

First thing to do was to cut out a new chassis plate:


Project Car Pc
Project Car Pc
Project Car Pc
Project Car Pc


I then cut 4 L shaped sections out to attach the wheels to:


Project Car Pc
Project Car Pc
Project Car Pc
Project Car Pc


Thats probably all for the day unless I can sneak in some more modding later.

It all needs to be finished by the 2nd of june so i will be finishing this mod quickly.

Hope you all like the progress so far 🙂

Project Focus: Finishing the chassis work

2004-05-22

I’ve done some more work on the chassis today. I’ve drill all the holes for the hard disc and psu board. I’ve rounded the corners of the chassis plate so it fits inside the shell. heres the pictures from today:


Project Car Pc
Project Car Pc
Project Car Pc
Project Car Pc
Project Car Pc


Next up is to redo all the wiring and tidy it up as its far too long and untidy at present.

Project Focus: Finished for the second time

2004-05-24

I’ve pretty much finished this revisit of Project Focus. Its looking far better than it did before. The chassis is now much cleaner and better to look at.

First job of the day was to redo the wiring looms , they were far too long before taking up valuable room underneath the motherboard. I shortened the main wires and rewired completely the power for the psu. I also made up a new power switch.


Project Car Pc


I then mounted the dvd drive at the rear of the chassis, I had to add a new l-shaped aluminium section to hold the drive in place. The drive fits snugly between the two wheels.


Project Car Pc
Project Car Pc


Next I had to finish the chassis, I cut a small section out of the rear of the chassis to allow cables to exit the case cleanly. I also cut a small square hole out for the power switch. After these had been done I set to work brushing the aluminium. This was nice and easy to do. With a quick coat of clear coat spray paint the finish is very nice.


Project Car Pc
Project Car Pc
Project Car Pc


Then it was time to add all the components and the cables back onto the chassis.

Project Car Pc
Project Car Pc
Project Car Pc


A quick shot of the base with all the parts in place including the switch for powering on the pc.


Project Car Pc


Now pretty much everything is installed and you can see how the drive is accessed


Project Car Pc
Project Car Pc


And finally some shots of the shell on the chassis and the pc under my tv in the lounge where it lives:


Project Car Pc
Project Car Pc
Project Car Pc
Project Car Pc


I have not put the lighting back in as it takes up so much room with all the cabling and it looks very untidy, I may add it back in with a tidier wiring setup at a later date. When time allows.

The project was nice and quick as I have to get on with my other projects as I have a deadline for this and project silicon to be finished by.

Project Focus: New Wheels

2004-08-11

I’ve been quiet on the mod front of late , that due to having to work on something secret. Its almost finished so I will be back working on my other projects on the go.

In the mean time , I got some new wheels for this project focus which look ace.


Project Car Pc
Project Car Pc
Project Car Pc


Project Focus: Better Pictures

2006-08-04

It’s about time I added these new pictures to this log, they are better shots that the others!

Project Car Pc
Project Car Pc
Project Car Pc


Project Car Pc
Project Car Pc
Project Car Pc


1
Jan

Project Mac Cube

Project Summary:

In Project Bad Apple I took a standard Apple Powermac G4 case and converted it to pc use. Now I want to go down the apple route again. Taking the fabulous Apple Powermac Cube case I intend to convert it to pc use. The final aim is to have a small pretty file server for all my movies etc.

Project Mac Cube:

2005-06-29

I’m nearly finished on Project Little Devil I just have a few minor bits still to finish when I pull my finger out.

So with that in mind I started thinking about my next project, I have two other ones on the back burner but neither of them really inspire me at the moment or suit my needs. What I really need is a fileserver that small and good looking. With this in mind I started coming up with some idea’s as to what to do.

My original plan was to do a smaller version of Project Mini Me which was a shuttle flex atx sized based project. I liked this idea but I couldn’t decide what to do with the externals to make it nice. The plan was to spray paint it but after Project Little Devil I’ve had enough paint fumes in my lungs over the last few weeks to last me a lifetime hehe.

So I set about trying to find some other idea, I stumbled across Sun’s Cobalt Qube 3 these would be great to convert into a file server. The only problem is they go for far too much money on ebay to make it worthwhile.

Now with my current Apple switch in progress I was having a look at older mac’s on ebay to see what we could sell my girlfriends Powermac G4 for. When I did this I stumbled across some mac cubes. They are Powermac g4’s crammed into a cube space. These were the very first SFF computer and are still ahead of the current sff’s in many ways.

I’ve spent the last month or two trying to find a well priced Apple Powermac Cube and finally I found a great donor case. It was a incomplete cube with just the motherboard , cpu and psu included. This suited my needs perfectly and after a short bidding war I won the auction!

Project Mac Cube
Project Mac Cube
Project Mac Cube
Project Mac Cube

I picked up the cube two days ago from the courier and set about taking it apart. I realised the previous owner had really abused it when removing some of the components, the inner chassis was missing some parts and others were damaged grrrrrrrr. It didn’t bother me too much as I wouldn’t be using most of the insides anyway.

I started taking the cube apart which is no easy task, the cube drew blood in my battle with it but I finally got it into is components.

The perspex has a few scratches and has some dirt so it needs work but for the most part its in excellent condition considering its age.

Project Mac Cube
Project Mac Cube

I’ve taken out most of the parts I won’t be needing now here’s the parts I will be using. including the very clever handle and locking mechanism which is going to be hard to use but worth the effort.

Project Mac Cube
Project Mac Cube
Project Mac Cube
Project Mac Cube

The black item in the first picture is the heatsink believe it or not! Its massive and a structural part of the chassis. So I will have to make something up to replace it as it takes up too much room!

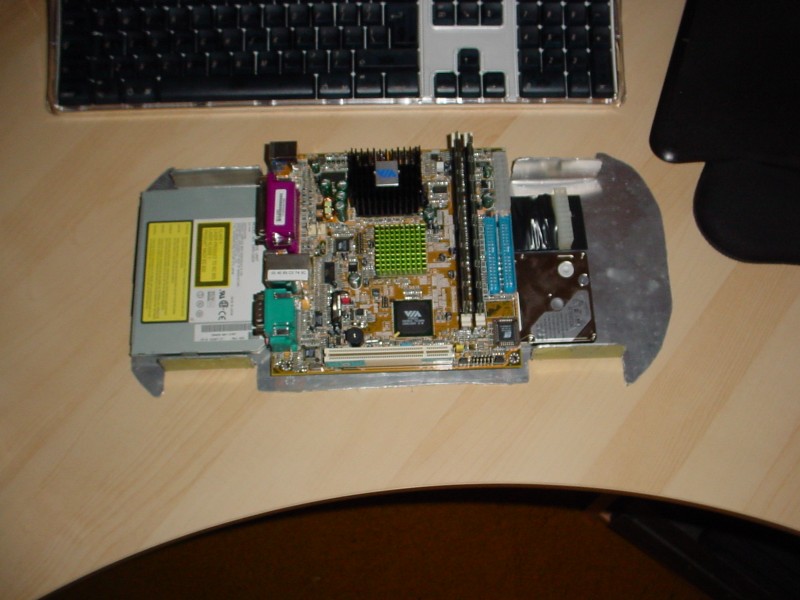
The original cube is very well built the motherboard is amazing its very nice indeed. How they shoehorned a fully working g4 in there all those years ago is amazing particularly when it was running 100% passive.

Project Mac Cube
Project Mac Cube
Project Mac Cube

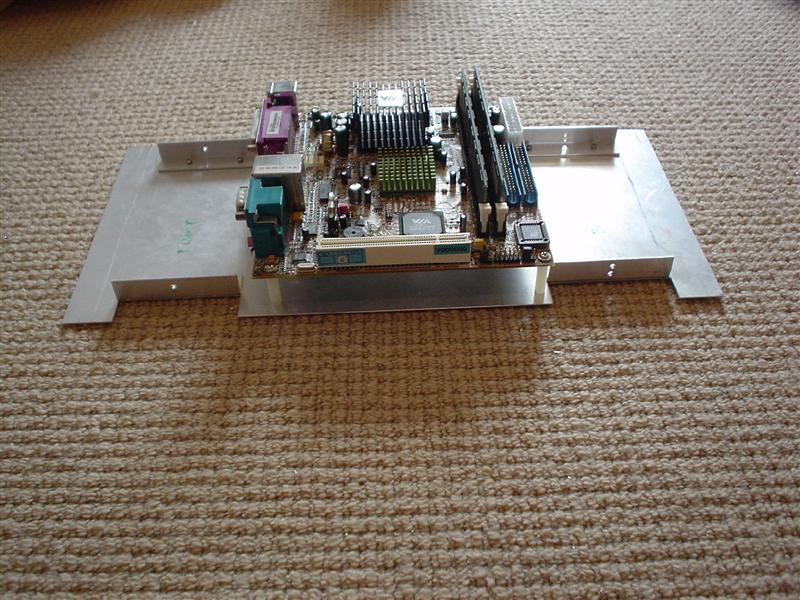
Here’s a couple of final shots of the motherboard to compare it to the mini-itx board that will be replacing it and a shuttle motherboard for comparison.

Project Mac Cube
Project Mac Cube

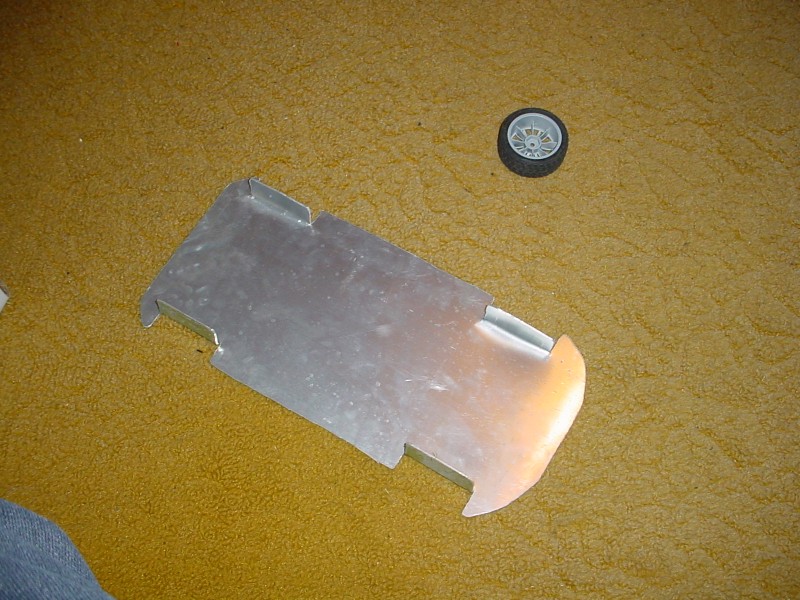
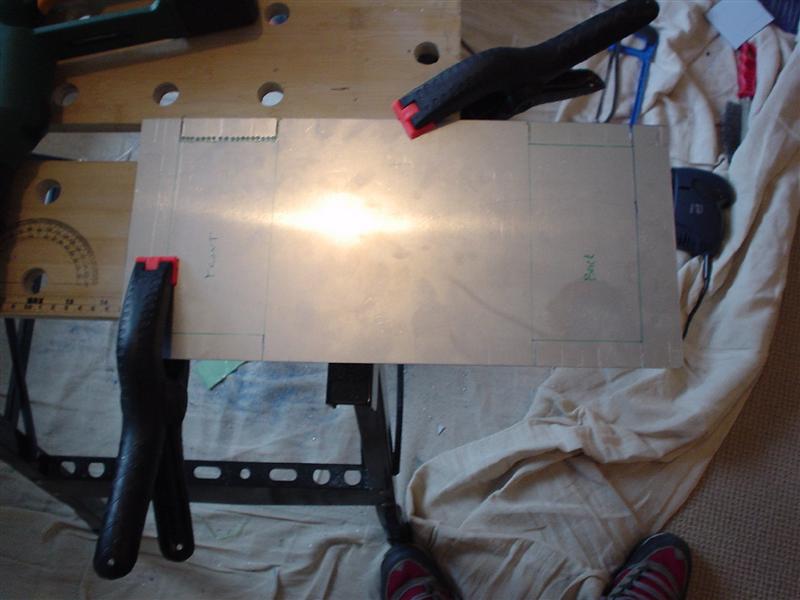
The first task for me to complete was to replace the missing top chassis plate , I’ve started work on cutting and bending a piece of aluminium to replace this section. After that I need to find a way of replacing the huge heatsink to allow me too shoehorn 2 hard discs in there. I ideally want 500gb of storage in the cube so I will use 2 x 250gb ide hard discs along with a laptop combo drive for optical storage.

I hope you like the project so far let me know what you think.

Project Mac Cube: First update modding with Ovens!

2005-07-04

Well its time for the first update on this project and its something I don’t normally do thats for sure!

I had a play with the internal layout and I worked out that I can fit 2x hard discs and one laptop optical drive in the cube chassis whilst still using the heatsink/structural element with a few changes. The advantage of this is that I dont have to machine a whole new structural element. It would be a nightmare to recreate. The only issue was that the bottom section of the heatsink would have to be removed.

Project Mac Cube
Project Mac Cube

You can see the bottom section in the second picture above. At first I thought it was screwed into place but I quickly realised it was soldered in place. This gave me some second thoughts on the idea but I came across the idea of heating the whole heatsink till the solder melted….

So for the first time ever for me I had to use my oven for modding 280 degrees of modding power hehe!

Project Mac Cube
Project Mac Cube

I wrapped the heatsink in foil to save my oven, apologises for the sorry state of the oven its in desperate need of a clean hehe. After five minutes in the oven the parts fell apart in my oven mitts!

Project Mac Cube
Project Mac Cube
Project Mac Cube

Project Mac Cube
Project Mac Cube

I’ve also started to create the new top chassis plate along with the motherboard plate. During the creating of the motherboard plate I discovered that the chassis is 16.7cm thick on the base and barring in mind the dimensions of the motherboard is 17.0cm that creates a small problem. I will have to sand back the area where the motherboard will fit to squeeze it in.

I’ve not taken any pictures of the plate so far, but I will do that tomorrow.

Project Mac Cube: Motherboard tray making

2005-07-06

I’ve had a chance to do a few more bits on this project, first thing to do was to make a motherboard tray after a couple of different designs I got one that worked. I had trouble finding a method of fitting it to the heatsink whilst still being able to mount the motherboard standoffs. I realised the best way round this was to use existing threads and I found three in the middle of the heatsink and even more luck they were m3 threads!

So I went about putting the heatsink and the handle mechanism back together this was far from easy!

Project Mac Cube
Project Mac Cube

Then the motherboard tray was attached to the heatsink. It sits flush to the heatsink which will help cooling I hope.

Project Mac Cube
Project Mac Cube

With the motherboard in place it works a treat.

Project Mac Cube

I then did a test fit of the heatsink/motherboard tray combination and it fits perfectly. I didn’t test fit the motherboard as it wont fit without the port cutouts that was next!

Project Mac Cube

I’ve started on cutting a rectangle into the chassis, I used a nibbler tool which takes little “bites” of metal so its great for this sort of thing. The only problem is that it gives nasty blisters without gloves and I hate using gloves grrr. I’d forgotten how hard steel is compared to aluminium this was hard work. It needs finishing yet but a particularly nasty blisters has stopped me for the day.

Project Mac Cube

Thats all for today I hope to get the motherboard into place tomorrow and then finish up the motherboard tray.

Project Mac Cube: Major Progress

2005-07-17

After working on project little devil mainly over the last week or so it was time to get back onto Project Mac Cube. I’ve made some real progress over this weekend. The main task was to get the optical drive and two hard discs mounted onto the chassis, along with making a blanking plate for the motherboard ports and stuff.

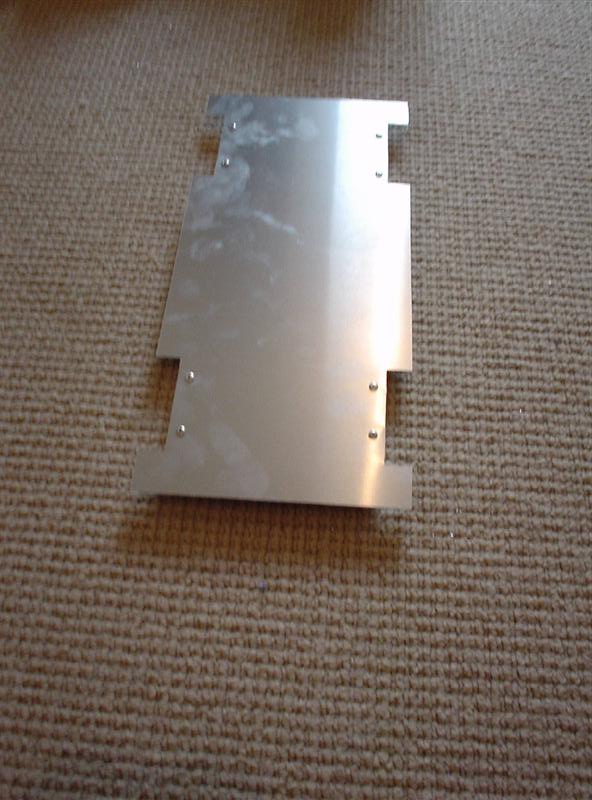
The first thing I made was the blanking plate, for this I used the proper one as a template to make a copy out of aluminium. I used a nibbler , a drill and a set of needle files to create it.

Project Mac Cube
Project Mac Cube
Project Mac Cube

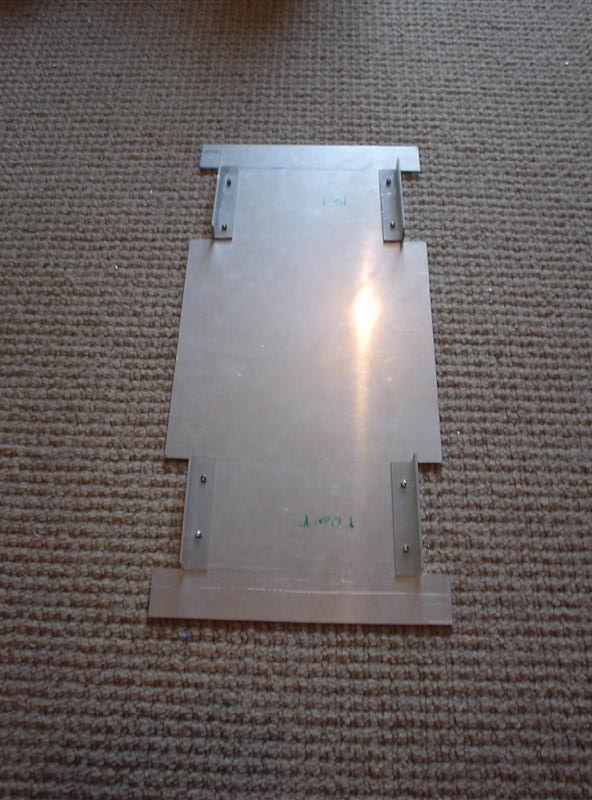
I then sanded back the interior of the chassis to gain the 2-3mm I needed to fit the motherboard into the chassis. I did a quick test fit and it was perfect.

Project Mac Cube

As you can see the two ps2 ports are blocked but I don’t have any use for them so I’m not bothered in the slightest. I then mounted the blanking plate for a test fit. It needed a bit of fiddling with but now fits perfectly.

Project Mac Cube
Project Mac Cube

After this I set to work on the mountings for all the drives this was far more work than I imagined. At first I tried to make it as simple as possible with all 3 drives held in by just two brackets.

Project Mac Cube
Project Mac Cube
Project Mac Cube
Project Mac Cube

Project Mac Cube
Project Mac Cube
Project Mac Cube

This was nice and easy to make well not that easy but I had to change my plans as this setup wouldn’t work the inner hard disc fouled the mechanism for inserting the chassis into the cube, so it wouldn’t work. grrr

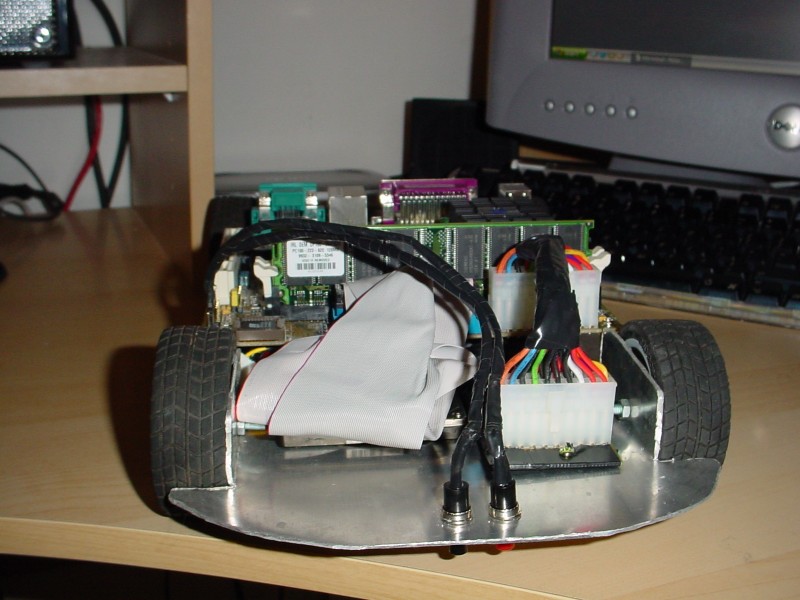
So I had to make set of plates for the two hard discs and a separate mounting for the optical drive so I could place it centrally without having the two hdd’s off center. In order for the optical drive to be mounted correctly I had to use three brackets but it works perfectly and the drive allows you to insert a disc when dropped in with no problems yeaaaah!

Project Mac Cube
Project Mac Cube

Its a cosy fit with everything in place but when I did a test fit into the cube chassis it works perfectly! You can see the original handle mechanism is still working you whip the cube over and push the handle in and it pops out. Then pull the inner chassis out. A great design. This works just as it does in the original.

Project Mac Cube
Project Mac Cube

Thats the progress to date, next up on the list of things to do is to mount the power switches and led’s and to look at the cabling. In the original cube design there is a plate on the top of the inner chassis. I’m not sure if this is actually needed other than to hold the power switch in place so I’m going to look at what is actually required. The cube came without this piece so I’m going to have to make my own if I do want to use it.

Project Mac Cube: Wiring and Problems

2005-08-04

This project hasn’t had an update for the last few days or so because I’ve been waiting on parts and hit some problems.

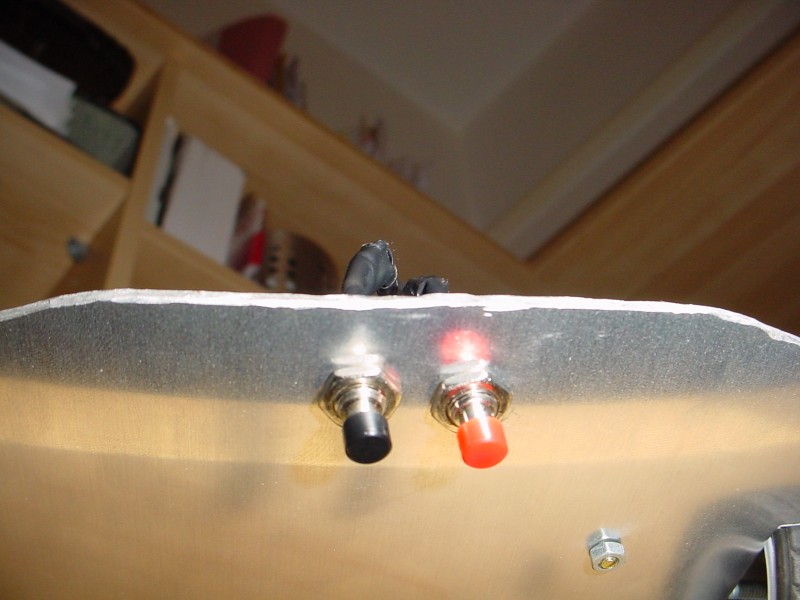
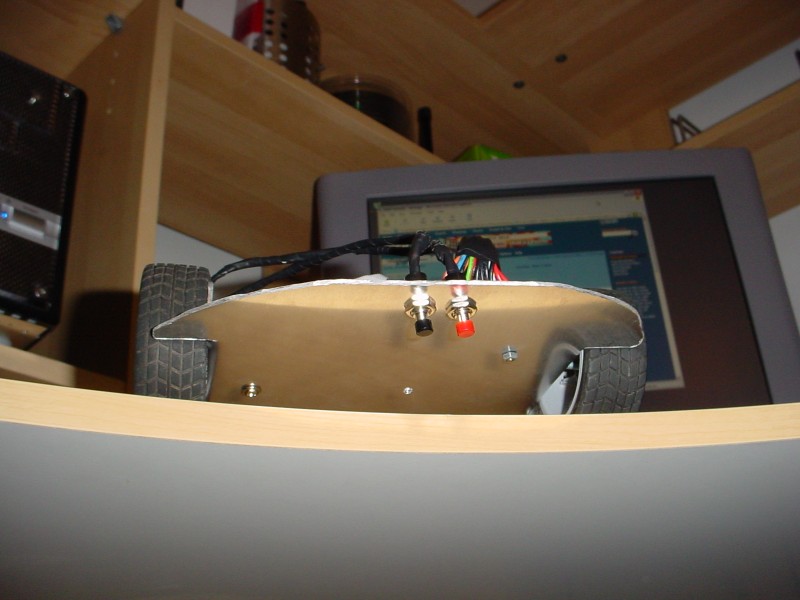
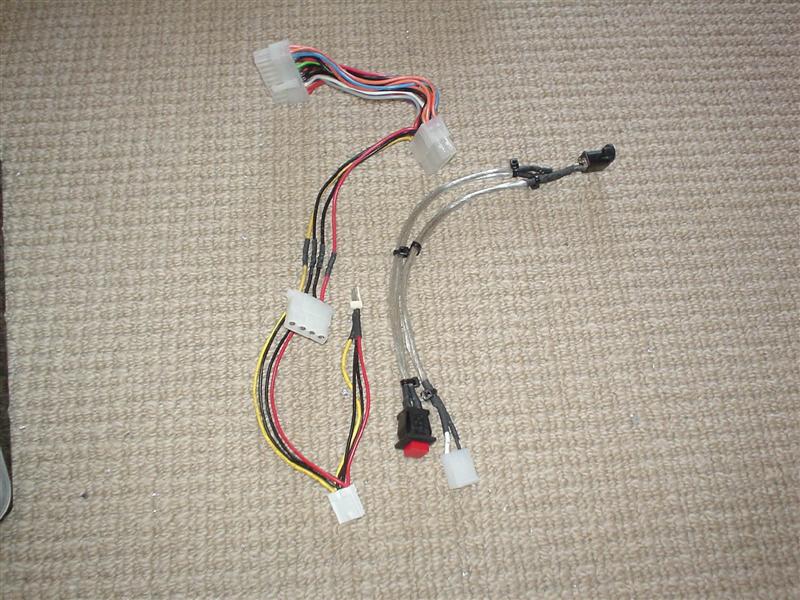
Last time I had completed the wiring rigs with some nice blue cable, this was fine until I tried doing a test fit of the cube and the wiring rapidly became a nightmare. I also created a plate for the switches and led’s to fit into. I wanted to use the chassis itself, but drilling the led holes showed that that wasn’t possible so I created a little plate to go onto the chassis like the motherboard I/O plate.

Project Mac Cube
Project Mac Cube

In order to fit the wires for the switches in I had to redo the wiring loom with far thinner wire. I used some nice blue and green wire but I wish I could use the blue see through stuff but it cant be done.

The parts I was using for the test fit are required for another project I am doing so I had to order a new mini-itx board and some other parts. I discovered the new VIA Epia SP8000E , this is a passively cooled mini-itx board with sata and all other new bits. Great I thought sata would be much easier to wire for. The snag I hit though was that the plug-in power supply wouldn’t fit this board nor was there any other ones out there. 🙁

So I had to go back to my original plan of a VIA Epia MII6000 board. This is identical to the one I was using before but only 600mhz and passively cooled. I also got a new plug in psu for this board. I takes up no more room that the mini-itx board does already.

Project Mac Cube
Project Mac Cube
Project Mac Cube

I’ve got a few more bits arriving over the next couple of days, I will redo the wiring to try to make it more managable. I’ve worked out that the wires will fit if I use the smaller wiring so it should all be easier this time.

Project Mac Cube: Booting!

2005-08-13

Ok a short text update on my progress pictures will follow tomorrow. The first thing is that it is now on and booting! The end is near!

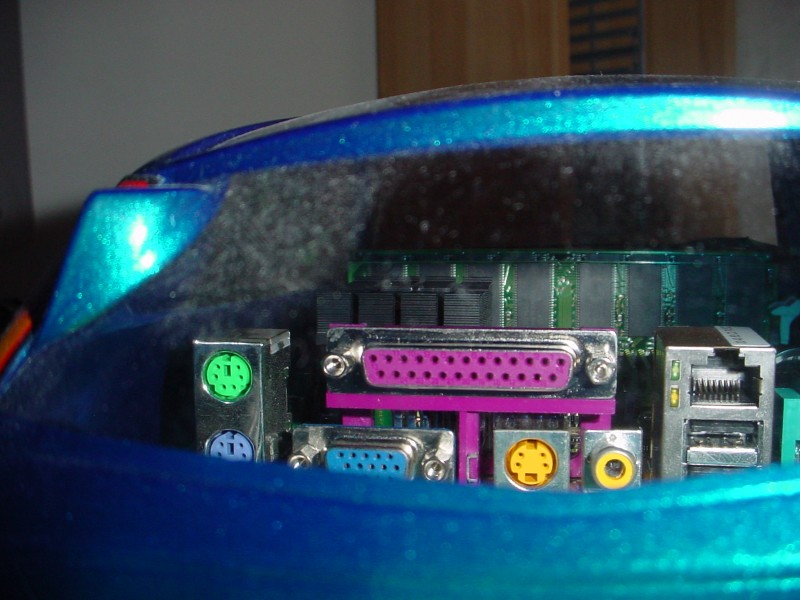
I’ve had a few problems since my last update, the first was that the I/O I made was made worthless as the psu manufacturer decided to change the connector design grrr, So I had to remake the I/O plate with this change.

Next all the wiring was redone to allow me to fit it all in. Making all the wires fit took me several hours this evening but I got there in the end! It booted up on first try (thats a first for one of my projects hehe),but I’ve hit a snag the two 250gb drives are being detected as 137gb drives 🙁 I believe there is a solution using partition manager so I will have to see if it can be overcome.

So far the cooling seems to be fine its not getting too hot but I will have to monitor this when I get it fully up and running.

Project Mac Cube: Final Bits and Bobs

2005-08-14

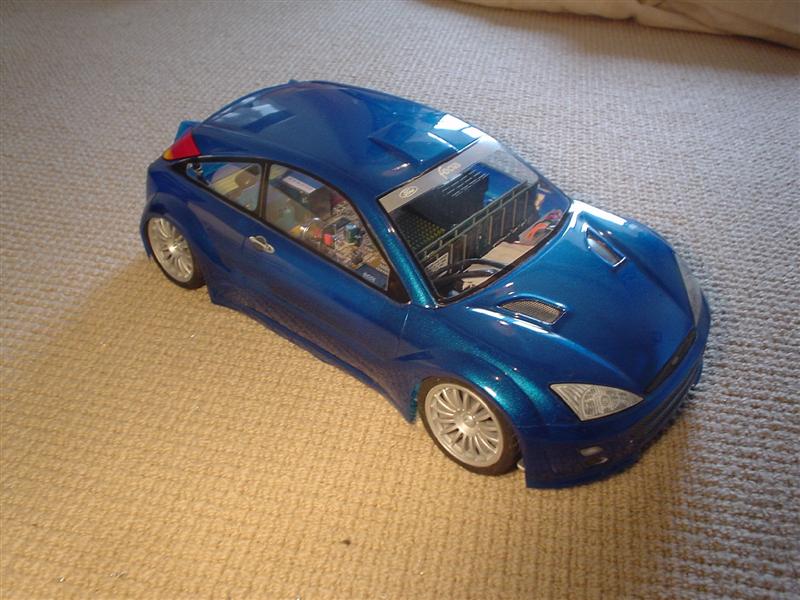
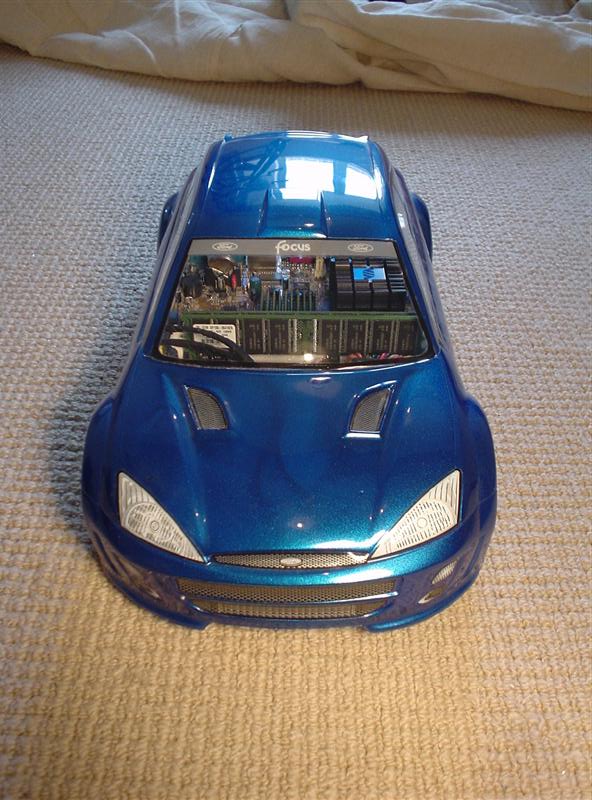
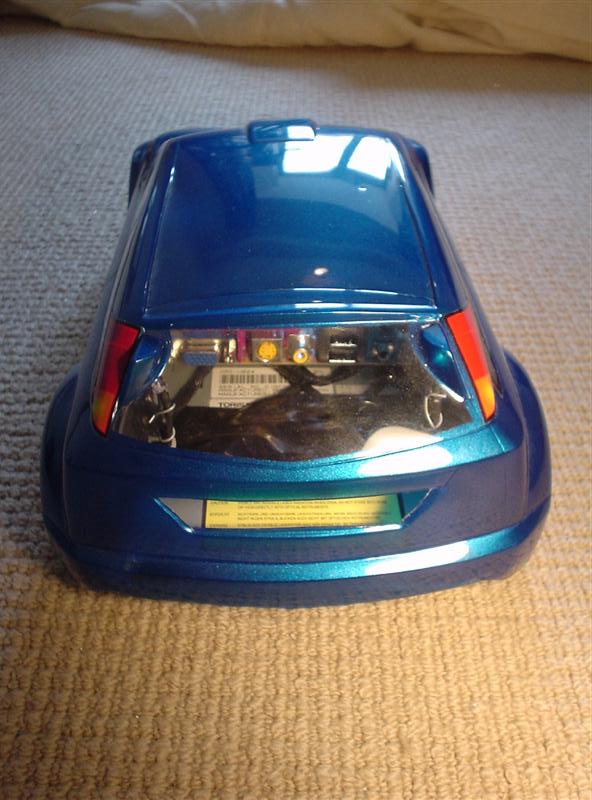
Time for the pictures. I’ve not got any shots of it hooked up yet but it looks ace. I’ve been out since 5am so I’ve not had a chance to do any proper in situ shots yet. I also need to play with the power led as its lighting at present.

Pictures of the building and it all inside the chassis, the wiring is mostly hidden from view when you remove the inner chassis. Just the bare minimum shows.

Project Mac Cube
Project Mac Cube
Project Mac Cube

Project Mac Cube
Project Mac Cube
Project Mac Cube

Project Mac Cube: Complete!

2005-08-15

Now that the project has been completed I have taken some more shots of the cube in place on my desk as well as a couple of other shots. I’ve also done two video’s one of me removing the components from the cube to show how easy it is and another to show the cool effect of the leds.

mac cube

mac cube

mac cube

mac cube

mac cube

mac cube

mac cube

mac cube

And the two video’s right click and select save as to download them.

Video 1: Taking it Apart (5.10mb)

Video 2: Blue Leds in action (2.84mb)